How to Check a Leaking Water Pipe
Learn a clear, step-by-step method to locate and assess a leaking water pipe at home. Safe, practical tips for DIY fixes and when to call a pro.

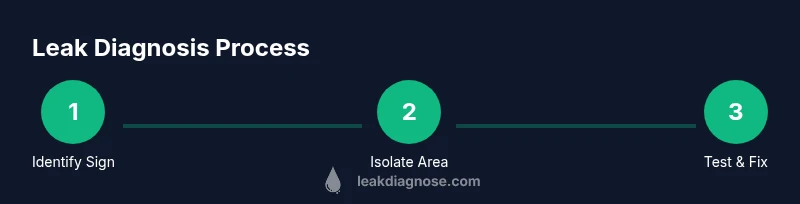
To check for a leaking water pipe, start by looking for dampness, stains, or mold along walls and ceilings. Listen for a constant dripping or running sound even when fixtures are off. Inspect exposed pipes for corrosion, cracks, or loose joints, and perform a gentle pressure test if safe. According to Leak Diagnosis, document findings and prioritize steps to prevent water damage.
Why Checking for Leaks Matters
Water leaks waste water, raise utility bills, and can cause hidden mold and structural damage. Early detection helps you avoid costly repairs, preserve indoor air quality, and protect your home’s value. For homeowners, a systematic approach that starts with visible signs and moves to safe, controlled testing is the most effective path. Common failure points include joints, valves, and supply lines; targeting these spots makes inspections faster and more accurate. By documenting findings, you can decide whether a DIY patch is feasible or if a licensed plumber is required. This article provides practical guidance, grounded in real-world scenarios, to help you act decisively and minimize damage from leaks.
According to Leak Diagnosis, recognizing the early signs of a leak reduces the chance of long-term water damage and mold growth. The goal is not only to identify a leak but to understand its source so you can plan an effective repair and prevention strategy.
Safety First: When Not to DIY
Safety is the foundation of any leak repair. If you see exposed electrical components near damp areas, hear buzzing, or notice scorch marks, stop and call a qualified professional. Water and electricity are a dangerous combination, and attempting a repair in such conditions can create serious hazards. If gas lines could be involved, evacuate the area and contact the utility immediately. Before you begin any inspection, locate the main shut-off valve and ensure you know how to turn it off quickly. Wear PPE: gloves, safety glasses, and non-slip footwear. If you are unsure about the system or if the leak is behind walls, don’t pressure-test or disassemble fixtures—call a licensed plumber. Leak Diagnosis emphasizes safety as the non-negotiable first step in any repair plan.
Quick Visual Inspection: Signs of a Pipe Leak
Visible leaks aren’t the only clue. Look for damp patches on walls or ceilings, water stains, warped cabinetry, or peeling paint near plumbing runs. Check under sinks for pooled water or damp insulation. Mold or a musty odor can indicate a hidden leak, even without obvious water on the surface. Inspect exposed copper or metal pipes for blue-green corrosion or white mineral deposits at joints. If the leak is behind a wall, pull back accessible panels or use a moisture meter to detect elevated moisture levels. Record any findings with photos and timestamps to guide your next steps and to help a plumber diagnose the issue quickly.
Keep in mind that some leaks manifest as slow seepage through drywall or plaster. In such cases, you might notice staining on multiple adjacent walls or ceilings, suggesting a leak in a supply line or a shared branch. Document the location, probable cause, and any changes in water usage or meter readings to support future repairs.
Sound Clues: Listening for Hidden Leaks
Sometimes the leak is audible even when fixtures aren’t in use. A constant hissing, dripping, or rushing sound along pipes can indicate a hidden leak. Use a long screwdriver or an inexpensive stethoscope to listen along the length of exposed pipes, joints, and valves—listen for changes in tone when you gently press on the pipe surface. If you hear a sound near a wall or behind cabinetry, consider probing with careful pressure checks or dye tests to confirm whether the issue is inside the wall cavity. Avoid forcing or tapping aggressively, which could damage the pipe or its insulation. Document quiet zones and correlate them with water usage patterns to pinpoint likely leak segments.
Tools and Prep: What You Need Before You Start
Before you dive into diagnosis, assemble basic tools and safety gear. You’ll want a bright LED flashlight, an adjustable wrench, a screwdriver set (both Phillips and flat-head), Teflon tape or pipe joint sealant, a clean bucket, towels or rags, and safety gloves and goggles. A moisture meter is helpful for hidden leaks, and a small auxiliary supply line or repair clamps can be useful for temporary fixes. Having these on hand ensures you can inspect efficiently and safely without scrambling for gear mid-task. If you’re unsure about any step, pause and reassess your approach—the goal is to avoid creating new hazards while locating the leak.
Step-by-Step Diagnosis: From Main to Fixtures
- Shut off the main water supply to stop further damage. 2) Visually inspect accessible pipes for dampness, corrosion, or loose joints. 3) Trace piping from the main toward fixtures, checking supply lines and connections at each elbow, valve, and joint. 4) Perform a controlled pressure test on suspect segments by briefly re-opening valves while monitoring for changes in moisture or puddling. 5) Isolate each segment with a valve if possible and re-test to narrow the leak source. 6) For minor, surface-level leaks, apply temporary fixes such as Teflon tape on threads or a clamp patch—these are not permanent solutions, but they can prevent further damage while you plan a proper repair. 7) Decide whether simple repair is feasible or if a licensed plumber is required—hidden or structural leaks almost always demand professional evaluation. 8) Dry the area thoroughly after tests and monitor for reoccurrence over the next 24–48 hours. 9) Document findings, photos, and meter readings to guide future repairs and track water usage changes.
Estimated total time: 60-90 minutes, depending on the complexity of your plumbing.
Tip: Record meter readings before and after tests to confirm whether any leaks persist.
Temporary Fixes and When to Call a Pro
Temporary fixes can stop fast leaks or slow down a drip while you plan a proper repair, but they are not a substitute for professional work. For threaded joints that leak, re-tightening with care can help, but overtightening may strip threads. A small rubber patch, epoxy putty, or emergency hose clamp can control a leak temporarily on exposed piping. Do not use sealant products that are not approved for potable water or that are intended for automotive applications in a home plumbing system. If the leak is in a concealed wall or under a floor, or if multiple joints show moisture despite fixes, it is time to contact a licensed plumber. Also, if you notice bulging drywall or structural damage, stop and seek expert help immediately. A professional will perform a pressure test, identify leaks behind walls, and replace compromised sections safely.
Drying, Mold Prevention, and Documentation
After addressing the leak, thoroughly dry all affected areas to prevent mold growth. Use fans, dehumidifiers, and a dehumidistat to maintain a low humidity environment until the area is completely dry. Inspect insulation around pipes and replace damp material to avoid future insulation damage. Take clear photos of the leak source and the repair attempts for reference and insurance purposes. If you suspect mold growth, consider professional mold remediation services. Finally, schedule a follow-up check in a few weeks to ensure no latent leaks are developing in adjacent sections.
Prevention and Maintenance: Keeping Pipes Leak-Free
Proactive maintenance reduces the risk of leaks significantly. Insulate exposed pipes, particularly in unheated areas, to prevent freezing. Schedule routine inspections of shut-off valves and joints, and replace aging copper or galvanized pipes before they corrode. Install water-leak detectors near appliances, under sinks, and in basements to catch early warning signs. Keep a small repair kit on hand and learn how to perform basic joints tightening and gasket replacements. Small proactive steps—regular meter readings, visual checks, and prompt attention to damp areas—can prevent major water damage and expensive repairs.
FAQ: Common Questions Answered Quickly
Tools & Materials
- Flashlight (bright LED, water-resistant)(Hands-free headlamp is ideal)
- Adjustable wrench(6-12 inch range preferred)
- Screwdriver set(Both Phillips and flat-head)
- Teflon tape / pipe joint sealant(Use on threaded connections only)
- Bucket(Catch drips during testing)
- Towels or rags(Lay beneath work area)
- Safety gloves(Waterproof if possible)
- Safety goggles(Protect eyes from debris)
- Moisture meter (optional)(Detect hidden moisture behind walls)
- Pipe repair clamp / epoxy putty (optional)(Temporary fix for minor leaks)
- Auxiliary repair supplies (optional)(Extra pipe sections, couplings)
Steps
Estimated time: 60-90 minutes
- 1
Shut off the main water supply
Locate the main shut-off valve and turn it clockwise until fully closed. This stops any further water flow and minimizes potential damage while you inspect. If you have a well system, shut off the pump first or use the external intake valve if available.
Tip: Keep a wrench or tool nearby to avoid struggling with a stiff valve. - 2
Perform a visual sweep for obvious leaks
Look along exposed pipes, joints, and valves for dampness, pooling, or corrosion. Check under sinks and behind appliances for signs of moisture. Take photos of any stains to compare against after repairs.
Tip: Document changes with time stamps to track progression. - 3
Trace the pipe path from the main toward fixtures
Follow the main line to branch lines, inspecting each elbow and connection. Pay special attention to age-related joints and areas where pipes pass through walls or floors. Use a flashlight to inspect inside accessible cavities.
Tip: Mark suspect segments with painter’s tape for organized testing. - 4
Test suspect segments under controlled pressure
Gently re-open valves one at a time and observe for renewed dampness or moisture. If you see a change in leak behavior, you’ve located the problem area. Do not exceed safe pressure limits for your piping material.
Tip: If you hear hissing or see water seep, stop and prepare a temporary seal. - 5
Apply a temporary fix if appropriate
For minor, accessible leaks, apply a patch or wrap with a clamp or Teflon tape on threaded joints. This is a short-term measure to buy time while planning a permanent repair. Avoid applying heat or forcing fittings.
Tip: Temporary fixes should be tested again after 24 hours. - 6
Decide on DIY vs. pro repair
Hidden leaks behind walls, under slabs, or involving gas lines require professional assessment. For clear, accessible leaks with simple joints, a DIY repair may be feasible with the right tools and materials. Consider safety, code requirements, and long-term reliability.
Tip: If in doubt, contact a licensed plumber for an inspection. - 7
Dry the area and monitor for reoccurrence
Use fans and dehumidifiers to dry the space completely. Re-check the area daily for a week to confirm the leak is resolved and no new dampness appears.
Tip: Keep doors open to improve air circulation during drying. - 8
Document results and plan preventive steps
Capture before/after photos, note replacement parts, and record meter readings. Plan future maintenance such as insulation, valve replacements, or leak detectors to reduce risk.
Tip: Create a simple home maintenance log for plumbing. - 9
Schedule a professional evaluation if needed
If you cannot confidently locate or fix the leak, arrange a visit from a licensed plumber. A pro can perform non-destructive testing and ensure compliance with local codes.
Tip: Ask for a written estimate and scope of work before approving repairs.
Questions & Answers
What is the first sign of a leaking water pipe?
Common early signs include damp patches on walls or ceilings, musty odors, and water stains near plumbing. Hidden leaks may show up as persistent damp insulation or mold.
Look for damp patches or a musty smell near plumbing; hidden leaks may show as mold or damp insulation.
Can I fix a leak myself or do I need a plumber?
Small, accessible leaks can sometimes be mitigated with temporary DIY fixes. Hidden or structural leaks behind walls usually require a licensed plumber and proper testing.
Small, accessible leaks may be DIY, but hidden leaks are best left to a professional.
What should I do if I find water damage?
Shut off the main water supply, remove standing water if safe, dry the area thoroughly, and check for mold. For significant damage, contact a contractor or plumber promptly.
Shut off water, dry the area, and seek professional help for large damage or mold.
How long does a DIY pressure test take?
A basic DIY pressure test can take about 15 to 45 minutes, depending on pipe layout and accessibility. Allow extra time for setup and cleanup.
Typically 15 to 45 minutes, plus setup and cleanup.
Is it safe to use leak sealing products?
Temporary sealants can help stabilize a minor leak, but they are not long-term solutions for all pipe types. Follow product instructions and replace with proper repairs.
Temporary sealants can help short-term, but don’t rely on them for long-term fixes.
How can I prevent future leaks?
Regular inspections, pipe insulation in cold areas, timely replacement of aging pipes, and installation of leak detectors can significantly reduce future leaks.
Regular checks and insulation help prevent future leaks.
Watch Video
Main Points
- Shut off water before inspecting to prevent damage.
- Look for dampness, stains, and unusual odors as leak indicators.
- Document findings and photos to guide repairs.
- Hire a pro for hidden or complex leaks to ensure safety and code compliance.