Fix Leak in Garden Hose: A DIY Guide
Learn how to fix leak in garden hose with step-by-step repairs, preventive tips, and tool suggestions. Practical guidance for homeowners and DIY enthusiasts to stop drips and extend hose life.

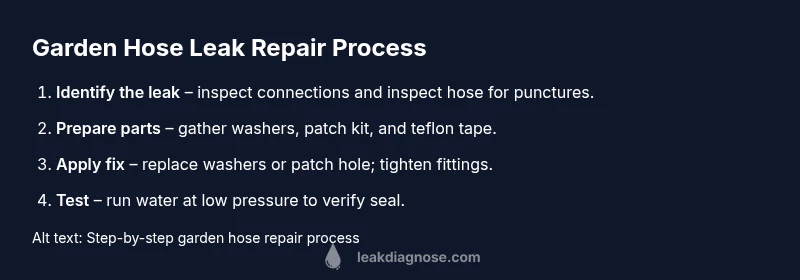
Learn how to fix leak in garden hose using common-sense steps: identify the leak, tighten fittings, replace worn washers, and apply a patch or replacement coupler. Gather a repair kit, washers, tape, pliers, and scissors. Follow a 5-step process to stop drips and test for a durable seal.
Why Fixing a Leak in a Garden Hose Matters
A leak wastes water, muddies soil, and wastes time when you’re trying to water plants or wash off equipment. Fixing a leak in a garden hose preserves water, reduces irrigation waste, and keeps your landscape evenly moist. Small leaks at fittings can drip for hours if left unchecked, slowly degrading seals and causing more wear. According to Leak Diagnosis, addressing these leaks early minimizes waste and extends the life of your watering system. When you repair proactively, you also reduce the chance of accidental slip-and-spray while you’re watering beds. This section explains why timely repairs matter, plus what you’ll gain by staying proactive across seasons and weather conditions.
In most yards, a simple connector or worn washer is the culprit. By learning the typical failure points and how to fix them, you’ll spend less on replacements and get more reliable water delivery to your plants. A well-maintained hose also lasts longer, saves water, and reduces the risk of carrying a leak into outdoor storage bins after use.
Diagnosing Hose Leaks: Common Points to Check
Leaks usually appear at three areas: the hose-to-spigot connection, the hose fittings, and any damaged hose sections. Start by inspecting all ends and couplings for cracks or loosening. A simple soapy-water test makes leaks obvious: apply a soapy solution and watch for bubbles as water runs. Leak Diagnosis analysis shows that most hose leaks originate at fittings and worn washers rather than large holes in the middle of the hose. If the leak is at the end where the connector threads onto the spigot, the problem is often a worn washer or a loose nut. If bubbles appear along the hose, the issue is typically a puncture or crack that should be addressed with a patch or replacement.
To pinpoint leaks, gently shake the hose while the water is on low; you’ll often hear or see a bubble forming at the exact spot. Pay attention to where the water droplets form first—this helps distinguish a loose connection from a cracked section. When you identify the source, you can choose a repair path with confidence instead of guessing.
If you’re dealing with a stubborn leak near a fixed fitting, evaluate whether the entire coupling or faucet adapter needs replacement. In some cases, a new washer is all that’s needed to restore a tight seal and prevent further drips.
Quick Fixes You Can Try Today
- Tighten loose fittings by hand, then snug them with a wrench just enough to stop the drip without risking damaged threads. Re-check after a minute of running water. - Replace worn washers inside couplers; a fresh washer makes an immediate, noticeable difference. - Apply plumber's tape (Teflon tape) to male threads where appropriate to improve sealing. - For minor punctures or small cracks, use a garden hose repair patch or replacement coupler from a repair kit. - If the hose is kinked, straighten it and test again after reassembly. - Always test at low pressure first to avoid splashing and ensure no drips remain.
If you notice the leak migrating toward the faucet, stop immediately and verify there isn’t backflow or damage to the spout.
Permanent Repairs: When to Replace Components
Some leaks are a sign that a part has reached the end of its life. If the hose itself shows cracks along the length, if the fittings are chipped or corroded, or if leaks persist after all quick fixes, replacement is the wiser choice. Upgrading to a reinforced hose with durable fittings reduces future failure. In some cases, replacing the faucet adapter or spigot connector can resolve persistent leaks at the source. Consider the overall system and plan for a component-wide refresh if you notice repeated issues. With a new hose and compatible connectors, you’ll typically enjoy fewer interruptions and a longer overall lifespan for your watering setup.
Pro tip: choose a hose rated for outdoor use with UV resistance to withstand sun exposure during the growing season.
Maintenance Habits to Prevent Future Leaks
Preventive care extends the life of your garden hose. Store the hose on a reel or hook to avoid ground abrasion, and keep it out of direct sun when possible to slow wear. Coil the hose loosely to prevent kinks, and drain it completely before winter to avoid freeze damage. Inspect washers and connectors at the start of each watering season, and replace worn parts promptly. Clean connectors after use to remove mineral buildup that can corrode seals. Regular checks help catch problems early before they morph into leaks that disrupt your watering routine.
Having a small repair kit on hand ensures you can address most leaks before they escalate. A little routine maintenance now goes a long way toward dependable irrigation all year long.
Choosing the Right Repair Kit and Tools
Select a repair kit that includes multiple patches, compatible washers, and at least one replacement hose fitting. Look for items made for outdoor use with UV resistance and weatherproof seals. Include Teflon tape, hose clamps, needle-nose pliers, scissors, and a small replacement hose section if you anticipate punctures. Match kit parts to your hose diameter (often 5/8 inch or 3/4 inch) and length for a clean fit. Consider investing in a reinforced hose for higher water pressure setups to reduce future leaks. By picking a kit that covers common failure modes, you’ll be prepared for most repairs without shopping mid-project.
Common Mistakes to Avoid
- Over-tightening can strip threads or crack fittings, making leaks worse. - Using the wrong washer size will create a poor seal. - Ignoring seasonal checks means tiny drips become big problems. - Rushing the test after a fix can miss a slow leak that reappears under pressure. - Delaying replacement when the hose is old can waste water and time over the long run.
Tools & Materials
- Garden hose repair kit (patches and couplers)(Choose kits with compatible patch sizes)
- Replacement washers for hose fittings(Ensure correct inner diameter for your connectors)
- Rack or storage reel(For organized storage and longevity)
- Adjustable wrench and pliers(Lightly snug fittings without over-tightening)
- Teflon tape (plumber's tape)(Use on male threads where appropriate)
- Scissors or utility knife(Trim damaged sections if needed)
- Silicone sealant (outdoor grade)(Only where the kit recommends)
- Replacement hose section (optional)(For punctures that cannot be patched)
- Soap in water and a brush(Test for leaks during the diagnostic stage)
Steps
Estimated time: Estimated total time: 25-40 minutes
- 1
Shut off water and disconnect
Turn off the outdoor faucet and allow the hose to drain. Detach the hose from the spigot and lay it out flat to inspect for damage. This prevents water spray while you work and makes it easier to find leaks.
Tip: Do not pressurize a loose connection during inspection. - 2
Inspect and clean fittings
Check threads, washers, and ferrules for wear or cracks. Clean the ends with a cloth to remove mineral buildup that can hide hidden leaks.
Tip: Use a flashlight to spot tiny cracks that aren’t obvious. - 3
Replace washers or tighten fittings
If the washer is worn, replace it. Reassemble and snug fittings by hand first, then give a light turn with a wrench. Re-test for leaks at low pressure.
Tip: Avoid overtightening; it can ruin threads. - 4
Patch or replace damaged sections
For punctures, cut around the damaged area and apply a patch or replace the affected section with a new coupler from the kit.
Tip: Align patches per kit instructions for best adhesion. - 5
Test the system under normal use
Reconnect to the faucet and run water at a low to moderate flow. Check all repaired areas for drips and re-tighten if needed. If leaks persist, consider a full hose replacement.
Tip: Test first with low pressure to avoid splashing.
Questions & Answers
What causes garden hose leaks?
Leaks commonly arise from worn washers, cracked hoses, or loose fittings. Regular inspection helps catch these issues early and prevents water waste.
Leaks usually come from worn washers, cracks, or loose fittings. Regular checks can prevent waste and extend hose life.
Can I repair a garden hose without replacing it?
Yes, many leaks can be fixed with a washer replacement or a patch kit. If the hose shows widespread cracking, replacement is often more economical in the long run.
Often you can fix leaks with patches or new washers. If the hose is cracked all along, replacement makes more sense.
How long do hose repair patches last?
Patch longevity varies with use, weather, and pressure. High-quality kits tend to last through multiple seasons if applied per instructions.
Patch longevity depends on use and weather; quality kits usually last multiple seasons with proper application.
Is it safe to use tape to fix leaks?
Tape is a temporary fix and not reliable for long-term sealing. Use manufacturer-recommended patches or replace parts for a durable solution.
Tape is a temporary fix; for a durable seal, use patches or replace parts as recommended by the kit.
When should I replace the hose entirely?
If cracking runs along the hose or leaks persist after repairs, replacing the hose is usually the most cost-effective option.
If the hose is cracked across its length or leaks keep returning, replace the hose.
Do winter storage tips help prevent leaks?
Yes. Drain the hose completely, store it off the ground, and protect it from freezing temperatures to prevent cracks and ruptures.
Drain and store the hose off the ground to avoid cracks from freezing and sun damage.
Watch Video
Main Points
- Inspect leak sources before buying parts.
- Most hose leaks are due to worn washers or loose fittings.
- Test your repairs at low pressure first.
- Keep a repair kit handy for quick, durable fixes.