How to Fix a Spigot Leak: A Practical Step-by-Step Guide
Learn how to stop a spigot leak safely with a clear, DIY-friendly approach. This Leak Diagnosis guide covers identification, essential tools, step-by-step actions, and maintenance tips to prevent future drips in your home.

Turn off the water supply, dry the area, and inspect the spigot to identify worn washers, O-rings, or a loose packing nut. Replace worn parts or reseal threads, then test for leaks. This step-by-step guide from Leak Diagnosis walks you through safe, practical DIY fixes for common faucet leaks today in your home.
Understanding Spigot Leaks
A spigot leak is typically a slow drip or a steady flow around the spigot where the handle meets the body or at the connections to the pipe. Common causes include worn washers or O-rings, a failing packing nut, corrosion, or loose fittings. Different spigot styles (compression, ceramic-disk, and knob-type) have distinct weak points. Understanding where the drip originates helps you pick the right fix and avoid unnecessary parts. In many homes, a simple washer replacement or reseating threads can stop drips without replacing the entire faucet. According to Leak Diagnosis, most household leaks are fixable with basic hand tools and careful disassembly, saving water and reducing damage to surrounding surfaces.
Safety and Prep
Before you touch any plumbing, shut off the water supply to the affected line. If you can’t find a local shut-off valve, shut off the main for the house. Drain the line by opening the spigot after shutting off the valve and catching any remaining water with a towel. Keep a bucket handy for spills and wear eye protection. It’s also wise to switch off nearby electrical appliances if the leak is near a power outlet or switch. Clear the work area of clutter to prevent slips, and have a plan for reassembly. Leak Diagnosis emphasizes safety first: do not work under pressure or with damaged pipes.
Tools and Materials Overview
You’ll need a basic plumbing toolkit plus a few spare parts. Essential items include an adjustable wrench, screwdrivers (flat-head and Phillips), replacement washers or O-rings, a replacement packing nut if present, plumber’s tape, a bucket, and towels for catching water. Optional items that can help with stubborn fittings include penetrating oil and a flashlight for better visibility. Choosing the correct washer size is crucial; bring the old parts to the hardware store for a precise match. This overview helps you assemble what you’ll need before you begin.
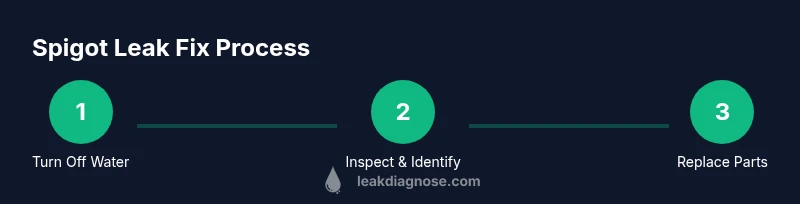
Step 1: Turn Off Water and Drain
Begin by turning off the water supply to the affected line. If there’s a dedicated shut-off valve near the faucet, use it; otherwise shut off the main water supply. Open the spigot to relieve pressure and drain any remaining water into a bucket. Wipe away standing water on the exterior and behind the faucet to prevent misdiagnosis from water shadows. This step reduces the risk of creating a mess or accidentally hitting live electrical components in the sink area. Pro tip: confirm that the area downstream is dry and fully depressurized before you proceed.
Step 2: Inspect the Spigot and Determine Cause
With the faucet exposed, inspect the handle, packing nut, stem, and the area where the spigot threads into the wall or pipe. Look for a loose packing nut, worn washers, or a corroded seat. If the drip occurs when the handle is turned, the packing or stem is often the culprit. If the drip is constant even when the handle is off, the washer or valve seat may be failing. Photograph any worn parts before removing them to ensure you buy the correct replacements later. A careful inspection saves multiple trips to the hardware store.
Step 3: Replace Washer or O-Ring
Disassemble the handle and remove the stem to access the washer or O-ring. Replace with a correctly sized washer or O-ring designed for your faucet type. If you’re unsure of size, take the worn part to the store for an exact match. Reassemble the stem and handle, ensuring the new washer sits squarely on the seat. Tighten the nut to just snug with a wrench—over-tightening can damage threads or warp seating surfaces. After reassembly, wipe away any excess sealant. This step is the most common fix for leaks around the spigot body.
Step 4: Tighten Packing Nut or Valve Stem
If the leak originates from the packing nut, tighten it gently with a wrench in small increments while the water supply is off. Do not overtighten; brass threads can strip or crack, especially on older fixtures. If tightening doesn’t stop the drip, you may need to replace the packing nut or the stem. Recheck all connections for snugness and ensure there are no cracks in the housing. A careful approach prevents further damage and reduces the need for major replacements.
Step 5: Reassemble and Test
Reassemble all parts and turn the main water back on gradually. Open the shut-off valve slowly to avoid a surge. Test by running water through the faucet for a few minutes, then observe for any dripping at the handle, packing area, or connections. If a leak persists, re-check the washer seating, re-tighten the packing nut, or consider replacing the entire spigot. Leakage behavior can change with temperature and pressure, so test under different conditions when possible.
Step 6: When to Replace the Spigot
If the faucet body is cracked, the threads are corroded beyond repair, or the valve stem has not stopped leaking after multiple replacements, replacement of the spigot may be the most economical and durable option. Compare the cost of a new fixture plus labor versus multiple failed repairs on an old unit. In some cases, replacing with a-modern cartridge valve reduces future leaks. If you’re uncertain, a professional plumber can give you a definitive assessment and help with installation to ensure proper sealing and code compliance.
Common Mistakes and Troubleshooting
Common mistakes include overtightening fittings, using excessive plumber’s tape, mismatching washer sizes, and neglecting to dry surfaces before reassembly. Also, failing to shut off the water first can cause sudden sprays and injuries. If you observe rust, deep pitting, or leakage behind the wall, the problem may be more complex. In such cases, avoid forceful disassembly and consult a professional. Always test after each repair step to confirm you’ve achieved a drip-free seal.
Maintenance Tips to Prevent Leaks
Preventive maintenance saves time and money. Periodically inspect spigots for corrosion, replace worn washers before they fail, and apply plumber’s tape correctly on threaded connections. Clean mineral buildup with a soft brush and avoid harsh chemicals that can degrade rubber components. Consider installing a small water-softening system if mineral deposits are persistent. Regularly check the supply lines for cracks and leaks, and address any issues promptly to protect walls, floors, and cabinets.
Quick Cost/Repair vs Replacement Considerations
Repairing a spigot is usually less expensive than replacement, especially if the issue is a worn washer or a loose nut. Costs vary based on fixture type, part availability, and labor, but a DIY repair can be very economical for a common spigot. If multiple components show wear or if the fixture is severely corroded, replacement may be more cost-effective in the long run. Consider the age of the plumbing, local labor rates, and whether upgrading to a modern, low-leak fixture could reduce future maintenance. Leak Diagnosis suggests evaluating not just price but the long-term reliability of the fix.
Tools & Materials
- Adjustable wrench(Fits most spigot nuts, choose 6-8 inch)
- Flat-head screwdriver(For handle set screws)
- Phillips screwdriver(For handle removal and plate screws)
- Replacement washer or O-ring(Match size to faucet type)
- Replacement packing nut or stem (if applicable)(Only if your unit needs it)
- Plumber’s tape (Teflon tape)(Wrap clockwise around threads)
- Bucket(Catch water during disassembly)
- Rags or towels(Keep area dry and clean)
- Penetrating oil(Optional for stubborn nuts)
- Flashlight(Better visibility in tight spaces)
- Replacement spigot (if needed)(Choose compatible model)
Steps
Estimated time: 45-90 minutes
- 1
Turn off water and drain
Locate the shut-off valve for the affected line and turn it off. Open the spigot to relieve pressure and drain residual water into a bucket. Wipe the area dry to prevent misdiagnosis and to keep the workspace clean.
Tip: Pro tip: test that water is fully off by trying to run a small amount through the valve before proceeding. - 2
Remove handle and access parts
Use a screwdriver to remove the handle screws, then lift off the handle to reveal the packing nut and stem. Inspect for corrosion or damaged components and take a photo for reference before removing parts.
Tip: Pro tip: keep screws in a labeled container to avoid misplacement during reassembly. - 3
Inspect and replace washers/O-rings
Identify the washer or O-ring that sits on the valve seat. Remove the old part and replace with an identical-size piece. If the seat shows wear, consider replacing the seat washer and reseating the stem.
Tip: Pro tip: avoid mixing up washer shapes; wrong fit prevents a proper seal and causes leaks. - 4
Tighten packing nut or stem
Reinstall the stem and tighten the packing nut in small increments. Stop tightening as soon as the drip ceases. Remember, overtightening can strip threads or crack the fixture.
Tip: Pro tip: use a torque-limiting approach—tighten a little, test, then adjust if needed. - 5
Reassemble and apply sealant if needed
Reassemble the faucet components in the reverse order of disassembly. If you used plumber’s tape, apply a fresh wrap on the threaded connections to promote a tight seal.
Tip: Pro tip: wipe excess tape from threads to avoid it entering the water flow. - 6
Test for leaks and finalize
Turn the water back on gradually and run the faucet to observe for leaks. If you see a drip, re-check the parts or consider upgrading to a newer fixture. If the leak persists, it may indicate a more serious issue.
Tip: Pro tip: test under different pressures and temperatures to ensure durability.
Questions & Answers
What is the most common cause of a spigot leak?
Most leaks originate from a worn washer, a damaged O-ring, or a loose packing nut. Replacing these parts resolves many leaks without replacing the faucet.
Most leaks come from a worn washer, a damaged O-ring, or a loose packing nut. Replacing these parts fixes many leaks.
Can I fix a spigot leak without replacing the entire faucet?
Yes, many leaks are solvable by replacing washers or O-rings and resealing threaded connections. If corrosion or extensive wear exists, replacement may be more reliable.
Yes, many leaks are fixed by replacing washers or O-rings and resealing threads. If corrosion is severe, replacement might be better.
How long does a typical spigot leak repair take for a DIYer?
A standard repair usually takes 30 to 90 minutes depending on faucet type and access. More complex fixes or replacements may require additional time.
Most repairs take about 30 to 90 minutes, depending on faucet type and access. More complex fixes may take longer.
Is it safe to DIY a spigot leak?
DIY fixes are typically safe when you shut off water supply and wear basic safety gear. If the leak is behind a wall or involves gas lines, hire a professional.
DIY is generally safe if you shut off water and stay careful. For leaks behind walls or near gas lines, call a pro.
When should I call a plumber?
Call a plumber if the leak persists after repairs, if you notice rust, or if you can't access the pipes safely. Professional assessment ensures code compliance and prevents water damage.
Call a plumber if leaks persist after repairs or if the pipes are hard to reach or corroded.
Can mineral deposits affect leakage?
Mineral buildup can affect seals and threads, causing leaks or reduced performance. Regular cleaning helps maintain a tight seal and extend fixture life.
Mineral buildup can cause leaks; clean fixtures regularly to maintain a good seal.
What safety steps should I take during repair?
Wear eye protection, work in a dry area, and ensure no live electricity near the work zone. Use proper tools and avoid forcing components.
Protect your eyes, keep the area dry, and avoid forcing parts. If unsure, pause and consult a professional.
Watch Video
Main Points
- Turn off water first to prevent flooding.
- Identify whether the leak is from a washer, packing nut, or stem.
- Replace worn parts with correct sizing and reseal threads.
- Test thoroughly after each repair to confirm a drip-free seal.
- Consider replacement if corrosion or wear is extensive.