Fix Faucet Leak: A Homeowner's Step-by-Step Guide
Learn how to fix a faucet leak safely and effectively with a clear, step-by-step approach. Save water, reduce bills, and prevent damage with practical tips from Leak Diagnosis.

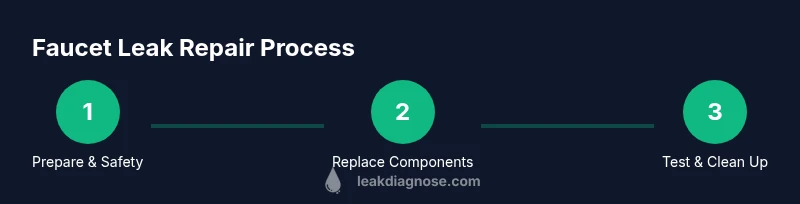
Learn how to fix a faucet leak with a simple, hands-on process. This guide covers identifying the leak type, gathering safe tools, and performing a basic washer or cartridge replacement. Following these steps will reduce water waste, prevent further damage, and minimize costly service calls. No special equipment required beyond common household tools.
Why fixing faucet leaks matters
According to Leak Diagnosis, even a small faucet drip can waste water over time, increasing your utility bills and potentially causing hidden damage behind fixtures. Fixing leaks promptly helps conserve water, protects surrounding cabinets from moisture, and extends the life of your fixtures. In many households, a leaking faucet is not just an annoyance but a measurable loss of water efficiency. By taking a methodical, DIY-friendly approach, homeowners can often stop leaks with basic tools and careful part replacement, avoiding the need for urgent service calls.
Types of faucet leaks and what they mean
Faucet leaks come in several common forms, each pointing to different root causes. A dripping from the spout often means worn washers or cartridges. Leaks around the handle can indicate worn seals or packing nuts, while leaks at the base may point to loose connections or worn ferrules. Cartridge faucets use a replaceable cartridge, whereas compression faucets rely on rubber washers and metal discs. Understanding the type helps you choose the right replacement parts and avoid overhauling the entire faucet. Regardless of type, most fixes involve accessing internal components, inspecting for wear, and replacing worn parts with appropriately sized equivalents.
Safety and prep before you begin
Before you reach for tools, turn off the water supply to the faucet and gather a few towels or a bucket to catch drips. Use safety glasses if splashing could occur when removing parts. Label or photograph each component as you disassemble to simplify reassembly. If you’re working under a sink, consider laying a drop cloth to protect cabinetry. Remember: if the fixtures are older or show signs of corrosion, you may need a more cautious approach or professional assistance.
What you should know about DIY fixes vs. professional help
Many faucet leaks are manageable with basic tools and replacement washers or cartridges. However, some leaks involve complex plumbing or aging fixtures that don’t respond to simple repairs. If you notice persistent leaks after attempting a swap, if the faucet is antique, or if shutoff valves are hard to operate, it’s reasonable to seek professional guidance. Safety should always come first—exposure to sharp edges, hot water, or gas lines (in certain configurations) increases risk if you proceed without proper precautions.
Common mistakes to avoid when fixing a faucet leak
Rushing the repair can lead to stripped screws or cross-threaded connections. Using the wrong size washer or cartridge will not seal properly and may cause further drips. Overtightening nuts is a frequent cause of new leaks or damaged threads. Skipping the step of testing after reassembly can allow hidden leaks to go unnoticed. Take your time to match parts precisely and reassemble gradually, testing as you go to confirm a solid seal.
Maintenance tips to prevent future leaks
Regular inspection of faucet handles, supply lines, and connection nuts helps catch wear before a leak appears. If you live in hard water areas, mineral buildup can wear seals faster; consider flushing cartridges and replacing washers on a routine schedule. Keep a small supply of common replacement parts on hand and note the faucet model to ensure you buy compatible components. A little proactive maintenance saves more water and money over time.
When to call a professional and what to expect
If the leak persists after replacing washers or the cartridge, if the fixture is damaged beyond simple repair, or if you’re uncomfortable disassembling plumbing under a sink, a licensed plumber is the safest option. Professionals can diagnose hidden leaks behind walls, reseal connections, and advise whether a fixture replacement is more cost-effective than repair. A quick consultation can prevent water damage and ensure safety in complex setups.
Tools & Materials
- Adjustable wrench(Set to fit 1/4"–1/2" nuts commonly found on faucets)
- Screwdrivers (flathead and Phillips)(For handle screws and fasteners)
- Replacement washers and O-rings(Match size to faucet model)
- Cartridge or stem kit (as needed)(Depends on faucet type)
- Plumber's tape (Teflon tape)(Wrap threads on metal fittings)
- Rags or towels(Protect surfaces and catch drips)
- Bucket(Catch water when removing parts)
- Penetrating oil (optional)(Loosen stubborn nuts)
- Safety gloves (optional)(Grip and hand protection)
Steps
Estimated time: Total time: 45-60 minutes
- 1
Turn off the water supply
Locate the under-sink shutoff valves and turn them clockwise to fully close. This prevents new water from flooding the area while you work. Open the faucet to release any remaining pressure and confirm there’s no flow.
Tip: If the valves are hard to turn, apply a small amount of penetrating oil and wait 5–10 minutes before retrying. - 2
Remove the faucet handle
Use a screwdriver to remove the handle screw, then lift the handle away. Set aside the decorative cap and handle, noting how parts are assembled so you can reassemble later.
Tip: Take a quick photo before removal to guide reassembly. - 3
Inspect the internal components
Check the washer, O-ring, and cartridge or stem for wear or damage. If a cartridge faucet, inspect the cartridge for cracks or deformation.
Tip: If parts are sticky, gently wipe with a microfiber cloth; avoid forcing any components. - 4
Replace worn parts
Install a new washer or O-ring if the old one shows wear. If the cartridge is damaged, replace it with a compatible cartridge kit.
Tip: Always confirm part compatibility with your faucet brand and model. - 5
Apply plumber's tape and reassemble
Wrap plumber’s tape around threaded fittings to improve seal, then reassemble in reverse order of disassembly. Tighten snugly without overdoing it.
Tip: Use a torque-limiting approach: small turns at a time and test frequently. - 6
Restore water supply and test
Turn the supply valves back on and slowly run the faucet. Look for drips at the handle, spout, and connections. If leaking persists, recheck components or repeat with alternative parts.
Tip: Run water for several minutes at varying speeds to ensure a solid seal. - 7
Clean up and monitor
Wipe dry the area and check for moisture on cabinets over the next 24–48 hours. Keep a log of any dripping so you know if another fix is needed.
Tip: Keep spare parts organized by faucet type and model number.
Questions & Answers
What causes a faucet to leak?
Leaking faucets are usually caused by worn washers, damaged cartridges, or loose connections. Age and mineral buildup can speed wear, so regular maintenance helps prevent leaks.
Leaks usually come from worn parts or loose fittings. Regular maintenance helps prevent them.
Can I fix a faucet leak without replacing washers?
If the washer is still intact and not deformed, you may reseat it or clean mineral buildup. However, most leaks come from worn parts and will require replacement for a lasting fix.
Sometimes you can reseat or clean a worn washer, but often replacement is needed for a lasting fix.
How long does a faucet repair take?
A typical repair can take under an hour, depending on faucet type and access. More complex fixtures may take longer or require part replacements.
Most fixes take under an hour, depending on the faucet and access.
Should I hire a plumber for a faucet leak?
If you’ve attempted the basic fixes and the leak continues, or if the fixture is archaic, a licensed plumber is a safer option. They can diagnose hidden issues and ensure a proper seal.
If the leak persists after DIY fixes or the fixture is old, call a plumber.
Is it safe to use plumbers tape on faucet threads?
Yes, threading tape helps seal metal-to-metal connections. Avoid taping the cartridge seals themselves; use tape on threaded fittings only.
Yes, tape threaded fittings, but not cartridge seals.
What is a cartridge faucet, and when should I replace it?
A cartridge faucet uses a single cartridge to control water flow. If you notice frequent leaks despite part replacements, the cartridge may be worn and should be replaced with a compatible kit.
Cartridge faucets rely on a cartridge. If leaks persist after parts swap, replace the cartridge.
Watch Video
Main Points
- Turn off water before starting to prevent spills.
- Replace worn washers or cartridges to stop drips.
- Test thoroughly after reassembly to confirm a seal.
- Seek professional help if leaks persist or the fixture is old.