No Leak Gas Can: Inspection, Fixes, and Safety Tips
Learn to prevent hazards with a no leak gas can. This step-by-step guide covers inspection, testing, fixes, and safe storage to keep fuel containment secure and compliant.

Goal: achieve a no leak gas can by thorough seal and vent checks. Inspect the cap, gasket, and vent tube for cracks or deformation. Test fittings with a soap solution; never use open flames near any fuel connection. If you detect a leak, stop using the can immediately and follow local safety guidance.
Why a no leak gas can matters
A no leak gas can is essential for home safety, reducing the risk of flammable fumes, fuel loss, and environmental damage. When a can leaks, vapors can accumulate in confined spaces, creating ignition hazards and posing health risks to occupants. The Leak Diagnosis team emphasizes proactive inspection and maintenance to maintain a reliable container. A well-sealed gas can minimizes evaporation losses, extends container life, and simplifies safe handling during transfers, refills, and transport. For homeowners, the goal is a no leak gas can that performs consistently under typical temperatures and loads, while remaining compliant with manufacturer instructions and local codes. By treating every can as potentially leaky until proven otherwise, you lower risk and increase safety for everyone in the household. A no leak gas can also helps with budgeting by preventing unexpected fuel waste and costly cleanup after spills.
Common sources of gas can leaks
Gas can leaks typically arise from wear at the cap seal, a cracked gasket, or a damaged vent line. Over time, plastic threads can wear down, causing poor sealing when the cap is tightened. Metal cans may develop corroded seams or dented edges that create micro-gaps for fuel vapors to escape. Temperature cycling—hot sun followed by cool night air—can stress seals and expand plastics, leading to leakage. Damaged pour spouts, compromised safety vents, or missing o-rings also contribute to a no leak gas can failing the test. Regular visual checks and a gentle pressure test with soapy water can reveal hidden leaks before they become dangerous.
How to test a gas can for leaks safely
Testing for leaks should be done in a well-ventilated area away from heat sources. Prepare a soap solution by mixing dish soap with water and load it into a spray bottle. Apply the solution to the cap, gasket, seams, vent, and pour spout while gently pressing the cap to simulate normal sealing pressure. Look for steady bubbles indicating a leak. If bubbles appear, stop using the can immediately and inspect the corresponding component for replacement. For a persistent issue, consult the can’s manufacturer or a qualified technician. Remember: a no leak gas can is a non-negotiable safety standard.
Fixes and maintenance to prevent leaks
If you identify a leak, first attempt a gasket or cap replacement if compatible with the can model. Ensure replacement parts are designed for fuel containment and approved by the manufacturer. Tighten caps according to the product’s torque recommendations, and avoid over-tightening which can crack seals. Clean any residue around joints with a safe degreaser, then re-test. If the body shows dents, corrosion, or seam cracks, retire the can and replace it with a certified container. Keeping spare gaskets, caps, and a basic repair kit on hand supports a proactive no leak gas can approach.
Storage and handling best practices
Store gas cans upright in a cool, ventilated area away from direct sunlight and heat sources. Use a dedicated, stable shelf or cabinet to prevent tipping, and keep cans away from ignition sources like pilot lights, heaters, or open flames. Clearly label each can with contents and the date of inspection. When transporting, place the can in a secure carrier to prevent movement and friction. A no leak gas can is most reliable when stored in a controlled environment and checked before each use.
Choosing the right containers and materials
Opt for cans that are certified for fuel storage and meet local safety standards. Prefer containers with intact caps, properly seated gaskets, and vented closures designed for the specific fuel type. Avoid older, corroded, or damaged cans, as even a small crack can compromise containment. If you must repair, only use manufacturer-approved parts and follow the replacement guidance. Consistency in container quality is a cornerstone of maintaining a true no leak gas can.
Tools & Materials
- Soap solution (water + dish soap)(Prepare in a spray bottle; bubbles indicate leaks)
- Spray bottle or squirt bottle(For even application to joints and seals)
- Soft brush or rag(To wipe surfaces and dry after testing)
- Replacement caps/gaskets(Keep on hand for common seal points)
- Gloves(Protect hands from fuel residues)
- Degreaser or mild cleaner(Remove residue around caps and seams)
- Permanent marker(Label inspection dates and findings)
- Safe fuel-compatible lubricant(Only if recommended by manufacturer)
Steps
Estimated time: 60-90 minutes
- 1
Inspect the cap and gasket
Remove the cap and visually inspect the gasket for cracks, warping, or brittleness. Check the cap threads for wear and ensure the cap seats fully when tightened. If the gasket shows damage, replace it before testing for leaks.
Tip: Carry spare gaskets and caps to swap quickly when you notice wear. - 2
Examine the can body and seams
Look for dents, corrosion, or cracks along seams and around the pour spout. Even minor damage can create micro-gaps that permit vapor escape. If you see structural damage, retire the can and replace it with a certified container.
Tip: Use good lighting and a magnifying glass for small seam cracks. - 3
Perform a soap test on joints
Apply the soapy solution to all joints, including the cap, gasket, and spout area. Gently re-seat the cap and observe for bubble formation indicating a leak. If bubbles appear, stop using the can immediately and inspect the fault area.
Tip: Test only in a ventilated area and away from ignition sources. - 4
Test the vent and pour spout
Verify the vent is clear and functioning—no blockages or kinks. Ensure the pour spout seals properly when closed. A compromised vent or spout can undermine overall containment even if other seals are intact.
Tip: Clear any debris with a non-scratch tool; avoid using metal picks that could scratch the metal can. - 5
Decide on repair or replacement
If a leak is detected and parts are available, replace them with manufacturer-approved components. If parts are not available or the can is heavily damaged, replace the entire container. Do not attempt risky field repairs on damaged fuel containers.
Tip: Document part numbers and dates of replacement for future maintenance. - 6
Store and label the can securely
Reassemble the can, re-test if you replaced parts, and store upright in a cool, ventilated area. Label with contents and the date of inspection. Establish a routine to re-check every 6–12 months or per manufacturer guidance.
Tip: Set calendar reminders for your next inspection to maintain a true no leak gas can.
Questions & Answers
What defines a 'no leak gas can'?
A no leak gas can shows no fuel seepage at joints, seals, or vents. It has an intact cap, gasket, and vent system, and passes a soap test without bubbles. Regular maintenance helps keep it compliant and safe.
A no leak gas can means there’s no fuel leakage at the cap, gasket, or vent. Regular maintenance and testing keep it safe to use.
Can I repair a damaged gas can myself?
Minor issues like a worn gasket or loose cap can sometimes be resolved with manufacturer-approved parts. Major damage such as a dented body or cracked seam should lead to replacement. Always follow the manufacturer’s guidance and safety rules.
You can fix small parts if the manufacturer approves them, but replace damaged cans. Follow safety guidelines.
What should I do if I smell gas near a gas can?
Leave the area immediately and relocate the can to a well-ventilated, outdoor space if safe. Avoid electrical switches or flames. After you’re clear, inspect for leaks using the soap test or contact a professional if needed.
If you smell gas, move away and ventilate the area. Do not operate flames or switches until it’s safe.
Is it safe to reuse a gas can after repair?
Yes, if all parts are manufacturer-approved, the seal is intact, and the soap test shows no bubbles. If there’s any doubt about integrity, retire the can and replace it. Safety first.
Reuse is safe only if tests show no leaks and parts are approved. If unsure, replace the can.
How often should I inspect gas cans?
Inspect cans at least every 6–12 months or per manufacturer guidance. More frequent checks are wise if the cans are stored in variable temperatures or near heat sources.
Check every 6 to 12 months, or more often if temperature varies or heat exposure is common.
Watch Video
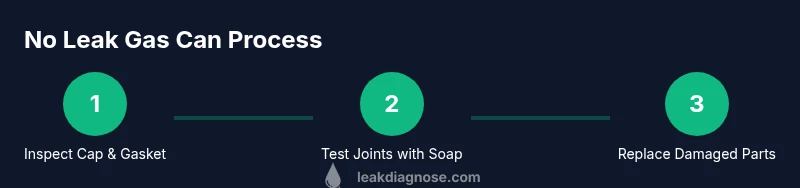
Main Points
- Inspect caps and gaskets for wear during each check
- Test joints with soap solution to identify leaks
- Replace damaged parts with manufacturer-approved components
- Store gas cans in a cool, ventilated area and label inspection dates