Will leaking injector cause misfire? A practical troubleshooting guide
Discover if a leaking injector can cause engine misfire, how to diagnose safely, and proven fixes. A practical, homeowner-friendly guide from the Leak Diagnosis team.

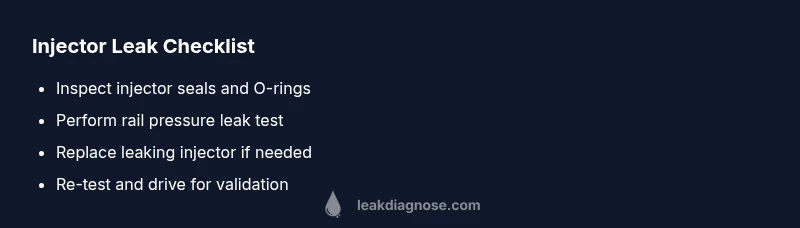
Yes—a leaking injector can cause misfire by skewing fuel delivery to one or more cylinders. A dripping injector or bad O-rings can flood a cylinder or create lean conditions that trigger rough idle and hesitation. Quick fixes include visually inspecting seals, performing a fuel-pressure test, and replacing the leaking injector if needed.
Will a leaking injector cause misfire? The short answer is yes. According to Leak Diagnosis, even a small external leak at the injector seal can alter pressure in the fuel rail and disturb spray patterns, which directly contributes to misfires in modern engines. The exact outcome depends on which cylinder is affected, the engine design, and how quickly the fuel system can compensate. If you notice a fuel smell after startup, a transient misfire, or a rough idle, consider injector leaks as a leading suspect. This guide explains how to verify the problem and what steps to take next. Understanding will leaking injector cause misfire is essential for any homeowner performing safe, at-home diagnostics before calling a professional. The Leak Diagnosis team emphasizes that early detection reduces fuel waste and protects your engine from potential damage, making a methodical approach the safest path forward.
Symptoms can point you toward the culprit, but they are not definitive. A misfire might feel like a stumble, a hiccup under acceleration, or a shake at idle. Fuel odor near the engine bay, wetness around the injector seal, or a consistent misfire on one cylinder increases the likelihood of an injector leak. However, some misfires stem from spark or compression issues, so don’t assume injectors are the sole cause. In practice, you’ll use symptoms as a starting point for a controlled diagnostic path, validating or ruling out injector leaks as you go. The key is to maintain a steady approach, documenting observations so you can compare results as you test different hypotheses, and to keep safety front and center while you work.
Immediate safety steps are essential before you begin any testing. Relieve fuel system pressure, disconnect the battery to prevent accidental sparks, and work in a well-ventilated area away from open flames. Gasoline vapors are highly flammable, and a small spark can ignite them. Wear eye protection and gloves, and keep a fire extinguisher within reach. Start with non-destructive checks (visual inspection and pressure tests) before disassembling components. If you smell gasoline or see fuel pooling, pause and consider professional assistance to avoid a hazardous situation.
Practical at-home checks you can perform safely. Start with a visual inspection of the injector seals and O-rings for cracking or deformation. Look for fuel residue around the injector body and rail connections. A fuel pressure test helps identify leaks that aren’t obvious at a glance; lower-than-spec pressure or a persistent drop during idle can indicate a leak. If you notice symptoms but cannot identify a leak, consider using a fuel system pressure tester or taking the vehicle to a shop that can perform a leak-down test. Keep a log of your findings to guide professional diagnostics if needed.
Diagnostic considerations: thinking beyond the injector. A misfire can be caused by a faulty spark plug, coil, or wiring; an issue with the fuel pump or rail pressure regulator; or a clogged nozzle. When diagnosing injector leaks, isolate the injector from the circuit and test fuel pressure with the rail connected. If you find a leak, replace or reseal only the affected injector—often, replacing O-rings or seals is enough to stop the leak. If leaks persist after seal replacement, the injector itself may be failing and require replacement.
The fix path and the safety-first mantra. If you confirm a leaking injector, the safest fix is to replace the injector or the seals, then re-test fuel pressure and engine performance. Many modern engines require a precise torque on fuel rail fittings and attention to injector pin alignment. After reassembly, clear any diagnostic trouble codes and run a controlled test drive to confirm the repair. Throughout the process, maintain a clean Work Area to avoid contaminating fuel lines, and dispose of old parts per local regulations.
Steps
Estimated time: 1-2 hours
- 1
Gather safety gear and tools
Put on eye protection and gloves. Gather a fuel pressure gauge, hand tools, replacement injector seals, and a suitable replacement injector if needed. Ensure the vehicle is on a stable, level surface with the engine off and keys removed.
Tip: Have a fire extinguisher within reach before starting. - 2
Depressurize the fuel system
Relieve fuel pressure according to your vehicle’s service manual. Disconnect the battery to minimize risk of sparks. Do not open fuel lines while the system is pressurized.
Tip: Work in a well-ventilated area away from flame sources. - 3
Inspect the injector area visually
Remove any shielding to access the injector rail. Check O-rings and seals for cracks or deformation. Look for fuel residue around the injector body which indicates a leak.
Tip: Only touch components with the engine cool to avoid burns. - 4
Test fuel pressure and leak-down
Attach a fuel pressure gauge to verify rail pressure matches factory specs. Run the test and observe if pressure holds or drops when the system is isolated. A drop or leak path points to a leaking injector seal or injector itself.
Tip: Record the baseline pressure and any changes during the test. - 5
Replace seals or injector as needed
If seals are faulty, replace O-rings and gaskets. If the injector leaks internally or shows poor spray, replace the injector. Reassemble with the correct torque on rail fittings.
Tip: Use OEM parts or manufacturer-approved equivalents. - 6
Re-test and validate
Reconnect the battery, clear codes, and start the engine. Check for leaks under pressure and perform a short test drive to verify smooth operation. If misfires persist, proceed to professional diagnostics.
Tip: Take note of any new codes or abnormal sounds during the test drive.
Diagnosis: Engine misfires with rough idle and possible fuel odor
Possible Causes
- highBad injector seal or O-ring causing external leak
- highInternal injector leak allowing fuel to drip into cylinder
- mediumFuel rail pressure issues leading to improper spray
- lowBlocked return line causing pressure imbalance
Fixes
- easyInspect and replace injector O-rings and seals if cracked or worn
- mediumPerform a fuel pressure and leak-down test to confirm leak path
- hardReplace leaking injector(s) and reseal rail connections as needed
- mediumInspect and replace faulty rail seals or regulators if indicated by tests
Questions & Answers
Can a small injector leak still cause a misfire?
Yes. Even a minor external leak or a small internal leak can disrupt fuel delivery enough to cause a misfire, especially on engines with precise injector timing. Look for accompanying smells or fuel pooling as confirmation.
Even a small leak can cause misfire because it disturbs fuel delivery and spray patterns, especially on modern engines.
Is a misfire always caused by the injector?
No. Misfires can be caused by spark plugs, ignition coils, wiring, fuel pump issues, dirty injectors, or vacuum leaks. Use a systematic diagnostic path to isolate the exact cause.
Misfires have multiple possible causes; injectors are just one possibility, so test other components too.
How long does injector replacement typically take?
Time varies by engine layout, but replacing a single injector or sealing kit often takes 1-2 hours for a DIY job, longer for complex engines or rail disassembly. Always refer to your service manual for exact steps.
Replacing an injector can take about an hour or two depending on the engine, with rail removal sometimes needed.
Can I drive my car if I suspect an injector leak?
Not advisable. Driving with a suspected injector leak can risk fire, fuel spills, and catalytic converter damage. If in doubt, have the vehicle towed to a safe, qualified repair facility.
No, it’s not safe to drive with a suspected injector leak; get it checked promptly.
What safety steps should I take before starting work?
Relieve fuel pressure, disconnect the battery, work in a ventilated area, and keep flames away from the workspace. Wear eye protection and use a spill kit for any fuel leakage.
Relieve pressure, disconnect the battery, ventilate the area, and wear eye protection before starting.
Should I replace only the seals or the whole injector?
If the leak originates from the O-rings or seals, replacing those is often enough. If the injector shows internal leakage or poor spray, a full injector replacement is usually required.
Seal replacement might fix the issue, but if the injector itself leaks, replace it.
Watch Video
Main Points
- Identify injector leaks early to prevent misfires
- Use safe, methodical testing before teardown
- Replace seals or injectors as indicated by tests
- Clear codes and verify with a test drive after repair
- Prevent future leaks through proper maintenance