Stop Brake Fluid Leaks: A Homeowner's Guide
Learn how to safely identify, contain, and repair brake fluid leaks. This comprehensive guide covers sources, safety, tools, and permanent fixes to keep your vehicle braking reliably.

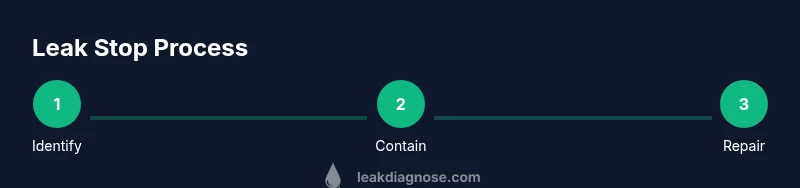
Goal: Locate and stop brake fluid leaks safely, then perform a permanent repair. You’ll inspect the system, contain spills, and choose the correct repair path (hose, line, caliper, or master cylinder). Expect to reseal or replace components and bleed the brakes after repairs. Never drive with a suspected leak; arrange service if uncertain. This quick answer sets expectations for the full tutorial.
Why Brake Fluid Leaks Are Dangerous
Brake fluid leaks are more than a mess; they threaten your ability to stop. Brake hydraulics rely on consistent fluid pressure to translate pedal movement into stopping force. A leak reduces pressure, leading to a soft or spongy pedal and increased stopping distances. Car owners should treat any sign of fluid loss as urgent. According to Leak Diagnosis, leaks often originate at worn seals, corroded fittings, or damaged hoses. Early detection is critical for safety, reliability, and avoiding damage to ABS modulator and other components. If you notice dampness on components, dark stains under the car, or a warning light, pull over safely and assess the situation. The Leak Diagnosis team emphasizes not driving with a compromised brake system. Regular checks of fluid level, color, and evidence of moisture at joints help catch leaks before they become serious.
Common Brake Fluid Leak Sources
Brake systems fail for a few predictable reasons. The master cylinder seals can wear, leading to seepage at the reservoir and cap. Rubber hoses and metal brake lines can become cracked or corroded, especially with harsh road salt or heat cycling. Calipers and wheel cylinders may develop leaks around pistons and bleeder screws. ABS hydraulic units and banjo fittings also present potential leak points. Understanding these sources helps you target repairs and avoid unnecessary parts replacements. Leak Diagnosis notes that most leaks cluster around hose connections, fittings, and seal interfaces. A systematic inspection of each connection and component during or after a leak reduces diagnosis time and increases repair accuracy.
Immediate Safety Steps You Should Take
If you suspect a brake fluid leak, don’t delay. Find a safe place to pull over, activate hazard lights, and set the parking brake. Check that wheels are chocked and the vehicle is stable before inspecting underneath. Do not attempt to drive long distances with a hydraulic leak. Brake fluid is slippery and corrosive; avoid skin contact and wipe away any spills with absorbent material. If the pedal goes to the floor or you notice a significant drop in braking effectiveness, call for roadside assistance. Your safety, and the safety of others on the road, depends on prompt action and careful handling of the braking system. The Leak Diagnosis team recommends arranging professional service when you’re unsure about the repair scope.
How to Diagnose a Brake Fluid Leak at Home
Start with a casual visual inspection: look for wet, shiny patches along lines, hoses, and fittings. Check the master cylinder reservoir level; a steadily dropping level indicates a leak somewhere in the system. Brake fluid has a distinct odor and a slippery feel; if you notice staining around joints or under the car near wheels, probe those areas for drips. A rubbing or grinding noise isn’t typical of a leak, but loss of brake performance is a warning sign. If you find a leaking hose, loose banjo bolts, or dampness around caliper pistons, those are likely sources. Always verify with a secondary check, like a flashlight inspection after the engine is off and the car is cooled. If the leak is inside the wheel well, be extra cautious and treat it as a high-priority issue.
Temporary Containment and Cleanup
Contain spills immediately to prevent harm to your yard, driveway, or skin. Place absorbent material (cat litter, sand, or commercial brake-fluid absorbers) over the spill, then scoop and seal it in a sturdy bag. Do not use water or household cleaners on a hot brake system—hot metal and fluids can react unpredictably. Wear gloves and eye protection while cleaning. After absorbing the fluid, dispose of the material according to local hazardous-waste guidelines. If you must move the vehicle, ensure the area is clear of people and pets and that you never park on a slope where fluid could flow toward a drain. Clean the area around the master cylinder and wheel wells with a dry cloth to identify fresh leaks during a test drive.
Permanent Repair Options: When to Patch vs Replace
Permanent fixes depend on the leak source and the severity. A small seep near a fitting may be addressed by tightening or careful re-sealing with manufacturer-approved parts. Cracked hoses or corroded brake lines typically require replacement. Worn master-cylinder seals or a failing caliper/wheel-cylinder usually mean replacing the component. In some cases, a temporary clamp or leak-stop product could be considered for short-term roadside containment, but these are not substitutes for a proper repair. The safest course is a full component replacement performed by a qualified technician with proper bleeding of the system after work. If the repair involves critical parts like the master cylinder or ABS unit, plan for a professional service appointment.
Tools, Parts, and Materials for Brake System Leaks
- Brake fluid compatible with your vehicle (DOT 3/4/5.1 as specified in the owner’s manual)
- Replacement hose or line sections, calipers, or master cylinder as needed
- Torque wrench and flare-nut wrenches
- Line clamps, pliers, screwdrivers, and wrenches
- Absorbent material (cat litter or dedicated absorbent)
- Drain pan and rags for spills
- Jack, jack stands, wheel chocks, and a sturdy work surface
- Protective gloves and eye protection
How to Prevent Future Leaks (Maintenance Tips)
Prevention is easier than repair. Regularly inspect brake lines and fittings for corrosion or wear. Check the brake fluid at least monthly and top up only with fluid specified by the manufacturer. Avoid mixing fluids or using any stop-leak products not approved for brake systems. Keep the reservoir cap clean and ensure the master cylinder seals remain intact. Replace hoses or lines at the manufacturer’s recommended intervals, and if you notice discoloration, dragging brakes, or a soft pedal, inspect quickly. Leak Diagnosis recommends a quick monthly visual check, especially after winter driving or long trips, to catch small leaks before they become big problems. Keeping a clean, dry engine bay and wheel wells helps identify new leaks early and reduces the risk of secondary damage.
Step-by-Step Overview: What to Do Next
- Begin with a safety check: pull over, engage hazards, and secure the vehicle.
- Locate and assess the leak source by inspecting master cylinder, lines, hoses, and calipers.
- Contain and clean any brake fluid spills immediately.
- Decide on repair path: tighten, replace, or have a professional perform the fix.
- Bleed and refill the brake fluid after repairs and recheck levels.
- Test the brakes in a safe area to confirm proper operation.
- Schedule a professional inspection if you’re unsure about the repair scope or safety implications.
Tools & Materials
- Brake fluid (DOT type as specified)(Check vehicle manual for correct DOT specification (3/4/5.1))
- Replacement hoses/lines or master cylinder as needed(Only use manufacturer-approved parts for the exact model)
- Torque wrench and flare-nut wrenches(Needed to ensure proper tension without damage)
- Pliers, screwdrivers, wrenches(For removing and installing fittings)
- Absorbent material (cat litter or dedicated absorbent)(For spill containment and cleanup)
- Drain pan and rags(To catch drips and keep the workspace clean)
- Jack, jack stands, wheel chocks(Secure vehicle during inspection and repairs)
- Protective gloves and eye protection(Safety first when handling brake fluid)
Steps
Estimated time: 60-120 minutes
- 1
Prepare the vehicle and safety setup
Park on a level surface, engage the parking brake, chock wheels, and wear protective gear. If you must lift the car, use a jack and secure it with jack stands. Ensure the engine is off and the area around the brake system is cool before inspecting.
Tip: Never crawl under a car supported only by a jack; always use jack stands. - 2
Inspect for the leak source
Visually inspect the master cylinder, reservoir, hoses, calipers, and wheel cylinders for wetness or staining. Look for damp patches near fittings and at the ends of steel lines. Gently wiggle hoses to check for looseness.
Tip: If you see a cracked line or a corroded fitting, plan for replacement rather than tightening more. - 3
Contain and clean the spill
Place absorbent material over the affected area and carefully collect it in a sealed bag. Wipe nearby components with a dry cloth to reveal fresh leaks. Dispose of used absorbents according to local hazardous-waste rules.
Tip: Keep a drain pan under the area during inspection to catch drips. - 4
Decide repair path
Determine whether a simple seal tightening, hose replacement, or full component swap is required. Minor seepage from fittings may be repaired by resealing; cracked lines or worn master cylinders require replacement.
Tip: Do not attempt permanent fixes beyond your skill level. Err on the side of safety and consult a professional if unsure. - 5
Perform the repair or arrange service
If replacing parts yourself, install the correct components and torque fittings to spec. After replacement, bleed the brake system to remove air, and top up fluid to the recommended level.
Tip: Follow manufacturer torque specs and bleeding procedures to avoid introducing air into the system. - 6
Bleed and refill brake fluid
After any repair, bleed the system starting at the furthest wheel to remove air. Refill to the proper level with the correct DOT fluid and reinstall reservoir cap.
Tip: Leftover air can mimic a soft pedal; proper bleeding is essential for pedal feel. - 7
Test in a safe area
Slowly test braking in a controlled environment, verifying braking response and pedal firmness. If the pedal remains soft or the leak reappears, stop and seek professional service.
Tip: Do not drive aggressively; keep tests short and controlled.
Questions & Answers
What are common signs of a brake fluid leak?
Common signs include visible wetness, dark stains near lines or calipers, a drop in reservoir level, a soft or sinking brake pedal, or a warning light. If you notice any of these, treat it as a safety issue and inspect the system or seek professional help.
Watch for wet spots near brake components, a low fluid level, or a soft brake pedal. If you see any of these, get the system checked promptly.
Is it safe to use stop-leak products in a brake system?
Most stop-leak products are not approved for brake systems and can contaminate the fluid, reducing braking efficiency or damaging components. Avoid using them as a substitute for proper repair and consult a professional for safe options.
Avoid stop-leak products in brakes; they can cause more problems. Get a proper repair instead.
Can I fix brake fluid leaks myself, or must I go to a shop?
Minor leaks from fittings or hoses may be DIY, but critical components like the master cylinder, calipers, or ABS unit usually require professional service. If you’re unsure, seek a mechanic’s evaluation before proceeding.
If you’re unsure about the repair, it’s safer to visit a professional.
What should I do if the pedal goes to the floor?
A pedal that sinks toward the floor indicates a significant hydraulic issue. In this case, avoid driving and call for roadside assistance. Do not attempt a temporary fix that promises a safe ride.
If the pedal goes to the floor, stop and call for help.
Will ABS intervene if there’s a brake-fluid leak?
ABS helps with braking stability, but a hydraulic leak can compromise brake pressure. Do not rely on ABS to compensate for a leak—repair the system promptly.
ABS helps with control, but a leak still reduces braking power; fix it fast.
How often should I inspect for brake-leak signs?
Check brake fluid levels monthly and inspect visible lines and hoses during routine maintenance. Promptly address any damp spots or changes in pedal feel.
Check fluid levels monthly and look for damp spots; fix leaks early.
Watch Video
Main Points
- Identify the leak early to prevent brake failure
- Use the correct DOT brake fluid and parts
- Do not drive with a suspected brake-fluid leak
- Bleed brakes after any repair to restore pedal feel