Repair Oil Leak: A DIY Guide
Learn how to diagnose and repair oil leaks safely with step-by-step methods, essential tools, and practical tips for engines and appliances.

Want to repair oil leak safely? This step-by-step guide helps you diagnose the source, choose appropriate repair methods for engines or appliances, and perform a clean, verified fix. You’ll learn essential tools, exact safety steps, leak-prevention tips, and when to call a professional. Whether you're tackling a DIY repair or confirming a professional estimate, this article keeps you in control.
Understanding oil leaks: sources and risks
According to Leak Diagnosis, when you see oil under your vehicle or appliance, it indicates the machine is losing lubrication. In engines, the most common sources are worn seals (valve cover, rear main) and failed gaskets, plus a loose or damaged oil filter or drain plug. In appliances, leaks often trace to seals around gearboxes, reservoirs, or oil-containing housings. Left untreated, leaks reduce lubrication, accelerate wear, and create slip hazards or environmental risk if oil reaches hot surfaces. Diagnosing requires tracing the path of the liquid back to its origin, because oil can travel along hoses or seams and appear distant from the source. For DIYers, start with a visual inspection, keep the area clean, and follow the evidence back toward the source. Remember: the observed puddle is rarely the first failure point—often the leak originates higher up and travels downward.
Safety and initial assessment
Before you touch anything, ensure safety. Park on level ground and turn off the engine or appliance, then let components cool. Wear chemical-resistant gloves and safety goggles, and keep a clear path for oil disposal. If you must work on a vehicle, support it with appropriate stands and chocks; never rely on a jack alone. Have a fire extinguisher and absorbent materials nearby in case of a flare or spill. Finally, check your local regulations for disposing of used oil and filters. This upfront safety buffer saves injuries and costly mistakes.
Conditions and materials you’ll need
A basic toolkit is enough for many minor engine oil leaks, but more complex leaks may require specialty parts. Gather a drain pan, absorbent rags, a wrench set, pliers, a torque wrench (if you have torque specs), replacement seals or oil filters, a solvent or degreaser for cleanup, and a good work light. If you suspect a rare seal failure, consider a UV dye kit to trace the leak path. Label parts as you remove them and take photos to aid reassembly. Designing your workspace around oil management will save time and reduce mess.
Common sources and how they fail
Engine oil leaks most often come from the valve cover gasket, oil pan gasket, rear main seal, or oil filter gasket. A loose drain plug or a damaged oil pan can also drip oil at a slow rate. In appliances and gearboxes, seals around shafts or reservoirs may wear or crack with age, causing slow seepage rather than a dramatic spill. Each source requires different repair approaches: sealing, gasket replacement, or in some cases, part replacement. Understanding the source helps you select the right fix and avoid unnecessary disassembly.
Diagnosing without destructive disassembly
Start with a clean, dry surface and inspect following the oil’s flow path. Wipe up existing drips, then run the engine or operating cycle for a short test while observing. Use a UV dye kit for easier tracing if you have persistent leaks. Note the location of fresh staining after a controlled test, and compare with your prior photos to identify progress. By tracing the liquid path you’ll reduce guesswork and minimize unnecessary teardown. This non-destructive approach often reveals the simplest fix first.
The professional decision: when to call for help
If the leak persists after tightening, the oil shows up in hard-to-reach areas, or you see significant loss between sessions, it’s wise to consult a professional. Advanced issues like a worn rear main seal or a cracked oil pan may require specialized tools and torque procedures beyond typical DIY scope. The Leak Diagnosis team recommends erring on the side of safety and scheduling a diagnostic with a certified technician when in doubt. A timely professional check can prevent bigger engine damage and costly repairs.
Tools & Materials
- Safety gloves (nitrile or neoprene)(Chemical resistant; oil won’t degrade gloves quickly)
- Safety goggles(Eye protection against splashes)
- Oil drain pan(Large enough for expected oil volume)
- Rags or absorbent shop towels(For blotting and cleanup)
- Wrench set (metric/SAE)(Open-end or socket; include 6-point variety)
- Torque wrench(Useful for accurate bolt torque)
- Replacement seals/gaskets or oil filter(Have spares and keep to OEM specs)
- Degreaser/solvent(Prep surfaces before reassembly)
- UV dye kit (optional)(For trace-dye leaks and faster locating)
- Work light(Bright, portable lighting)
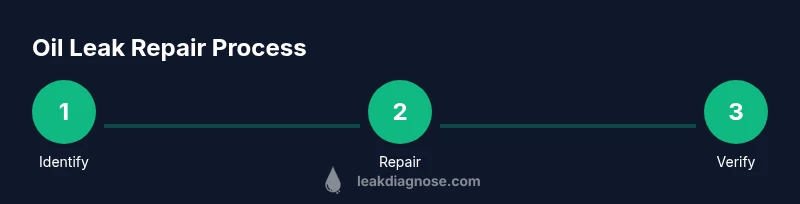
Steps
Estimated time: 60-120 minutes
- 1
Prepare workspace and safety gear
Park on level ground, engage parking brake, and let components cool. Put on gloves and eye protection, and cover the floor with absorbent material. Confirm you have a clear path for disposal and a safe way to lift the vehicle or appliance if needed.
Tip: Set up wheel chocks and a stable surface; never rely on a jack alone. - 2
Identify the leak source with a systematic scan
Wipe the area clean, start the machine briefly, and observe fresh stains. Trace the liquid path back upstream, noting seals or joints that are most likely to fail. If you’re unsure, use UV dye to reveal hidden leaks.
Tip: Take photos before disassembly to document the original state. - 3
Check the most common points first
Inspect the oil filter gasket, drain plug washer, valve cover gasket, and oil pan gasket for signs of seepage. For appliances, check reservoir seals and gearbox seals. Tighten fittings if threads are clean but observe not to over-tighten.
Tip: Use the correct torque specs and avoid overtightening plastic components. - 4
Clean, prep, and replace parts as needed
Clean the area around the leak, remove the faulty part, and replace with a new gasket or seal. If a seal is damaged, ensure mating surfaces are clean and free of old sealant. Re-apply lubricant as recommended by the manufacturer if required.
Tip: Document disassembly with photos to aid reassembly. - 5
Reassemble and tighten to spec
Reinstall the part and hand-tighten, then use the torque wrench to reach manufacturer specifications. Double-check that all connections are clean and properly seated before moving to test.
Tip: Do not mix lubrication types unless specified; use the correct oil grade. - 6
Test, observe, and re-check after driving
Start the engine or run the appliance and watch for any fresh leaks. If you see seepage, re-tighten or replace the suspect seal as needed. Monitor for 24–48 hours and re-evaluate after a short drive to ensure the fix holds.
Tip: Record results and check the area again after a 50–100 mile/test cycle.
Questions & Answers
What are the most common causes of an engine oil leak?
Most engine oil leaks originate from worn valve cover or rear main seals, a failing oil pan gasket, or a loose drain plug. Inspect these areas first before deeper disassembly.
Most leaks come from worn seals or a loose drain plug; start by inspecting valve covers, seals, and the oil pan.
Can I fix an oil leak myself at home?
Yes, you can fix minor leaks with basic tools and careful attention to torque specs. More serious leaks or damaged housings may require professional service to avoid engine damage.
You can handle minor leaks at home with the right parts, but serious leaks should be checked by a pro.
How long does a typical oil leak repair take?
A straightforward seal replacement may take 1–2 hours, while more complex repairs on engines or gearboxes can require several hours or more. Always budget extra time for diagnostics and cleanup.
Most fixes are manageable in a couple of hours, but complex seals can take longer.
What tools are needed for a basic oil leak repair?
A basic set includes gloves, goggles, a drain pan, rags, a wrench set, and the correct replacement gasket or seal. A torque wrench helps you meet manufacturer specs.
You’ll need gloves, goggles, a pan, rags, and wrenches plus the right seal.
Is driving with an oil leak dangerous?
Yes. Oil can reduce lubrication, leading to engine wear, and it can create a fire risk if spilled near hot components. Stop driving if the leak is significant and seek service promptly.
Driving with a leak is risky; it can cause engine damage and a fire hazard.
When should I replace oil seals vs re-seal?
If a seal is visibly worn, cracked, or the mating surfaces are damaged, replacement is advised. Re-sealing may work temporarily, but persistent seepage usually means a full seal replacement is needed.
Worn seals usually need replacement rather than a temporary reseal.
Watch Video
Main Points
- Identify the source before disassembly
- Use the correct parts and torque specs
- Prioritize safety and proper disposal
- Test the repair and monitor for recurrence