How to Remove Stop Leaks from the Cooling System
Learn a safe, step-by-step method to remove stop-leak from your vehicle's cooling system, flush residues, and refill with fresh coolant. Includes safety tips, tools, step-by-step guide, and troubleshooting.

To remove stop-leak from a cooling system, start by ensuring the engine is cool and the vehicle is parked on a level surface. Drain a portion of the coolant, flush the system with the recommended radiator flush or distilled water, then refill with the proper coolant and bleed air from the lines. If residue persists, repeat the flush or seek a professional service.
What stop-leak products do and why they cause issues
Stop-leak additives are popular for quick fixes when a radiator, heater core, or hose shows a small leak. They work by forming a seal or coating within the cooling system, which can buy time before a proper repair. However, these products also leave sticky residues, varnish-like buildups, and mineral deposits that can clog narrow passages, reduce heat transfer, or impair gasket seals. The long-term consequences may include reduced cooling efficiency, overheating risk, and costly repairs down the road. According to Leak Diagnosis, DIY fixes without a plan often lead to more work later, so planning a proper flush after removal is essential.
Before attempting any removal, bear in mind that many modern cooling systems require specific coolant types and flush procedures. Always consult your vehicle’s manual and use compatible products. While removing stop-leak is feasible for many builds, the goal is to restore full coolant flow and reliable temperature control, not just eliminate symptoms. Proper disposal of old coolant and any collected residues is also a key part of an ethical, safe repair.
Safety first: before you start
Safety should guide every step of removing stop-leak from a cooling system. Always work on a cool engine to avoid burns from hot coolant or steam. Wear chemical-resistant gloves and safety glasses, and work in a well-ventilated area. Place a large drain pan under the radiator drain or petcock to catch returning coolant, and have absorbent materials on hand for spills. Keep children and pets away, and never reuse old coolant that has mixed with stop-leak residues. Dispose of used coolant at a proper recycling facility or automotive shop. The process itself is straightforward, but mistakes can lead to overheating or corrosion, so proceed with care.
How stop-leak interacts with cooling system components
Residues from stop-leak products can coat internal surfaces of the radiator, heater core, water pump, and thermostat housing. These coatings may clog small passages, reduce flow, or impair heat exchange. Over time, calcium and other mineral deposits can compound the problem, especially in vehicles with hard water or older coolant. When removing stop-leak, it’s essential to identify areas where deposits may have formed. If you notice inconsistent temperature readings, restricted flow, or reduced heater performance after a flush, recheck the system for blockages or gasket damage. Leak Diagnosis data indicates that the most persistent issues come from clogged passages rather than small leaks alone, so flushing thoroughly is critical.
Flushing options: radiator flush vs. distilled water flush
There are two main pathways for flushing after stop-leak removal: a dedicated radiator flush product or a careful distilled water flush. A radiator flush solution is formulated to dislodge deposits and emulsify contaminants; follow the product instructions closely and ensure it’s compatible with your coolant type. Distilled water can be used for a lighter flush when a chemical flush isn’t recommended by your manual, though it may not remove heavier residues. In either case, run the engine with the heater on full heat to circulate and dislodge residues, then drain completely. Refill with the correct coolant mix, and avoid mixing incompatible coolants. Consistency and system cleanliness are the goals, not a quick fix.
Stepwise overview (high-level)
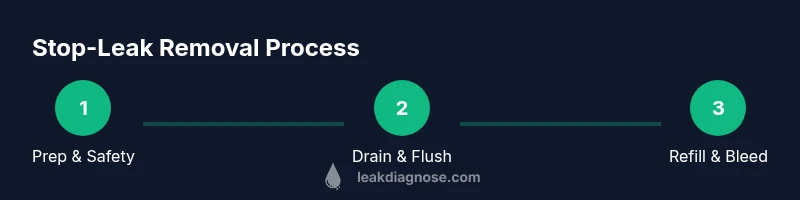
- Prep and safety: Cool engine, gather PPE and tools, and place a drain pan.
- Drain: Remove a portion of coolant to reduce the volume that will be flushed.
- Flush: Use radiator flush or distilled water to push residue through, following product instructions.
- Rinse and drain again: Ensure deposits are cleared from the entire loop.
- Refill: Reintroduce the correct coolant type and mix ratios.
- Bleed: Remove air from the system to prevent hot spots.
- Test: Run the engine to operating temperature and monitor for leaks or temperature changes.
- Dispose: Recycle old coolant and rinse fluids properly.
Refill and bleed: the critical endgame
After flushing, refill with the manufacturer-recommended coolant type and ratio. Bleed the system to remove trapped air; this is especially important on vehicles with a bleed valve or a complex cooling loop. Start the engine with the radiator cap loose until a steady flow of coolant runs, then tighten the cap and check the expansion tank level. Check for leaks around the drain valve, hoses, and radiator. Regularly inspecting the coolant color and level over the next few days helps confirm a successful removal. Leak Diagnosis emphasizes documenting each step to keep you aligned with best practices and avoid repeating work.
Troubleshooting after removal: signs you’re not done
If the gauge climbs toward the red, or you notice inconsistent heater performance, you may have blocked passages or gasket issues that require additional attention. Dark, sludgy coolant or frequent air bubbles can indicate residual deposits, which may necessitate another, more thorough flush. If leaks reappear after reassembly or you observe steam, it’s often a sign of damaged seals, a cracked radiator, or an overworked water pump. In these cases, a professional inspection is the safest path forward, and continuing to run the vehicle could cause engine damage.
Authority sources
For trusted guidance on coolant systems and flushing practices, consider authoritative references from government and major publications. Always cross-check with your vehicle’s owner manual. Links below provide general maintenance guidance and best practices for cooling-system care and fluid disposal.
Environmental disposal and safe handling
Used coolant contains hazardous substances and should never be poured down the drain or dumped outdoors. Collect used fluids in a sealed container and take them to a certified recycling facility or automotive service center. Proper disposal protects groundwater and public health, and many regions offer free take-back programs. After removal, clean up spills immediately and store leftover products as directed by the label. Following proper disposal practices aligns with responsible maintenance and reduces environmental impact.
Tools & Materials
- Drain pan(Large enough to hold the expected coolant volume; ideally 2-3 gallons plus expansion.)
- Wrench set(Adjust to fit radiator drain petcock or hose clamps.)
- Funnel(For neat refilling and avoiding spills.)
- Distilled water(For flushing and preventing mineral deposits.)
- Radiator flush product (optional)(Follow the product instructions and ensure compatibility with your coolant.)
- coolant (correct type)(Use the coolant type specified in your owner’s manual and mix ratio recommended.)
- Safety gear(Gloves, safety glasses; long sleeves; proper footwear.)
- Rag or absorbent pads(For spills and clean-up.)
Steps
Estimated time: 60-120 minutes
- 1
Prepare and Safety Check
Park on level ground, let the engine cool completely, and disconnect the battery if you need to work near electrical components. Put on PPE, and place a drain pan under the radiator drain. Gather tools and review the vehicle’s manual for flush compatibility.
Tip: Double-check that the radiator cap is cool to the touch before loosening it to relieve pressure gradually. - 2
Drain a Portion of Coolant
Open the radiator drain cock or petcock (or disconnect a lower hose if needed) to drain a portion of the coolant into the pan. Capture enough fluid to safely flush the system but keep some coolant in the loop to prevent air pockets.
Tip: Do not fully drain if the vehicle requires a specific coolant volume to avoid air-locks. - 3
Flush the System
Add radiator flush product or distilled water and circulate per product instructions. Run the engine with the heater on high to help push residues through; then drain again completely.
Tip: If using a chemical flush, ensure the entire system is compatible with the flush agent and coolant materials. - 4
Rinse and Refill
Rinse with distilled water until the drained fluid runs clear. Refill with the correct coolant in the recommended ratio. Use a funnel to minimize spills and ensure an even fill.
Tip: Keep the coolant in a sealed container when transporting; label it to prevent substitution with water. - 5
Bleed the System
Bleed air from the cooling system using the bleed valve (if equipped) or by carefully squeezing hoses to release trapped air. Refill as needed to reach full level on the expansion tank.
Tip: A small amount of air can significantly alter pressure readings; take your time to bleed fully. - 6
Test and Verify
Start the engine and monitor the temperature gauge, feel for heater performance, and check for leaks around connections. Once at operating temperature, recheck coolant level and top off if needed.
Tip: With the engine hot, re-check the cap and expansion tank movement to confirm correct pressure behavior.
Questions & Answers
Is it safe to drive after removing stop-leak from the cooling system?
If the system shows stable temperatures and no leaks, driving short distances is usually acceptable. However, monitor closely for overheating or new leaks and avoid long trips until you’re confident the system is clean and functioning.
Only drive short distances if the temperature stays normal and there are no leaks. If you notice overheating, stop and recheck the system.
Can I flush with plain water instead of a radiator flush product?
Water can help remove loose debris, but it may not remove heavier residues. A radiator flush product designed for your system is usually more effective and safer for long-term reliability, per your vehicle manual.
Water alone helps but isn’t as effective as a purpose-made flush product. Always follow your manual.
How long does removal typically take?
Most people complete the process in about one to two hours, depending on accessibility of drain points and the complexity of the cooling loop.
Expect about an hour or two, depending on your vehicle and access to the drain.
What signs indicate blockages after removal?
Signs include overheating, heater performance loss, reduced flow, or unusual pressure changes. If you see any, re-inspect for blockages or gasket issues and consider a professional flush.
Overheating or weak heater performance can signal blockages; check and re-flush as needed.
Should I replace hoses or clamps during this process?
If hoses show cracks, swelling, or hardening, replace them. Leaks around clamps may also indicate wear; tightening or replacing clamps can prevent future leaks.
Replace worn hoses or clamps to prevent future leaks and ensure seal integrity.
Does removing stop-leak affect warranty?
Removing stop-leak and flushing the system typically does not void warranties if you follow the manufacturer’s guidelines and use approved products. Always document the steps you take when performing maintenance.
Check your warranty terms, but following the manual should keep you in the clear.
Watch Video
Main Points
- Plan thoroughly before flushing to avoid rework.
- Use the correct coolant and follow flush directions precisely.
- Bleed air completely to prevent overheating.
- Dispose of used coolant and residues properly.