Do You Need a New Tire for a Slow Leak? A DIY Troubleshooting Guide
Learn how to diagnose tire slow leaks, decide between repair and replacement, and fix safely. Quick steps, practical tips, and when to call a pro from Leak Diagnosis.

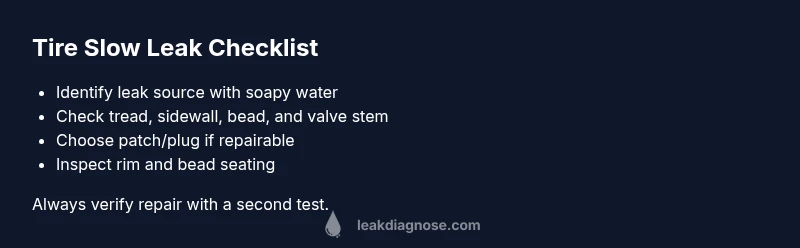
This is usually repairable; you don’t automatically need a new tire for a slow leak. Start by locating the leak, testing with soapy water, and choosing patch/plug or valve repairs. If the tread is worn or the sidewall is damaged, replacement is likely necessary. See the full step-by-step guide for specifics.
Do you need a new tire for a slow leak? A practical first look
When a tire loses air slowly, the instinctive question is often do you need a new tire for a slow leak. The short answer: not always. Many slow leaks come from repairable sources like nails, valve stems, or bead seating. According to Leak Diagnosis, the most important move is to pinpoint the air loss origin and assess overall tire health before deciding. This article walks you through a safe, systematic approach to determine repairability versus replacement, with clear signs that indicate a tire should be replaced. Keep in mind that driving on a compromised tire is dangerous, and timely action protects your vehicle and family.
The tire’s condition, tread depth, and sidewall integrity all matter. In many cases, a tire with a small puncture or valve issue can be restored to road-readiness with a proper patch or valve service. If the tire shows severe tread wear, sidewall bulges, or exposure of the cords, replacement is the prudent choice. The goal is to avoid unnecessary waste while maintaining safety on the road. The Leak Diagnosis team emphasizes safety and accuracy over quick fixes.
Common causes of slow leaks and how to spot them
Slow leaks have common culprits. A puncture in the tread from nails or screws often creates small, contained leaks that can be repaired if the puncture is within repairable zones. A faulty valve stem or worn valve core likewise allows air to escape slowly and is often inexpensive to fix. Bead seating issues, where the tire seal isn’t fully seated against the rim, can cause slow loss as well, especially after mounting or rim repair. Less commonly, rim damage or sidewall cracks indicate more serious problems. The key is to layer checks: look for objects embedded in the tread, listen for hissing at the tire, and apply soapy water to suspected areas to observe bubbles. Leak Diagnosis analysis shows that many drivers misattribute slow leaks to worn tires when a repairable source exists.
Repair vs replacement: a decision framework
Once you identify the leak source, use this framework to decide if repair is feasible. If the puncture is in the tread and the damage is not on the shoulder or sidewall, a patch or plug (inside or outside) can often seal the leak. Valve-related leaks are typically fixable by replacing the core or the valve stem. If bead seating is the issue, reseating may be possible with professional equipment, but it could require rim work. Sidewall damage or large punctures that expose internal structures usually require tire replacement. Remember, the goal is safety first: a repaired tire should hold air reliably under normal driving conditions. The Leak Diagnosis team recommends erring on the side of caution when damage is uncertain.
How to locate and test a slow leak safely (step-by-step)
Begin with a calm, safe setup: park on a flat surface, engage the parking brake, and inspect visually for objects. Inflate the tire to the recommended pressure and check for pressure loss over 24 hours. Use a soap solution on the tread, sidewalls, valve stem, and bead area to watch for bubbles that indicate leaks. A gentle approach helps identify whether the leak is from the tread, valve, or bead. If bubbles appear near the valve stem, the core or stem may be the culprit. If the tires pass a soap test but still lose air slowly, the leak could be microscopic or due to hidden rim damage. The goal is to isolate the source without creating new hazards.
Step-by-step repair options for common slow leaks
- Remove the object if safely accessible and repair the puncture from inside the tire with a patch, then seal the area. 2) Replace the valve core or valve stem if the leak originates there, ensuring the valve seating is tight. 3) If bead seating is the issue, request a professional bead reseat and rim inspection. 4) For sidewall or extensive tread damage, prepare for tire replacement. After any repair, recheck pressure and re-test with soap to confirm the seal. 5) If the tire cannot be repaired safely, replace it promptly to maintain road safety.
Prevention and maintenance to avoid future slow leaks
Regular tire pressure checks are essential, as underinflation accelerates damage and creates false leak indicators. Rotate tires as recommended to ensure even wear, and have the valve stems inspected during routine service. Addressing pothole damage quickly and inspecting tires after off-road or rough roads reduces hidden risks. Sealants marketed for temporary fixes are not a substitute for professional repairs or replacement. Finally, replace tires before tread wear becomes extreme, and never ignore persistent air loss.
Safety first: when to call a professional and why it matters
If you are unsure about the leak source, if the tire has sidewall damage, or if you cannot locate a leaking area after a thorough soap test, seek professional help immediately. A trained technician can perform pressure tests, rim inspections, and proper bead seating using specialized equipment. Professional service reduces the risk of blowouts and ensures your vehicle remains safe. The Leak Diagnosis team underscores that some fixes require attention beyond home tools, particularly in high-pressure environments or after tire damage from road hazards.
Steps
Estimated time: 60-120 minutes
- 1
Park safely and inspect visually
Set the parking brake on a flat surface and perform a visual inspection for embedded objects or obvious damage. Look for nails, screws, or cuts in the tread and sidewalls. This initial check helps determine whether the problem is localized and repairable.
Tip: Never place yourself under a wheel; use wheel chocks and a jack only if you know how. - 2
Check pressure and perform a soap test
Inflate to the recommended pressure and monitor over 24 hours, then apply soapy water to the tread, sidewalls, valve stem, and bead area. Watch for bubbling, which pinpoints the leak source.
Tip: Use a spray bottle with soapy water for even coverage and clear bubbles. - 3
Identify repairability
If bubbles appear on the tread and are away from the shoulder, repair is often possible. If bubbles appear on the sidewall or near the bead, replacement is usually safer.
Tip: Err on the side of caution when sidewall damage is suspected. - 4
Address the leak source
For tread punctures, install a patch or plug from inside if feasible. For valve leaks, replace the core or stem. Bead issues may require professional reseating.
Tip: A professional repair tends to last longer and maintains safety. - 5
Re-test and re-inflate
Inflate to the recommended PSI and re-check with soap. Ensure there are no new bubbles and that the tire holds air over the next day or two.
Tip: Do not drive at highway speeds on a recently repaired tire until it’s verified. - 6
Decide on replacement if needed
If the tire cannot be repaired safely, replace it promptly to maintain traction and protection.
Tip: Consider the tire’s age and tread depth when deciding on replacement.
Diagnosis: Tire loses air slowly over days or weeks
Possible Causes
- highPuncture in tread from nails or screws
- mediumLeaking valve stem or core
- lowBead seating issue or rim damage
- lowSidewall crack or severe tire damage
Fixes
- easyInspect for objects and patch from inside or outside if repairable
- easyReplace valve core or stem if leaking
- mediumRe-seat bead or inspect rim; may require professional equipment
- hardReplace the tire if sidewall damage or irreparable tread
Questions & Answers
Can I fix a slow tire leak at home?
Yes, small punctures in the tread or valve issues are often repairable with the right tools and steps. However, some problems require professional service for safety and reliability.
You can fix many slow leaks at home if they’re from the tread or valve, but some issues need a professional check for safety.
Do slow leaks always mean I need a new tire?
Not always. Many slow leaks are repairable. Replacement is usually advised if the tread is worn beyond safe limits or if the sidewall or bead is damaged.
Not always; many leaks can be repaired, but replace if the tire is too worn or the sidewall is damaged.
How long does a tire repair typically take?
Most standard repairs can be completed within an hour or two, depending on the leak source and whether a patch, plug, or valve replacement is needed.
Most repairs take about an hour or two, depending on the leak and the fix.
What can I do to prevent slow leaks?
Regularly check tire pressure, inspect for damage after road hazards, rotate tires as recommended, and address repairs promptly to prevent progressive leaks.
Check pressure regularly, inspect after rough roads, and fix leaks quickly to prevent bigger problems.
Is it safe to drive on a tire with a slow leak?
If the tire has a slow leak but still holds air above a safe minimum, limit driving and seek repair or replacement promptly to avoid a blowout.
Drive carefully and get it repaired soon; a slowly leaking tire can be risky if it loses air quickly.
Watch Video
Main Points
- Diagnose leaks before deciding on replacement
- Repairable leaks are common in tread punctures and valve issues
- Bead seating and sidewall damage often require professional repair or replacement
- Use soap testing to accurately locate leaks
- Safety and road-worthiness come first; seek pros when unsure