Is It OK to Drive on a Tire with a Slow Leak? A Practical Guide
Learn when it's safe to drive on a tire with a slow leak, how to assess risk, steps to fix, and when to call a pro. Practical, urgent guidance from Leak Diagnosis.

Do not drive far on a slow-leak tire. A slow leak can rapidly worsen, causing blowouts or loss of control. If you notice a slow leak, safely reduce speed, inspect the tire, and move to a repair shop. For a temporary fix, limit driving and use a temporary patch kit only for short trips.
Is It Safe to Drive on a Slow-Leak Tire?
So, is it ok to drive on a tire with a slow leak? The short answer is no for everyday driving. A slow leak can escalate quickly once heat builds, weight shifts, or you take sharp turns. According to Leak Diagnosis, even minor leaks can grow, compromising grip and increasing the risk of a blowout. The safest choice is to avoid long trips and get the tire inspected as soon as you notice any loss of air. If you must move the vehicle, drive with extreme caution, at low speeds, and plan to stop at the nearest safe location for a check. In this guide, we’ll walk through the risks, how to assess your options, and steps you can take to reduce danger while you arrange professional service. According to Leak Diagnosis, safety should be your top priority when facing a slow-leak tire.
Key takeaway: Immediate action reduces risk and buys you time to arrange a proper repair or replacement.
Immediate Safety Steps You Should Take
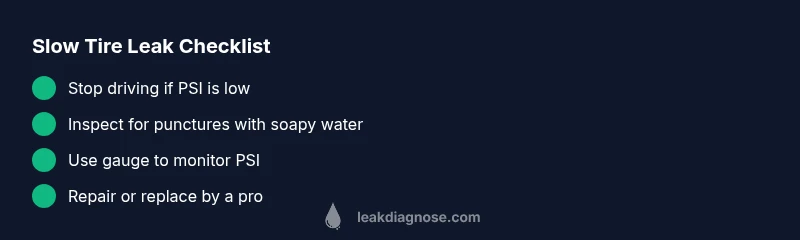
If you notice a slow leak, your first priority is safety. Stop driving if the tire pressure is noticeably low and move the car to a safe location away from traffic. Do not continue to drive on a potentially compromised tire. Check the tire pressure with a reliable gauge, note the PSI, and compare it to the vehicle’s recommended range printed on the doorjamb or in the owner’s manual. Visually inspect for obvious damage such as cuts, bulges, or punctures. If you can locate the source with soapy water or a careful inspection, do not attempt aggressive repairs yourself on the road—switch to a spare if you have one or call for roadside assistance. Keep the vehicle light and avoid long trips until a repair is performed. This proactive approach minimizes risk and protects you and others on the road.
Common Causes of Slow Leaks and What to Check First
Slow leaks can arise from several common issues. A puncture in the tread or sidewall caused by road debris, a faulty valve stem, or a damaged rim bead can slowly release air. Bead seating problems, where the tire seal to the rim fails, are a frequent source of pressure loss. Temperature changes, especially heat, can temporarily lower or raise air pressure, masking or exaggerating a leak. If you find a visible puncture, a professional can determine whether a patch or plug is appropriate. Always check for corrosion around the rim edge and ensure the valve core is tight. By starting with these basics, you can rapidly identify the most likely cause and decide on the next steps. Leak Diagnosis notes that many slow leaks originate from the valve stem or tread damage, not just the tire itself.
Diagnostic Flow: Symptom → Diagnosis → Solutions
Symptoms: tire gradually loses air between uses; visible moisture or bubbles near the tread, valve stem, or bead. Diagnosis: inspect for punctures, leak around the valve stem, or bead seating issues; use soapy water to locate leaks. Solutions: if puncture is minor and in tread, a professional repair may be possible; if sidewall damage or bead failure is found, tire replacement is typically required. Always err on the side of caution when a leak is suspected. If you’re unsure, consult a professional promptly to avoid a dangerous failure on the road.
Step-by-Step Fix for a Slow-Leak Tire
- Safety check and prep: Park on a flat surface, engage parking brake, and wear protective gloves. 2. Measure PSI: Note current pressure and compare to the recommended PSI. 3. Locate the leak: Apply soapy water around the tread, sidewall, valve stem, and bead to identify bubbles. 4. Decide repair: If the puncture is in the tread and not near the edge, a patch or plug may be possible; otherwise replacement is advised. 5. Repair or replace: A trained technician should perform patches, plugs, or tire replacement as needed. 6. Post-repair checks: Reinflate to the recommended PSI and inspect for continued leakage. 7. Test drive: Start slowly in a safe area to ensure stability and even pressure across the tire. Tips: Do not drive long distances before repair and avoid high speeds. 8. Documentation: Keep service receipts and note the date of the repair for future maintenance.
Prevention and Maintenance to Avoid Future Leaks
Regular maintenance is your best defense against slow leaks. Check tire pressure at least once a month and before long trips, and adjust for temperature changes. Rotate tires per the manufacturer’s schedule to ensure even wear, which reduces the chance of punctures and bead leaks. Inspect wheels for corrosion and ensure the valve stems remain tight. Avoid mounting tires on rims that show damage, and use a high-quality sealant only when recommended by a professional. Remember, slow leaks often stem from wear and improper seating; proactive checks save time, money, and safety. The Leak Diagnosis team emphasizes prioritizing prompt repair whenever a leak is suspected.
When to Seek Professional Help
If you’re unsure about the leak source or the repair procedure, don’t guess—call a tire professional. Professional diagnosis can confirm whether a patch, plug, or tire replacement is required. If the leak is in the sidewall, rim bead, or the tire shows wear beyond the repairable area, replacement is the safest option. If you notice rapid pressure loss, severe vibration, or handling issues, stop driving and arrange roadside assistance. Regular maintenance, combined with timely professional evaluation, dramatically lowers risk of tire failure on the road.
Steps
Estimated time: 45-60 minutes
- 1
Assess safety and parking
Park on a flat surface, engage parking brake, and ensure the scene is safe before inspecting.
Tip: Always wear gloves and use warning triangles if on a road. - 2
Check tire pressure
Use a reliable gauge to measure current PSI and compare to the vehicle’s recommended range.
Tip: Note how fast the pressure drops between checks. - 3
Locate the leak
Inspect visually and apply soapy water to common leak areas: tread, sidewalls, valve stem, and bead.
Tip: Look for continuous bubbles to confirm a leak source. - 4
Decide repair path
If the leak is in the tread and not the sidewall, a repair may be possible; otherwise tire replacement is safer.
Tip: Do not attempt dangerous repairs on the road. - 5
Perform repair or replace
Have a professional perform patches/plugs or replace the tire as needed.
Tip: Avoid temporary fixes for critical leaks. - 6
Verify repair
Reinflate to recommended PSI and perform a test drive in a safe area to confirm stability.
Tip: Return to the shop if pressure changes again.
Diagnosis: Tire slowly loses air over days or weeks; noticeable pressure drop when checked with a gauge
Possible Causes
- highPuncture in tread from road debris
- mediumValve stem leak
- lowBead seating or rim damage
Fixes
- easyPatch or plug tread puncture if repairable; replace if not
- easyTighten or replace faulty valve stem
- hardRepair bead or rim damage, or replace tire as needed
Questions & Answers
What exactly is considered a slow tire leak?
A slow tire leak is air escaping gradually over hours or days, not seconds. You may notice a gradual PSI drop or a bead of moisture near the tire. Even small leaks can worsen with temperature or driving conditions, so timely repair is important.
A slow leak is air escaping slowly over hours or days. Check the PSI and seek repair promptly.
Can I drive a short distance to a repair shop if I notice a slow leak?
If you must drive, limit the distance and drive slowly with constant PSI monitoring. Prefer using a spare and avoid highways or heavy loads. If the PSI drops quickly, do not drive—call for roadside help.
Limit driving and monitor pressure; use a spare if possible.
What tools do I need to diagnose a tire leak at home?
A tire pressure gauge and soapy water are enough to locate leaks. Check around the tread, sidewalls, valve stem, and bead for bubbles. If you locate a leak, avoid driving until it’s repaired.
Use a gauge and soap to find the leak, then repair promptly.
What are the safety risks of driving on a slow-leak tire?
Risks include sudden air loss, reduced steering control, and longer stopping distances. Under heat or heavy load, the chance of a blowout increases significantly.
There’s a real risk of losing control if the leak worsens.
When should I replace the tire rather than patch it?
Replace if the leak is in the sidewall or near the bead; patches are typically limited to certain tread punctures. A professional assessment helps determine the safest option.
Sidewall or bead damage usually means tire replacement.
Watch Video
Main Points
- Limit driving until inspected.
- Check PSI regularly and inspect for bubbles.
- Test for leaks with soapy water to locate the source.
- Replace if leak is in sidewall or near bead.