How to Check for a Leak in a Tire: A DIY Guide
Learn a safe, step-by-step method to check tires for leaks using common tools, identify leak sources, and decide when to patch or replace for safe driving.

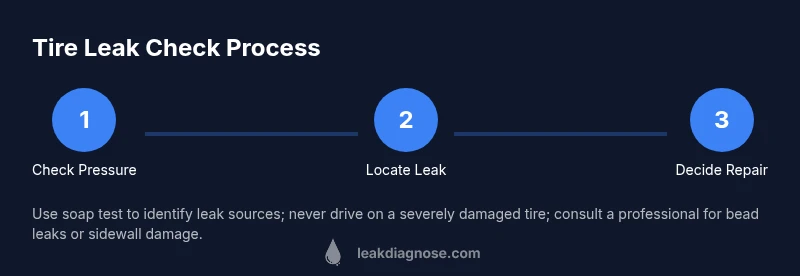
This guide teaches you how to check for a leak in a tire, locate the source, and decide whether repair at home is possible or if professional service is needed. You'll learn to confirm leaks with a cold PSI check, a soap test, and careful inspection of valves and beads. According to Leak Diagnosis, the most common sources are valve stems, beads, and punctures.
Why Checking for Tire Leaks Matters
Tires are the only point of contact between your vehicle and the road, so even small leaks can escalate into dangerous situations if ignored. Regularly checking for leaks helps prevent sudden flats, maintains fuel efficiency, and extends tire life. For homeowners and DIY enthusiasts, a basic leak-check routine can be done with simple tools and safe practices. According to Leak Diagnosis, many tire leaks originate at predictable spots, so a methodical approach saves time and money. By understanding common leak sources, you can quickly determine whether a leak is slow and manageable or requires professional attention.
A tire with a small, slow leak may still be drivable, but driving on an underinflated tire raises the risk of blowouts and poor handling. In this guide, you’ll learn to verify a leak using a cold PSI test, localize the source with careful inspection, and perform a safe soap-test to confirm the leak. The goal is to prevent unsafe driving and to know when to seek expert help.
Tools and Materials You Need
Before you start, gather a few basic items. A tire pressure gauge (digital or analog) lets you record a cold PSI reading. A spray bottle with soapy water or a bowl with dish soap mixed in works for bubble testing. Chalk or a tire marking pen helps you mark the area you’re testing. A flashlight improves visibility, especially around the bead and valve stem areas. Optional but helpful items include gloves for grip and a partner to assist with air pressure checks and safety.
Keep all tools clean and ready, and work on a flat, stable surface. If you need to lift the vehicle, use jack stands and follow safe lifting practices.
Step 1: Check Tire Pressure When Cold
Start with a cold tire - do not measure right after a drive, as heat inflates the air and skews readings. Park on a level surface, apply the parking brake, and remove the valve cap. Use your tire gauge to measure the current PSI and compare it to the vehicle’s recommended pressure found on the door placard or owner’s manual. If the pressure is below the recommended level, add air in short bursts and recheck until you reach the target.
Why this matters: a correct cold PSI baseline helps you detect actual leaks rather than temperature-driven fluctuations. If you cannot reach the recommended PSI, stop and consult a professional if the tire continues to lose air rapidly.
Step 2: Locate the Suspected Area
If the tire is visibly deflated or you notice a nail, cut, or bulge, start at the most obvious areas: tread, sidewalls, valve stem, and bead seat where the tire meets the rim. Mark any area with chalk or a marker so you can easily return to it after testing other sections. Look for irregular wear, cracks, or embedded objects. If the tire appears damaged beyond minor surface wear, do not attempt risky DIY repairs; seek professional service.
Step 3: Use Soapy Water to Find the Leak
Prepare a soapy solution and apply it to the suspected areas: tread grooves, sidewalls, valve stem, and bead area. Use a sprayer or brush to cover all tested sections evenly. Watch for steady or bubbling foam indicating escaping air. If bubbles appear, note the location, as it pinpoints the leak source. Have a partner help by applying air pressure while you observe the test area for bubbles.
Step 4: Inspect Valve Stem and Bead for Leaks
Leaks often originate at the valve stem or around the bead where the tire seals to the rim. Check the valve core, ensure the stem cap is present and tight, and reseat the valve if needed. For bead leaks, inspect the rim edge for corrosion or damage, and listen for a hissing sound near the bead while applying gentle pressure around the tire’s circumference. If you suspect bead damage, do not continue to drive on the tire.
Step 5: Assess the Severity and Decide on a Fix
Based on your findings, decide if the leak is minor enough to monitor or if immediate action is required. A tiny bubble at one spot might be slowed with a sealant or patch, but most persistent leaks require professional repair or tire replacement. If the tire shows sidewall damage, large punctures, or bead failure, replacement is the safer option. Always err on the side of caution when tire integrity is in doubt.
Step 6: Patch vs Replace: When Home Repair Is Appropriate
Temporary roadside fixes like sealants may fast-track safety, but they are not permanent solutions. Patching is sometimes possible for punctures in the tread area well away from the sidewall, but sidewall leaks or bead leaks usually require tire replacement. If you’re unsure about the patch’s durability or if you lack proper equipment, seek a professional repair. Correctly repaired tires should be rechecked by a technician to ensure air retention and safety.
Safety Considerations and When to See a Professional
Never drive on a visibly damaged tire or with an air leak you can’t control. If you notice a rapid air loss, a foreign object protruding from the tire, or any bead, sidewall, or rim damage, stop driving and contact a mobile tire technician or shop. Regular tire maintenance, including pressure checks and tread depth monitoring, helps prevent dangerous blowouts. Regularly inspect tires for wear, nails, and cuts, and replace tires when the tread is worn below the recommended limit.
Next Steps: After You Find a Leak
Document the leak location and the observed PSI behavior for future reference. If the leak is minor, monitor tire pressure weekly and adjust as needed until you can have the tire inspected by a professional. If the leak is significant or the tire shows damage beyond simple repair, arrange for a replacement and ensure your spare is in good condition. Keeping a spare tire and a basic tire repair kit in the vehicle supports safer driving.
Tools & Materials
- Tire pressure gauge(Digital or analog; ensure accurate readings)
- Soapy water solution or dish soap + water(Use a spray bottle for even coverage)
- Spray bottle or brush for applying soap(Fine mist works best for quick coverage)
- Chalk or tire marking pen(Mark suspected areas to track changes)
- Flashlight(Improve visibility in dark or shadowed areas)
- Gloves(Grip and hand protection during inspection)
Steps
Estimated time: 45-60 minutes
- 1
Prepare the area and safety basics
Park on a flat surface, engage the parking brake, and wear gloves. Ensure the tire is cool before testing and remove the valve cap to prepare for PSI measurement.
Tip: Never perform testing on a hot or recently driven tire; heat expands air and distorts readings. - 2
Check the cold PSI against the spec
Take a cold PSI reading with a reliable tire gauge and compare it to the recommended level on the door placard or owner’s manual. If below spec, add air gradually and recheck until you hit the target.
Tip: If you’re unsure about the correct PSI, err on the side of slightly higher than lower; avoid underinflation. - 3
Mark any suspicious areas
If the tire looks deflated or shows damage, mark the area with chalk or a marking pen so you can return to it after testing elsewhere.
Tip: Keep your markings clear and visible for quick reference during the test. - 4
Apply soapy solution and inspect for bubbles
Liberally apply the soap solution to tread, sidewalls, valve stem, and bead area. Watch closely for bubbling that indicates escaping air from a leak.
Tip: Pause to re-check any bubbles that subside; a consistent bubble indicates a leak source. - 5
Inspect the valve stem and bead area
Examine the valve stem for looseness or damaged cores and check the bead seat where the tire meets the rim for signs of air loss.
Tip: If the valve core is loose, tighten gently with the appropriate tool; avoid over-tightening. - 6
Assess severity and decide on action
Determine whether the leak is minor or significant. Small, localized bubbles may be managed temporarily, but large or persistent leaks usually require professional repair or replacement.
Tip: Do not attempt risky repairs beyond your experience level. - 7
Decide patch vs replace
Patches may work for certain tread-area punctures away from the sidewall, but sidewall and bead leaks generally require tire replacement. If in doubt, seek a professional assessment.
Tip: Keep records of the leak test results for your tire shop visit. - 8
Safety wrap-up and next steps
If a leak is confirmed, remove the tire from service if needed and schedule a repair or replacement. Drive cautiously if you must move the vehicle to safety, and never drive on a compromised tire.
Tip: Always drive slowly and avoid highway speeds with a suspected leak.
Questions & Answers
What should I do if I find a leak in my tire?
If you locate a leak, assess the damage. For slow leaks in the tread area, a professional repair may be possible. For sidewall or bead leaks, replace the tire and seek professional assistance.
If you find a leak, stop driving if possible and have the tire inspected. Repairs may be possible for tread-area punctures, but sidewall leaks usually require replacement.
Can a tire leak be fixed at home?
Minor punctures in the tread area can sometimes be repaired at home with a patch, but many leaks require a professional repair or tire replacement. Always follow safety guidelines and refer to a qualified technician when in doubt.
Small tread-area punctures can sometimes be patched, but sidewall or bead leaks usually call for a professional repair or replacement.
How do I know if a leak is coming from the valve stem or bead?
Inspect the valve stem for looseness or damage and check the bead area where the tire seals to the rim. Use a soapy test around both areas to confirm which location bubbles consistently.
Check the valve stem and bead with soap; consistent bubbles point to the leak source.
Is it safe to drive with a slow tire leak?
A slow leak can become dangerous over time. If you notice significant air loss, reduce driving and seek professional inspection as soon as possible.
A slow leak can be risky; if you lose air, get the tire checked promptly.
How long can I drive on a tire with a leak before replacement?
There is no universal safe duration. It depends on the leak’s size and location. When in doubt, replace the tire or seek immediate professional advice.
There isn’t a universal time frame—watch the pressure and replace if the leak worsens.
Watch Video
Main Points
- Check cold PSI before driving.
- Use soap test to locate leaks precisely.
- Inspect valve stem and bead for common leak sources.
- Decide between patching and replacing based on damage.
- Seek professional help for bead or sidewall leaks.