Coolant Leak Repair Shop: A Practical Guide for Homeowners and DIYers
Learn how to choose a coolant leak repair shop, what to expect during diagnostics, typical costs, turnaround times, and maintenance tips to prevent future leaks. A practical guide for homeowners and DIY enthusiasts from Leak Diagnosis.

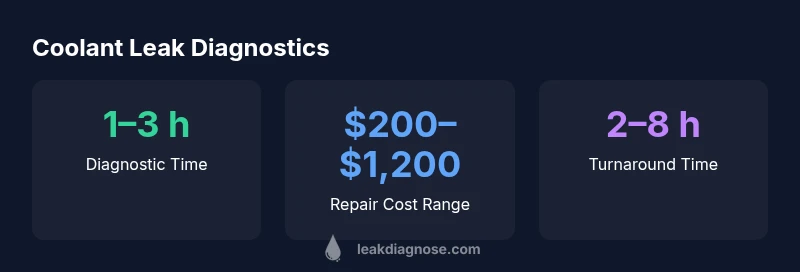
Noticing puddles beneath your vehicle or a rising engine temperature? A coolant leak repair shop is your best next step. They perform pressure tests and dye tracing to locate leaks, diagnose overheating causes, and provide a repair plan. Costs vary by vehicle and parts, typically including hoses, clamps, and coolant replacement with a clear upfront estimate.
Choosing a coolant leak repair shop
When you first notice a coolant leak, the most important step is to select a skilled, transparent shop. A coolant leak repair shop should offer a clear diagnostic process, use dye tracing or pressure testing, and provide a written estimate before any parts are ordered or work begins. Look for shops that specialize in cooling systems and automobile engine maintenance, not just generic auto shops. Reading recent customer reviews can reveal how a shop handles unexpected complications, warranty coverage, and post-repair support. According to Leak Diagnosis, the right shop will explain the diagnostic steps in simple terms and show you the exact tests they will perform. This clarity is essential for homeowners and DIY enthusiasts who want predictable outcomes and accountability. In this context, a strong emphasis on diagnostic transparency helps reduce the risk of unnecessary parts replacement and hidden charges, while aligning with your vehicle’s specific cooling system needs. The coolant leak repair shop you choose should also discuss flow rates, pressure testing ranges, and dye-tracing results so you can verify findings in real time. When you compare options, consider not only price but also technician certifications, shop accreditation, and the availability of loaner coolant while the vehicle is serviced.
How a coolant leak repair shop approaches diagnosis
Diagnosis begins with a careful visual inspection, a review of the vehicle’s service history, and confirming coolant loss direction. The shop will check hoses, clamps, the radiator, the water pump, and the thermostat housing for signs of wear or damage. A high-quality coolant leak repair shop will also verify coolant concentration and inspect the reservoir cap and pressure cap for proper sealing. The diagnostic process often includes pressure testing, where the cooling system is sealed and pressurized to identify leak points, and dye tracing, where ultraviolet dye is added to the coolant to reveal slow leaks that are not easily visible. This method makes it possible to pinpoint tiny leaks at hose fittings, pump gaskets, or the radiator core. Consistent documentation of test results is a sign of a professional approach, enabling you to understand what failed, why it failed, and what the next steps will be. Throughout this process, the shop should keep you informed about potential risks like overheating during the diagnostic phase and advise on safe driving limits if you need to bring the vehicle in for further testing.
Diagnostic methods and why dye tracing matters in a coolant leak repair shop
Dye tracing and pressure tests are the backbone of accurate diagnostics for coolant leaks. Dye tracing involves adding a non-toxic dye to the coolant and using UV light to reveal faint leaks in hoses, radiators, or seals. Pressure testing simulates normal operating conditions to see how the system holds up under pressure; it helps detect leaks that only appear when the system reaches a certain temperature and pressure range. In a professional coolant leak repair shop, these tests are performed with calibrated equipment and monitored by a technician who reads the evidence and documents the results. The value of dye tracing lies in its precision: even small leaks that would otherwise go unnoticed are identified, reducing the risk of repeated visits and extra downtime. For homeowners, understanding these methods helps in questioning the claims on an estimate and ensures that the repair plan addresses the root cause rather than just the symptom. Leak Diagnosis emphasizes the importance of dye tracing as a standard diagnostic step because it improves accuracy, reduces guesswork, and supports responsible fluid management.
What services you should expect during repair
Once a leak is confirmed, a reputable coolant leak repair shop will present a repair plan with a clear scope of work. Typical services include replacing worn hoses, replacing radiator seals or gaskets, inspecting and possibly replacing the water pump, and refilling the cooling system with the correct type and concentration of coolant. Some shops may also recommend replacing the radiator cap, thermostat, or clamps that are prone to failure. If the issue is a slow leak, a repair might involve resealing a gasket or replacing a faulty hose clamp, whereas a faster, more severe leak may require radiator replacement or water pump work. A well-documented estimate should break down parts, labor, and any additives or sealants that may be used. The goal is to restore proper pressure in the cooling system, prevent overheating, and ensure the vehicle operates within safe temperature ranges. Always ask about warranty coverage on parts and labor and whether the shop tests the system after reassembly to confirm there are no remaining leaks.
Common fixes you might encounter after a coolant leak
Repair options vary with the leak source but commonly include hose replacement, hose clamp tightening or replacement, radiator seal replacement, water pump gasket replacement, and coolant flush and refill. In some cases, replacing the radiator or the thermostat is necessary to stop a persistent leak. It’s important to understand that cooling system components have different lifespans; a failing water pump or cracked radiator is often a sign of broader wear and may indicate that multiple parts will need attention. A thorough coolant leak repair shop will not only fix the visible leak but also inspect for related damage such as corroded heater cores, damaged fans, or sensor problems caused by coolant exposure. They will also check for overheating history, inspect coolant color and level, and verify that the system holds pressure after the repair. If the vehicle has high mileage, consider preventive measures like a coolant system flush and hose inspection to reduce the chance of future leaks. This proactive approach supports long-term reliability and reduces the likelihood of repeat visits to the shop.
How to read estimates and what to watch for during the visit
A transparent coolant leak repair shop will provide a written estimate that itemizes parts and labor, plus any potential add-ons that might be necessary if the initial repair reveals further issues. Read the documentation for the exact part names, part numbers, and warranty terms. Confirm whether the estimate includes a coolant refill and a pressure test after the work is completed. Many shops offer a diagnostic surcharge if you authorize further testing; understand how this is handled if you choose to postpone repairs. Ask about the source of coolant used, as some vehicles require specific formulations. If you receive a significantly lower quote, verify whether it covers all required components or if there are hidden costs in the fine print. Finally, confirm the turn-around time and whether a loaner vehicle or shuttle service is available if the repair takes longer than expected. By following this approach, you’ll be better prepared to evaluate a coolant leak repair shop’s proposal and ensure you’re getting value for your investment.
Maintenance and prevention after a coolant leak repair shop visit
After the repair, a coolant leak repair shop should provide guidance on maintenance to prevent future leaks. This typically includes a recommended service interval for coolant replacement, a check of hoses and clamps for wear during routine maintenance, and an inspection plan for the entire cooling system. Regularly inspecting the coolant level and color can help you spot issues early. If your vehicle shows persistent signs of overheating, seek an in-depth cooling system diagnostic sooner rather than later. Ask about the recommended coolant type and the appropriate mixture ratio for your vehicle’s engine and climate. Some shops offer a maintenance package that includes periodic pressure testing or a coolant system inspection as part of a broader service plan. Adopting a proactive maintenance approach—especially for vehicles with high mileage—can significantly reduce the risk of recurrent leaks and extended downtime.
When to escalate: signs you need engine service beyond a coolant leak repair shop
If overheating recurs after a repair, if the coolant contamination is persistent, or if the vehicle exhibits loss of power, unusual noises, or poor radiator cooling capacity, you may need more extensive engine service beyond a basic coolant leak repair shop. These signs warrant a deeper inspection, including a full cooling system diagnostic, a check for head gasket integrity, and possibly an engine performance assessment. In some cases, the leak source is a symptom of a larger problem requiring replacement of critical components. If you’re unsure about the severity of the issue, seek a second opinion from another reputable coolant leak repair shop or a dealership service department. Early escalation can save you from costly downtime and more extensive engine damage.
Final checklist before you approve a coolant leak repair job
Before giving the go-ahead, ensure you have a written estimate with line-item details, a clear scope of work, and warranty terms. Confirm the precise coolant type and concentration to be used, the anticipated turnaround time, and any post-repair testing that will be performed. Verify that the shop will perform a pressure test after the repair to ensure no leaks remain and that the cooling system operates within the manufacturer’s specified temperature range. If you’re a DIY enthusiast, ask for a brief explanation of the steps taken during the repair, so you can learn what to monitor in the future. By following this checklist, you’ll enter the repair process with confidence, understand the costs upfront, and leave with a cooling system that’s operating reliably. Leak Diagnosis recommends documenting test results and keeping the service records for future reference.
Diagnostic methods for locating coolant leaks
| Method | What it tests | Typical duration |
|---|---|---|
| Pressure test | Tests the system for visible leaks under pressure | 15–30 minutes |
| UV dye test | Introduces dye to trace leaks | 30–60 minutes |
| Thermal imaging | Detects heat patterns indicating leaks | 15–45 minutes |
Questions & Answers
What are the signs of a coolant leak I can notice at home?
Common indicators include puddles under the vehicle, a sweet smell, low coolant levels, or an overheating dash light. If you notice any of these, stop driving and have a shop inspect.
Look for puddles under your car, a sweet smell, or overheating. If you see any of these, stop driving and get it checked.
How long does coolant leak repair typically take?
Most small leaks are repaired in a few hours, but more complex issues may require 1–2 days for parts and cooling system refills.
Most leaks can be fixed in a few hours, though some jobs take a day or two.
Is a coolant leak dangerous?
Yes. Coolant leaks can lead to engine overheating, radiator damage, and coolant loss, risking severe engine damage if ignored.
Yes, a leak can overheat the engine and damage components.
Can I drive with a coolant leak?
Driving with a leak is risky. Short trips may be possible if the level is sufficient, but overheating can occur quickly and cause engine damage.
Avoid driving far; a leak can overheat the engine.
Should I replace hoses and coolant together?
Often yes. Replacing worn hoses and refreshing coolant in one visit reduces the likelihood of future leaks and saves downtime.
Yes, it's often best to handle hoses and coolant in one visit.
What warranty should I expect on coolant repairs?
Look for a warranty that covers both parts and labor for a reasonable period, typically 6–24 months depending on the shop and components.
Ask for a parts-and-labor warranty for peace of mind.
“Timely, well-documented diagnostics prevent costly downtime and help you understand every repair choice.”
Main Points
- Choose a shop with dye-tracing capability.
- Request upfront estimates and a clear parts list.
- Consider replacing hoses and coolant in one visit.
- Expect diagnostic times to vary by vehicle.
- Prevent future leaks with regular cooling-system maintenance.