Brake Fluid Leak Fix: DIY Guide for Safer Braking
Learn how to diagnose, fix, and prevent brake fluid leaks with a practical, homeowner-friendly approach. Tools, steps, safety tips, and guidance on when to call a pro.

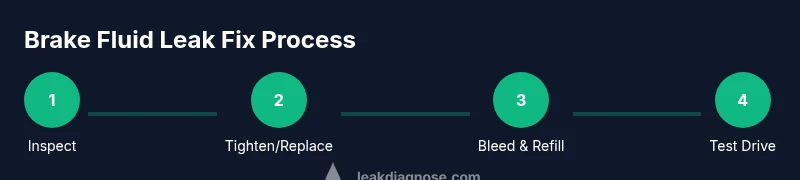
By the end of this guide, you will locate the brake fluid leak fix source, assess severity, and complete a safe repair. Steps include tightening fittings, replacing worn hoses or seals, bleeding the brake lines, and refilling to spec. Always wear protective gear and ensure the vehicle is securely supported before you begin.
Understanding brake fluid leaks and why they matter
Brake fluid leaks are more than a nuisance. They can compromise your vehicle’s stopping power and lead to complete brake failure if ignored. Brake fluid is essential for hydraulic pressure that pushes the brakes when you pedal. A brake fluid leak fix that’s neglected can cause air to enter the lines, reduce braking efficiency, and increase the risk of an accident. According to Leak Diagnosis, addressing a brake fluid leak early is crucial for safety and cost control. Recognize signs early, such as damp spots near lines, a noticeable drop in fluid level, or a sweet-smelling, oily residue on components. If you notice these signs, prioritize a brake fluid leak fix promptly. This guide helps homeowners understand the problem and take safe, informed action.
Key takeaway: act quickly on brake fluid leak fix to protect braking performance and overall safety.
Common sources of brake fluid leaks
Brake fluid leaks can originate from several points in the hydraulic system. Common sources include worn master cylinder seals, loose or cracked brake lines, deteriorated hoses, and damaged caliper seals or wheel cylinder cups. A brake fluid leak fix often involves these components, but accurate diagnosis is essential before replacing parts. The master cylinder reservoir and cap should also be checked for cracks or improper sealing, which can masquerade as a leak. When you pursue a brake fluid leak fix, inspect both ends of lines and all fittings for seepage. Leak diagnosis workflows emphasize tracing the leak to the source rather than replacing parts blindly. This reduces repair time and prevents unnecessary fluid loss.
- Master cylinder seals and reservoir
- Brake lines and hose connections
- Caliper pistons and wheel cylinders
- ABS fittings and banjo bolts
- Reservoir cap and gasket
Pro tip: keep the system clean during inspection so you can spot new leaks quickly and perform a precise brake fluid leak fix.
Safety first: precautions before attempting a brake fluid leak fix
Safety cannot be bypassed when performing a brake fluid leak fix. Brake fluid is corrosive and can irritate skin and eyes, and a car held up on jacks without proper supports is dangerous. Before you begin, wear chemical-resistant gloves, safety glasses, and a long-sleeve shirt. Work on a flat surface and use wheel chocks. If you must lift the car, use jack stands on solid ground and never rely on a jack alone. Always depressurize the system by avoiding pedal pressure while connectors or lines are open. Keep a fire extinguisher nearby and avoid exposing brake fluid to painted surfaces, as it can damage the finish. These precautions underpin a safe brake fluid leak fix and protect you during the process.
Note: If you discover a severe leak or fluid is leaking near the brake rotors, stop and seek professional help immediately.
Tools and materials for a brake fluid leak fix
Having the right tools and materials is essential for a successful brake fluid leak fix. Gather a clean catch pan, rags, brake fluid compatible with your vehicle (DOT specification from the owner’s manual), a set of flare-nut wrenches, line wrenches, and a bleeding kit or access to a buddy to help bleed brakes. Include a torque wrench if you plan to resecure fittings to spec. You’ll also want brake cleaner, a funnel, a flashlight, and a tray for old parts. Don’t forget wheel chocks and jack stands for safe lifting, along with fresh hoses or seals if you identify worn components. Preparing these items beforehand makes the brake fluid leak fix smoother and safer.
Tip: label hoses and bolts as you remove them to ease reassembly and ensure the brake fluid leak fix goes smoothly.
Diagnosis: locating the leak source and planning the brake fluid leak fix
To plan an effective brake fluid leak fix, start with a visual sweep under the vehicle and around the master cylinder, lines, and calipers. Look for dampness or staining around fittings, hoses, and valve blocks. If the leak is slow, you may see a persistent wet spot after driving. Check the brake fluid reservoir level and color; dark or contaminated fluid can indicate internal wear. A good diagnostic approach combines observation with simple tests, like tightening accessible fittings (carefully) and testing for continued seepage. Once you identify the source, you can create a focused brake fluid leak fix plan that targets the failing component, minimizes fluid loss, and restores hydraulic pressure.
Tip: document the leak pattern with photos for reference when you shop for replacement parts.
Step-by-step approach to diagnose and plan the brake fluid leak fix
A structured plan helps you stay organized during a brake fluid leak fix. Start by securing the vehicle, then isolate the leak by methodically inspecting each hydraulic connection from the reservoir to the caliper. If you find a loose banjo bolt or a cracked hose, address it first. Plan to bleed after any opening in the hydraulic circuit to remove air introduced during the repair. Ensure you have the correct DOT brake fluid and that the reservoir cap is clean and sealed before refilling. This approach minimizes contamination risks and ensures a robust brake fluid leak fix.
Pro tip: work with clean hands and clean tools to avoid contaminating the braking fluid during a brake fluid leak fix.
Core brake system fixes you can perform safely
Not all brake fluid leaks require new parts; some fixes are straightforward. If a leak is at a loose banjo bolt or a loose line fitting, tighten carefully with the proper wrench. If you notice a cracked hose or degraded caliper seal, plan a replacement. After addressing the source, bleed the brakes to remove air and restore pedal feel. Refill the reservoir to the recommended level and check for signs of further leakage. These steps comprise the core brake fluid leak fix you can perform at home if you have the right tools and safety measures in place.
Pro tip: replace any worn hoses or seals rather than just tightening to ensure the fix lasts. Always bleed until clear fluid flows and there are no air bubbles.
When to call a professional and how to avoid future brake fluid leaks
Some brake fluid leaks demand professional service, especially when the failure involves internal components such as a damaged master cylinder or a corroded ABS line. If you discover brake fluid around the wheel well or feel a spongy pedal after attempting a fix, it’s wise to consult a pro. A professional inspection can verify whether your brake fluid leak fix addressed the root cause or if deeper repairs are needed. To minimize future leaks, perform regular checks, replace worn components proactively, and maintain clean lines and reservoirs. A routine brake system check can catch leaks before they compromise safety.
Important reminder: leaks are a safety risk; treat brake fluid leak fix with priority and seek professional assistance for complex issues.
Maintenance habits to prevent brake fluid leaks
After you complete a brake fluid leak fix, adopt maintenance habits that reduce the likelihood of future issues. Regularly inspect brake lines for signs of wear or corrosion, keep the reservoir cap clean, and change brake fluid as recommended by your vehicle manufacturer. A proactive brake fluid leak fix program includes checking for fluid level drops, cleaning the master cylinder area, and ensuring all fittings remain tight and sealed. In the long run, these habits support consistent brake performance and safety. Regular maintenance also helps you plan future brake fluid leak fixes before they escalate into costly repairs.
Authority sources and further learning
For foundational information on brake systems and safe repair practices, consult authoritative sources:
- U.S. Department of Transportation, National Highway Traffic Safety Administration: https://www.nhtsa.gov/vehicle-safety/brake-systems
- Agricultural Extension Service: https://extension.illinois.edu/topics/repair-maintenance
- Occupational Safety and Health Administration (PPE and safety practices): https://www.osha.gov/
These references support best practices for a brake fluid leak fix and ongoing brake-system maintenance. Leakage issues vary by vehicle, so always align procedures with your manual and safety guidelines.
Tools & Materials
- Brake fluid (DOT 3 or DOT 4 as specified by manufacturer)(Check owner’s manual for grade)
- Wrench set including flare-nut wrenches(For fittings and line joints)
- Line wrenches(Prevent rounding of fittings)
- Brake bleeding kit or helper for brake bleeding(Needed to remove air after repair)
- Catch pan(To collect old fluid)
- Shop rags and disposable towels(For cleanliness and cleanup)
- Gloves and safety glasses(Eye/skin protection)
- Torque wrench(If you need to re-tighten to spec)
- Brake cleaner(Clean spills without residue)
- New seals/hoses or caliper/wheel cylinder kit(Only if wear is detected)
- Jack, jack stands, and wheel chocks(Lift and secure vehicle safely)
- Funnel and spare brake fluid container(For controlled refilling)
Steps
Estimated time: 60-120 minutes
- 1
Prepare safety gear and vehicle support
Put on protective gear and gather all tools. Chock wheels, and raise the vehicle with a jack and secure stands. Ensure the work area is well-lit and on a flat surface before you begin the brake fluid leak fix.
Tip: Always use jack stands; never rely on the jack alone when working under a raised vehicle. - 2
Identify the leak source
Inspect the brake lines, hoses, master cylinder, and caliper seals for wet spots or staining. Check the reservoir level and look for a cap seal or gasket issue. A precise diagnosis guides the brake fluid leak fix and prevents unnecessary part replacements.
Tip: Trace any dampness toward the probable origin, not just the most obvious spot. - 3
Tighten or replace accessible components
If the leak originates from a loose banjo bolt or hose connection, tighten with the correct flare-nut wrench. Replace any cracked hose or worn seal as needed. Confirm that fittings are snug but not over-tightened.
Tip: Over-tightening can damage threads and worsen the leak, so tighten to manufacturer torque specs. - 4
Bleed the brake system to remove air
Connect the bleeding kit or coordinate with a helper to bleed the brake lines until clear, bubble-free fluid appears. This step is essential after opening the hydraulic circuit to ensure consistent pedal feel and braking performance.
Tip: Bleeding is critical; air in lines compromises stopping power and may appear as a spongy pedal. - 5
Refill and verify
Fill the reservoir to the proper level using the correct brake fluid. Recheck all fittings for seepage, then perform a low-speed test stop in a safe area to observe pedal firmness and any continuing leaks.
Tip: Test with light pressure first; avoid aggressive braking until you confirm the system is leak-free. - 6
Clean up and dispose
Wipe up spilled fluid, dispose of old fluid according to local regulations, and clean the work area. Keep fluids away from painted surfaces and store unused material properly for future brake fluid leak fix tasks.
Tip: Always clean and recycle or discard fluids properly to prevent environmental harm. - 7
Monitor after road testing
Take a short, cautious drive to confirm the brake fluid leak fix has addressed the issue. Recheck the fluid level and inspect for new leaks after the test drive.
Tip: If you see any renewed seepage, stop and reassess; some leaks require professional diagnosis.
Questions & Answers
Can I drive my car with a brake fluid leak?
No. A brake fluid leak can lead to reduced braking power and possible total brake failure. If you notice a leak, address it before driving and seek professional help if the leak is extensive.
No—driving with a brake fluid leak is unsafe and can cause brake failure. Get the issue checked promptly.
What brake fluid type should I use?
Use the fluid specified in your owner’s manual, typically DOT 3 or DOT 4. Do not mix different DOT grades in the same system. When in doubt, consult your manual or a professional.
Use the grade your manual specifies and never mix fluids.
How long does a brake fluid bleed take?
A typical bleed can take 20-45 minutes per axle depending on system complexity and whether you have someone to assist. Plan for about 30-60 minutes per side if new to the process.
Bleeding brakes usually takes about half an hour per axle, depending on system complexity.
Is brake fluid leak fix a DIY task?
Many minor leaks can be addressed at home with the right tools, but leaks involving the master cylinder or ABS lines should be handled by a professional to ensure safety.
You can handle simple leaks, but complex failures should be left to a pro.
What safety gear should I wear?
Wear gloves, safety glasses, and long sleeves. Brake fluid is corrosive and can irritate skin and eyes. Clean up spills promptly to prevent slipping hazards.
Protective gloves and safety glasses are essential when working on brakes.
Watch Video
Main Points
- Act quickly on brake fluid leak fix to maintain braking safety
- Follow a structured, safe diagnostic and repair plan
- Bleed and refill correctly to restore hydraulic pressure
- Replace worn components rather than only tightening fittings
- Keep fluids and the work area clean to prevent contamination