Water Leak Hot Water Heater: Quick Troubleshooting Guide
Urgent, practical troubleshooting for a water leak hot water heater. Learn sources, safe steps, when to call a pro, and prevention to minimize damage and downtime.

A water leak around a hot water heater is most often caused by a loose connection, a failing drain valve, or a leaking T&P (temperature‑pressure) relief valve. For safety, shut off power and the cold-water supply, then dry the area and inspect for active drips. Tighten any obvious fittings and drain valves; if the leak persists, prepare for professional service. Water damage can escalate quickly, so act fast.
Signs You're Dealing with a Water Leak Around the Hot Water Heater
If you suspect a water leak hot water heater, the first sign is often moisture on the floor around the unit. You might see a growing puddle at the base, damp concrete, or mineral deposits hinting at a slow drip. Other clues include rust on the tank, a damp or musty odor, or sounds of running water behind walls. A leak can originate from the cold-water inlet, the hot-water outlet, the drain valve, or the temperature-pressure relief (T&P) valve. Because water damage can escalate quickly, treat any moisture near the heater as urgent. This guide helps homeowners diagnose the source, isolate the problem, and decide on safe fixes or professional help. Consistently monitor the area for changes, and remember the keyword water leak hot water heater to stay focused on the right components as you inspect.
Common Causes of Water Leak Hot Water Heater
Leaks around a hot water heater commonly come from a few predictable sources. A loose or damaged drain valve at the bottom of the tank is a frequent culprit, especially after maintenance. Inlet and outlet connections can loosen over time due to pressure fluctuations or improper assembly. A faulty or worn T&P (temperature-pressure) relief valve may drip continuously if it’s blocked or fails to reseat properly. Condensation on the outside of a cold tank can look like a leak but is typically not water escaping from the tank. Finally, a corroded or cracked tank, or long-term mineral buildup inside the tank, can lead to larger leaks that require replacement. Distinguish between drips and streams; the distinction guides urgency and next steps.
Safety First: Immediate Steps to Take
Safety comes first when you notice a water leak hot water heater. If you have electric power to the unit, switch off the circuit breaker to the heater; if it’s gas, shut off the gas supply following the manufacturer’s instructions. Then turn off the cold-water supply to stop new water from entering the tank. Do not touch hot surfaces, and keep children and pets away from the area. If you smell gas, evacuate, call emergency services, and contact your utility provider. Dry the floor around the unit with towels or a mop to prevent slips and to better observe where the leak is coming from. After de-energizing and de-watering, you can begin a careful inspection of valves and connections.
Diagnostic Approach: How to Identify the Source
A systematic approach helps pinpoint the leak source without guessing. Start by cleaning and drying the area thoroughly. Place a dry sheet of cardboard or a paper towel under the suspected drip area to observe active leaks. Check the drain valve at the bottom and tighten if it’s slightly loose. Inspect the cold-water inlet and hot-water outlet fittings for moisture—hand-tighten only if needed and avoid overtightening. Test the T&P relief valve by lifting the test lever gently; if water escapes, the valve or the pipe may be blocked or the tank may be at excessive pressure. If you identify active water around the tank seam or corrosion on the surface, you may be facing a tank failure. Record findings and plan next steps with safety as a priority.
Quick Fixes You Can Try Safely
For minor, non-tank leaks, several quick fixes may slow or stop the drip. First, ensure all drain and supply valve connections are snug, but never force fittings beyond their seating. If the drain valve is leaking, replace it or install a new washer, following the manufacturer’s instructions. If the T&P valve leaks, ensure there’s no mineral buildup blocking the valve; if blockage is present, the valve may need replacement. For small drips from elbow joints or piping, reseating fittings and applying appropriate thread sealant or PTFE tape (plumbers tape) can help. Never attempt to seal a crack in the tank itself; that requires professional assessment. After any fix, restore power or gas and water supply, then monitor for 24 hours to confirm the issue is resolved.
When to Call a Professional
Call a licensed plumber or a water heater technician if you find a cracked tank, persistent leaks after tightening fittings, or a faulty T&P valve that continues to drip. Gas water heaters require a professional if you suspect gas issues or improper venting. If the unit is older, corroded, or leaking at the base, replacement is often more cost-efficient and safer than continuing repairs. A professional can perform a pressure test, confirm water quality in the supply, verify venting (for gas units), and install a new valve or tank as needed. In many regions, leaks around the heater may trigger water damage insurance considerations, so document the issue and communicate with your insurer as required.
Prevention: Maintenance to Extend Your Water Heater’s Life
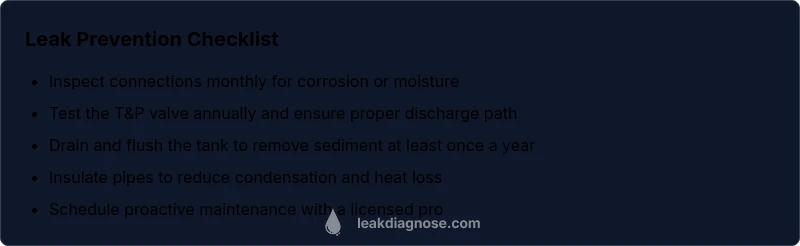
Prevention is simpler than large repairs. Schedule annual maintenance and flush the tank to remove sediment buildup that contributes to overheating and corrosion. Test the T&P valve during routine maintenance and inspect the drain valve for wear. Insulate hot water pipes and the tank to reduce condensation on the exterior, especially in humid spaces. Check connections for tightness after any service, and replace aging components before they fail. A proactive maintenance plan reduces the risk of sudden leaks and extends the life of the appliance.
Cost Considerations and Warranties (What to Expect)
Costs for fixing a water heater leak vary based on the source and the unit’s age. Minor valve replacements or resealing are generally less expensive than replacing a corroded tank, which may require a full unit replacement. If your heater is under warranty, a trusted contractor can guide you through coverage options. If not, ask for a written estimate that covers labor, parts, and any required permit fees. When evaluating bids, ensure the contractor tests the system for leaks after the repair and provides a clear maintenance plan to prevent future leaks.
Tools and Materials Checklist for DIY Fixes
- Adjustable wrench and channel-lock pliers
- PTFE tape (plumber’s tape) and thread sealant
- Replacement drain valve or hose bib, if needed
- T&P valve replacement kit (if required)
- Bucket, towels, and a flashlight
- Non-contact voltage tester for electrical safety
- WD-40 or penetrating oil for stubborn fittings
- Garden hose and rags for clean-up
- A smartphone or camera to document the leak and repairs
- A level or straight edge to check alignment of connections
Summary Checklist (Key Points)
- Identify whether the leak comes from the drain valve, supply connections, or the T&P valve.
- Shut off electricity/gas and water before any inspection.
- Tighten or replace faulty valves; never seal a tank with DIY remedies.
- If the leak persists, call a pro; early intervention saves water damage costs.
- Maintain a regular maintenance schedule to prevent leaks in the future.
Steps
Estimated time: 60-90 minutes
- 1
Shut off power and water supply
Locate the circuit breaker or gas shutoff for the heater and switch power off. Then close the cold-water supply valve to stop more water from entering the tank. This prevents additional leakage while you assess the situation.
Tip: Never bypass safety devices; ensure the power is truly off before touching the heater. - 2
Dry and inspect the area
Wipe away existing water and allow the area to dry. Look for active drips from the drain valve, fittings, or T&P valve. A dry surface makes it easier to spot the exact source and quantify any leaks.
Tip: Use a flashlight to illuminate tight spots around fittings. - 3
Check drain and valve fittings
Tighten loose drain valve and any nearby fittings with the correct wrench size. Do not overtighten plastic or metal fittings. If the valve is damaged, replace it per the manufacturer’s instructions.
Tip: Have a bucket ready for any residual water when removing components. - 4
Test the T&P valve
Lift the test lever or discharge valve gently to see if water escapes. If water continues to drip from the valve or the discharge pipe, the valve may be defective or the tank may be over-pressurized.
Tip: Only perform the test if you’re sure the area is safe and dry. - 5
Restore power and water, then monitor
Turn the cold-water supply back on and restore power. Keep an eye on the area for 24–48 hours to confirm the leak is resolved and there are no new drips.
Tip: Take photos to document the condition for future reference. - 6
Decide on next steps
If the leak persists, or you observe rust, cracks, or pooling from the tank, plan for professional service or a full replacement. Do not continue operating a compromised unit.
Tip: Having a professional assess a persistent leak now can prevent costly water damage later.
Diagnosis: Visible water pooling at or near the bottom of the hot water heater, or damp spots around pipes and valves
Possible Causes
- highLoose or worn drain valve
- highLeaking or loose cold-water inlet / hot-water outlet connections
- mediumFaulty temperature-pressure relief valve
- lowCorroded tank or internal failure
- lowCondensation mistaken for a leak
Fixes
- easyTighten drain valve or replace valve washer and ensure proper seating
- easyTighten or reseal inlet/outlet connections with appropriate fittings; replace damaged connectors
- mediumTest and, if needed, replace the T&P relief valve; inspect discharge pipe for obstructions
- hardIf tank shows corrosion or crusty staining, plan replacement by a licensed pro
- easyConfirm whether condensation is causing the surface moisture and address humidity or insulation if needed
Questions & Answers
What should I do first if I notice a leak around my water heater?
Shut off power and the cold-water supply to stop the leak and prevent electrical or flood hazards. Then dry the area and inspect the source of the drip before deciding on next steps.
First, turn off the power and the water supply, then dry the area and identify the leak source before you proceed.
Is a small drip from the drain valve normal?
A small, occasional drip can occur after maintenance, but a constant drip usually signals a faulty valve or connection that needs attention.
A tiny drip after maintenance can be normal, but a steady drip usually means a valve or connection needs repair.
Can I fix a leak myself?
You can handle simple tasks like tightening valves or reseating fittings if you follow safety steps. More complex issues, especially tank damage or a faulty T&P valve, should be handled by a licensed professional.
You can do simple fixes safely, but for tank damage or faulty relief valves, call a pro.
How do I tell if the tank is beyond repair?
Visible rust, pitting, bulging, or cracks on the tank indicate irreversible damage and likely replacement is required.
If you see rust or cracks on the tank, replacement is usually the safer option.
What maintenance helps prevent leaks?
Annual flushing to remove sediment, testing the T&P valve, inspecting connections, and insulating pipes all reduce leak risk and extend the life of the heater.
Regular flushing and valve checks prevent leaks and extend heater life.
How long do water heaters typically last?
Most water heaters last around 8–12 years, though performance and leak risk rise as they age. If you’re near the end of the typical life, plan for potential replacement.
Water heaters usually last about 8 to 12 years; consider replacement as they age.
Watch Video
Main Points
- Identify source quickly to minimize damage.
- Prioritize safety: power, gas, and water shutoffs first.
- Tighten/replace valves only as needed; avoid risky repairs.
- Persistent leaks require professional evaluation.
- Regular maintenance prevents most leaks.