Water Leak from AC Indoor Unit: Troubleshooting Guide
Urgent, practical troubleshooting guide for water leaks from an indoor AC unit. Learn common causes, safe checks, diagnostic flow, and step-by-step fixes to prevent water damage and mold.

A water leak from ac indoor unit is commonly caused by a blocked condensate drain line or a damaged drain pan. Step 1: power off and unplug the unit. Step 2: inspect the condensate line and pan for clogs or cracks. Step 3: clear the line and dry the area. If it persists, contact a licensed HVAC pro.
Understanding the problem
A water leak from ac indoor unit can indicate a drainage problem in your HVAC system. It’s a warning sign that condensate is not flowing safely away from the evaporator coil. When addressed quickly, you can prevent mold growth, water damage to walls and floors, and possible electrical hazards. According to Leak Diagnosis, these leaks are most often tied to the condensate drainage path rather than refrigerant faults. By understanding the basics, homeowners can distinguish between a DIY-friendly fix and a job that requires a professional. Expect some moisture at first—what matters is how you respond and how quickly you act to protect your home and family.
Common causes and manifestations
Leaks don’t always look the same, but there are common culprits. Here are the frequent causes you may encounter:
- Clogged condensate drain line: algae, mineral buildup, or debris can block drainage and cause overflow.
- Damaged or misaligned drain pan: cracks, rust, or poor slope lets water escape the cabinet.
- Frozen evaporator coil: restricted airflow from a dirty filter or low refrigerant can freeze the coil; melting ice drips water.
- Improper installation or slope: if the unit isn’t pitched correctly, condensate won’t flow to the drain as designed.
- High humidity or extended operation: extreme humidity can overwhelm a line not sized for heavy use.
- Condensate pump failure (in pump-equipped systems): a failing pump can back up water into the cabinet. Recognizing these patterns helps you pick the right fix and know when to escalate care.
Safe initial inspections you can perform
Before calling for service, perform a few safe, low-risk checks to narrow down the cause. The aim is to confirm whether the leak is drainage-related or something more serious, without risking electric shock or further damage.
- Power down: Turn off the unit at the thermostat and switch off power at the breaker. Do not touch live wires.
- Inspect around the unit: Check the condensate drain line for clogs or kinks and look for pooling water near the discharge point.
- Check the drain pan area: Look under the evaporator for visible cracks or rust. Do not force panels open if you’re unsure.
- Check airflow and filtration: A very dirty filter reduces airflow and can contribute to coil icing; replace if clogged and inspect the evaporator coil if accessible.
- Verify line slope: Ensure the drain line slopes slightly downward toward the exit. If the slope is incorrect, plan for adjustments.
- Safety first: Do not bypass safety components or reassemble without confirming all connections are secure. If anything feels risky, pause and call a pro.
Diagnostic considerations and flow
A logical diagnostic flow helps you isolate the issue and determine the proper remedy. Start with symptoms observed during normal operation and proceed to likely causes. If you see water on the floor near the air handler after a run cycle, the condensate drain line is the primary suspect. If water leaks from the service panel, the drain pan or cabinet may be damaged. If a defrost cycle recently occurred or the space is particularly humid, coil ice could contribute to the leak. Use the symptom-to-diagnosis approach below to guide your actions.
- Symptom: Water on the floor near the indoor unit. Likely cause: condensate line blockage or pan issue. Action: inspect and clear the line; check pan integrity.
- Symptom: Water dripping from the cabinet. Likely cause: pan damage or loose panel. Action: inspect and replace damaged parts.
- Symptom: Visible ice on the evaporator coil when running. Likely cause: restricted airflow or refrigerant-related fault. Action: address airflow first (filters, blower), then consult a pro for refrigerant concerns.
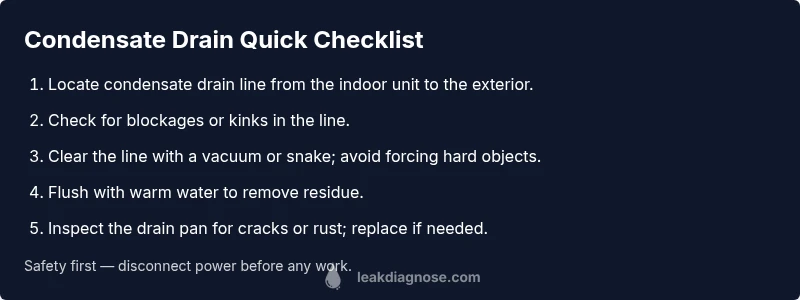
Step-by-step fix for the most common cause: clogged condensate drain
This section walks you through clearing a clogged condensate drain, the most frequent cause of leaks from the indoor unit. Follow these steps in order and stop if you encounter uncertainty.
- Power off and access the path: Ensure the unit is powered off at the thermostat and the breaker is off. Safety first—don’t touch live parts. Tip: Have a flashlight handy to inspect hidden trays.
- Locate the drain line and pan: Find the PVC drain pipe or flexible hose connected to the evaporator housing. Note its orientation and any traps.
- Clear the line: Use a wet/dry vacuum attached to the line’s exterior end to pull out the clog. If a vacuum cannot reach the blockage, try a flexible pipe-cleaning brush gently.
- Flush and verify: Run warm water through the line to flush debris. Avoid harsh chemicals that could corrode the pipe. Tip: Do this slowly to monitor for backflow.
- Inspect the pan: Check for cracks, rust, or discoloration. If damaged, replace the pan or seal the crack with an appropriate material.
- Reassemble and test: Reconnect any panels, power up the system, and run a short cycle while watching the drain for new leaks. Tip: Place towels or a shallow tray to catch stray drips during testing.
- Monitor closely: Over the next 24–48 hours, observe for renewed leaks and ensure proper drainage. If water continues to appear, escalate to a professional.
Prevention: maintenance to minimize future leaks
Prevention is easier than repeated repairs. Implement these regular practices to keep condensate lines clear and the system healthy:
- Schedule annual professional checks to verify drain integrity, pan condition, and overall drainage performance.
- Clean or replace filters regularly; clogged filters impair airflow and can trigger coil icing.
- Keep the condensate drain area clear of debris and ensure exterior discharge is unobstructed.
- Consider a condensate overflow alarm that notifies you of leaks before water damage occurs.
- If you use a condensate pump, test it monthly to confirm it’s lifting water properly and routing it to a safe location.
- Document your maintenance and repairs so you can spot recurring patterns and address them early.
When to call a professional and what to expect
While many leaks are fixable with basic maintenance, some situations require a licensed HVAC technician. If you observe persistent leaks after clearing the line, a rusted or cracked drain pan, refrigerant-related concerns, or electrical issues near the cabinet, stop DIY work and schedule a service call. A pro can perform a pressure test, drain-line inspection, pan replacement, and refrigerant checks while safeguarding your home and guaranteeing code-compliant repairs.
Steps
Estimated time: 60-90 minutes
- 1
Power down and access the drain path
Ensure the unit is powered off at the thermostat and switch off the breaker. This prevents electrical shock while you inspect the drainage components.
Tip: Have a flashlight handy and wear gloves to handle moisture safely. - 2
Locate the condensate drain line
Find the PVC pipe or flexible hose that carries condensate away from the evaporator. Note any traps or joints that could trap debris.
Tip: Take a photo before disassembly to help with reassembly. - 3
Clear the line
Detach the end of the line at the exterior outlet or use a wet/dry vacuum on the line to pull out the clog. If needed, gently work a flexible brush through the trap.
Tip: Do not use sharp tools that could puncture the pipe. - 4
Flush and inspect the pan
Run warm water through the line to flush debris. Inspect the drain pan for cracks or rust and repair or replace if needed.
Tip: Avoid harsh cleaners that could damage metal pans. - 5
Reassemble and test
Reconnect panels securely, restore power, and run a short cycle to observe for leaks. Keep a towel nearby during testing.
Tip: Watch the exterior discharge area for the first 24 hours. - 6
Monitor and plan next steps
If leaks reappear, note the symptoms and contact a professional for a definitive diagnosis and possible pan replacement or coil service.
Tip: Document symptoms and timing to share with the technician.
Diagnosis: Water pooling or dripping from the indoor AC unit cabinet
Possible Causes
- highClogged condensate drain line
- mediumDamaged or cracked drain pan
- lowFrozen evaporator coil due to restricted airflow or refrigerant issues
- lowImproper drain line slope or installation
Fixes
- easyClear or replace condensate drain line; correct line slope
- mediumReplace damaged drain pan and reseal cabinet as needed
- mediumThaw coil, restore airflow, and check refrigerant levels
- easyAdjust installation slope or reroute drain line to ensure proper drainage
Questions & Answers
Why is my air conditioner leaking water inside the house?
Most indoor leaks stem from condensate drainage problems—blocked lines, a damaged pan, or improper slope. Refrigerant issues are less common causes. Start with drainage checks and filter maintenance before pursuing more complex repairs.
AC leaks usually come from drainage problems like a clogged line or a damaged pan, not from the refrigerant.
Is a water leak from an AC unit dangerous?
Yes, leaks can lead to mold growth, structural damage, and electrical hazards if water contacts live components. Treat it as urgent and shut off power until the issue is resolved.
Leaks can be risky—shut off power and get it checked quickly.
Can a dirty air filter cause a leak?
A very dirty filter reduces airflow, which can cause the evaporator coil to freeze and subsequently leak when it thaws. Replacing the filter often resolves this.
A clogged filter can contribute to leaks by freezing the coil; replace it and check the drainage.
Should I use a shop vac to clear the condensate line?
A shop vac can help, but only if you can access the exterior end safely and there’s no risk of backflow into electrical components. Do not force components or bypass safety switches.
A shop vac can help if you can reach the line safely; otherwise call a pro.
When should I call a professional vs DIY?
If clearing the line doesn’t stop the leak, if you find damage to the pan, or if refrigerant issues are suspected, call a licensed HVAC technician. Electrical hazards also warrant professional involvement.
If leaks persist after basic checks or you’re unsure, it’s best to hire a pro.
What maintenance prevents leaks?
Regular filter changes, annual HVAC servicing, and keeping the condensate line clear are key. Consider a drain alarm to catch leaks early.
Routine maintenance helps prevent leaks and protects your home.
Watch Video
Main Points
- Check the condensate drain first.
- Do not force panels or electrical parts.
- Clear the line and test after each step.
- Call a pro for persistent leaks or damage.