Hot Water Heater Leak from Bottom: Urgent Troubleshooting
If you notice a hot water heater leak from bottom, act fast. This guide helps homeowners diagnose the cause, shut off power and water safely, and decide between repair or replacement with practical steps, safety tips, and prevention from Leak Diagnosis.

A bottom leak on a water heater is a red flag that requires immediate action. The most common causes are tank corrosion, a faulty drain valve, or a pressure-relief valve issue. Shut off power and water, then call a licensed pro if you cannot contain the leak. Leak Diagnosis recommends treating this as an urgent repair or replacement scenario.
Understanding the symptom: hot water heater leak from bottom
A leak at the bottom of a water heater is not a minor drip to ignore. When homeowners notice a sustained damp area or mineral crust forming around the base, the condition is often described as a hot water heater leak from bottom. This symptom usually points to one of a few failure modes: tank corrosion or rupture from age, a faulty drain valve, or an issue with the temperature and pressure relief valve. The bottom location makes it more likely that the water is from the tank itself or a nearby connection rather than vapor or condensation. In any case, this is a sign that the unit is failing and needs prompt assessment. According to Leak Diagnosis, bottom leaks frequently indicate internal corrosion or a weak connection rather than a simple surface splash. Quick recognition and action can prevent water damage and scald hazards in your home.
Before you diagnose further, note the color and consistency of the leak (clear water vs. rusty tint) and whether the leak size changes with hot water use. These clues help you determine if the problem is a loose valve, a worn gasket, or tank failure. Remember, a leaking water heater can still deliver hot water, but continued operation may escalate damage and increase energy waste. Use this moment to plan a safe shutdown and a professional inspection.
Safety first: shut off power, water, and gas reliably
Safety comes first when a water heater is leaking from the bottom. Locate and shut off the power supply (electric units), gas supply (gas-fueled units), and the cold-water supply line to halt fresh water from entering the tank. For electric heaters, switch off the circuit breaker dedicated to the water heater, then unplug it if accessible. For gas heaters, shut off the gas valve and ventilate the area if you smell gas or hear hissing sounds. After power and gas are secured, close the cold-water shutoff valve to stop additional water from filling the tank. Keep in mind that even a small leak can cause slippery floors and mold growth, so wear slip-resistant footwear and place towels or a bucket on the floor. Leak Diagnosis emphasizes not attempting adjustments while the unit is hot or pressurized. If you cannot reach the shutoff safely, evacuate the area and call emergency services or a professional immediately.
Once power and water are off, test for residual energy with an appropriate tester and keep children and pets away from the area. If the leak continues after shutdown, assume the unit is compromised and arrange professional service as soon as possible. Do not attempt to repair a hot water heater leak from bottom with makeshift fixes that might leave you exposed to scalding water or electrical shock. The priority is to reduce damage and secure your family's safety.
Common causes of bottom leaks and how to spot them
Bottom leaks can stem from several reliability-breaking issues, with tank corrosion and drain-valve problems topping the list. Here are the frequent culprits and how to spot them:
- Tank corrosion or rust-through: Look for rusty coloration at the base and around the sump area. This often indicates long-term degradation of the metal shell, which is typically beyond simple patching.
- Faulty drain valve or packing nut: If your leak is a steady drip near the drain, the valve or packing nut may be loose or worn. Tightening may help, but a corroded or damaged valve often needs replacement.
- Faulty temperature and pressure relief valve (TPR valve): A TPR valve releasing water due to overpressure can cause water to pool near the base if the discharge line is blocked or misrouted. Listen for a frequent hissing sound or cool water pouring after valve activation.
- Loose inlet/outlet connections: Pipes connected to the tank can loosen over time, causing leaks at joints or fittings that look like the bottom of the heater.
- Condensation vs. actual leak: In some cases, cold pipes in warm rooms condense moisture near the bottom. This is not a true leak from the tank but a humidity issue to address.
Leak Diagnosis notes that bottom leaks are often tied to corrosion or worn components rather than a quick fix. In practice, the best course is to treat the problem as a potential tank failure and plan for a replacement if the unit is beyond its service life. Regular maintenance, including annual inspections and safe drainage, reduces the risk of bottom leaks and extends the life of your heater.
Immediate steps you can take while waiting for help
After acknowledging a bottom leak, act quickly to prevent water damage and reduce risk:<br>
- Keep the area dry with towels and a bucket, and place a mat to prevent slipping. Avoid stepping into pooled water that could hide sharp objects or electrical hazards.
- If possible, drain some water from the tank to reduce pressure and volume, but do not drain completely unless you are prepared and know how to refill safely.
- Prepare a safe space for the repair crew: clear the surrounding area, turn off breakers, and ensure adequate ventilation if you smell gas or burning electronics.
- Document symptoms with photos: note the color of the water, locate the leak source, and observe whether the leak worsens with hot water use.
- Do not attempt home repair on gas-fired units without professional help, as a misstep could create a dangerous situation. Leak Diagnosis recommends calling a licensed plumber or water heater technician if you cannot clearly identify or safely fix the leak.
What a professional will do during a repair or replacement
A licensed technician will perform a structured assessment to determine whether repair or replacement is appropriate. Typical steps include:
- Visual inspection of the tank, connections, valves, and mounting hardware to locate the exact leak source and assess corrosion.
- Pressure and temperature testing to evaluate the structural integrity of the tank and determine if the PRV or drain valve has failed.
- Draining and pressure testing operations to verify containment and inspect the drain valve and fittings.
- If corrosion is present or the tank shows signs of stress, the technician will discuss replacement options, including unit size, energy efficiency, and installation requirements.
- Safety checks and final testing after reassembly ensure no further leaks and proper operation of controls.
In many cases, a bottom leak indicates tank failure, meaning replacement is the safer, longer-term solution. Leak Diagnosis emphasizes that attempting to patch a corroded tank is not reliable and can lead to intermittent leaks or catastrophic failure. A professional assessment clarifies whether an upgrade to a higher-capacity or more efficient model is warranted, and ensures proper venting, drainage, and flush procedures are followed.
Prevention tips to reduce future leaks and extend life
Prevention is key to avoiding repeat bottom leaks. Adopt these best practices to extend the life of your water heater:
- Schedule annual professional inspections to check for corrosion, valve integrity, and sediment buildup.
- Drain and flush the tank at least once a year to remove mineral deposits that accelerate corrosion.
- Verify the integrity of the TPR valve and discharge pipe; ensure unobstructed discharge paths and proper piping slopes.
- Use the right replacement parts, including gaskets and valves designed for your tank model and fuel type.
- Keep the area around the heater dry, well-ventilated, and free of clutter to help detect leaks early and prevent water damage.
The Leak Diagnosis team recommends treating preventive maintenance as a critical part of home upkeep, especially for aging units. Taking these steps now can save you from costly repairs and unexpected downtime later.
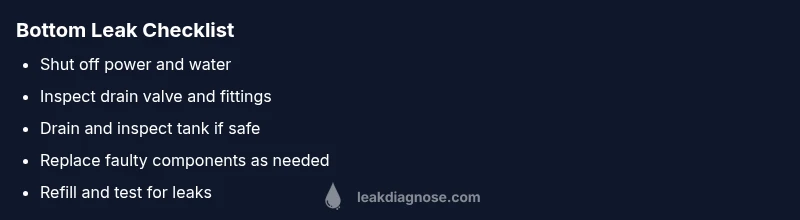
Steps
Estimated time: 60-120 minutes
- 1
Turn off power, gas, and cold-water supply
Locate and switch off the power at the breaker for electric heaters, or shut off the gas valve for gas units. Close the cold-water supply valve to stop more water from entering the tank. If you can’t reach any shutoff safely, evacuate and call for help. This step prevents further damage and reduces safety hazards.
Tip: If you’re unsure about the gas shutoff, call your energy provider or a professional to avoid a dangerous situation. - 2
Identify the leak source
Carefully inspect the base and nearby fittings. Check the drain valve, inlet/outlet connections, and any visible piping for cracks or wetness. A flashlight and moisture detector can help differentiate a true leak from condensation.
Tip: Take photos of the connections before loosening anything to help with reassembly. - 3
Decide on immediate containment
If the leak is minor and the valves are dry, you may temporarily tighten a loose valve or cap a crack only as a stopgap, but never rely on this long-term. Place towels or a bucket to catch drips and minimize water damage.
Tip: Do not use tools that could damage the valve or pipe if you lack experience. - 4
Drain and assess the tank
If you can safely drain the tank, do so to reduce pressure and confirm the origin of the leak. Attach a hose to the drain valve, open it slowly, and direct water to a safe drain. Monitor the area for renewed leaks during drainage.
Tip: Only drain if you can safely manage the lower water temperature and you’re prepared to refill afterwards. - 5
Repair or replace faulty components
Install a new drain valve, gaskets, or PRV as needed. For any tank corrosion or tank shell compromise, plan for replacement with a compatible model. Have a licensed technician perform the replacement to ensure proper venting and connections.
Tip: Keep warranty details handy; some repairs require licensed service to maintain coverage. - 6
Refill, test, and verify
Close the drain valve, refill the tank slowly, and restore power or gas. Run hot water and inspect all connections for leaks. If any leak recurs, stop and call a professional rather than continuing to operate.
Tip: After testing, monitor the area for 24–48 hours to ensure the repair holds.
Diagnosis: Visible water pooling at the base of the water heater, damp floor, or mineral crust near the base
Possible Causes
- highTank corrosion or rust-through due to age
- highLoose or faulty drain valve or packing
- mediumFaulty pressure-relief valve (TPR) or misrouted discharge line
- mediumLoose water supply connections
- lowCondensation mistaken for a leak
Fixes
- easyShut off power/gas and the cold-water supply to stop influx and reduce risk
- easyTighten or replace the drain valve or its packing nut if accessible and safe
- mediumConsult a licensed plumber to inspect the tank and valves for corrosion or failure
- hardIf the tank shows corrosion, replace the unit rather than patching it
Questions & Answers
What does a bottom leak on a water heater usually indicate?
Bottom leaks typically indicate tank corrosion, a faulty valve, or a failed relief valve. Leaks from the base should be treated as a potential tank failure rather than a minor fix. A professional assessment is recommended once safety steps are taken.
Bottom leaks usually mean the tank is failing or a valve has failed. A professional assessment is recommended after you shut off water and power.
Can I fix a bottom leak myself?
Some minor valve leaks can be addressed if you have the right tools and know-how, but a leaking tank or corroded shell usually requires replacement. For gas heaters or units with electrical components, professional service is strongly advised.
DIY fixes are risky when the tank is involved. For tank leaks or gas heaters, call a pro.
How urgent is a bottom leak?
A bottom leak is urgent because it can lead to water damage, mold growth, and electrical or gas hazards. Prompt shutdown and a professional evaluation reduce risk and cost.
It’s urgent. Shut it off and get a pro to inspect soon to prevent damage.
What maintenance helps prevent bottom leaks?
Regular draining and flushing, annual inspections, and replacing worn valves help prevent bottom leaks. Keeping the area clean and monitoring for early signs of corrosion can extend heater life.
Regular maintenance like draining and checks prevent many leaks.
Is condensation mistaken for a leak?
Condensation can resemble a leak but is usually moisture from humidity on cold surfaces. If water appears consistently and pools near the base, treat it as a leak and inspect the connections.
Condensation can look like a leak, but if it’s persistent, have it checked.
What should I do if the leak is accompanied by a gas smell?
If you smell gas near the heater, evacuate immediately and call your gas utility or emergency services. Do not operate electrical switches near the area.
Gas smell means danger—leave the area and call for help right away.
Watch Video
Main Points
- Shut off power and water immediately for any bottom leak
- Identify the leak source before attempting repairs
- Call a licensed pro if you’re unsure or if gas is involved
- Prevent future leaks with annual maintenance and proper valve care