Hot Tub Leak Fix: DIY Guide to Stop Water Waste Now
Step-by-step DIY guide to locate, seal, and test a hot tub leak. Learn safe practices, common failure points, tools, and maintenance tips from Leak Diagnosis to prevent future water loss.

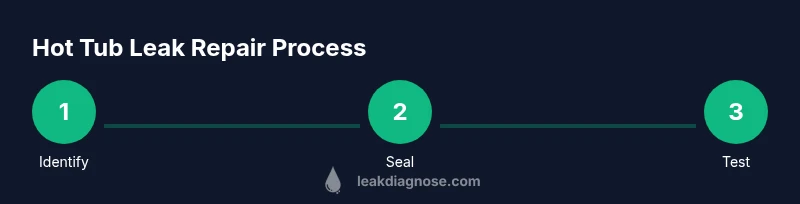
This comprehensive guide walks homeowners through a practical, step-by-step approach to a hot tub fix a leak. You’ll learn how to safely locate the source, choose the right sealants, and test the repair, with maintenance tips to prevent recurrence. Based on Leak Diagnosis methods, the process covers common leak points, from fittings to shell cracks, and when to seek professional help if needed.
What causes a hot tub leak and how to recognize them
A hot tub leak can arise from aging seals, worn gaskets, loose fittings, and damage to the acrylic shell. Common signs include dampness around the cabinet, around filtration components, or near jets. Water level drops steadily, and you may notice staining on decking or mineral buildup near joints. According to Leak Diagnosis, small drips at supply lines and union fittings are frequent and repairable with basic tools and proper sealants. Regular inspections help catch issues early, preserving water, energy efficiency, and spa performance. If you see persistent damp spots or hear a hiss near a fitting, treat it as a leak risk and investigate promptly. A careful, patient approach helps identify the source without unnecessary disassembly.
Safety first before any repair
Power down the spa by switching off the circuit at the breaker and unplugging any control panels. Use a non-contact voltage tester to confirm there is no live current near exposed wiring. If water needs to be drained for a repair, do so gradually and avoid completely emptying the tub unless the shell requires it. Keep the work area dry and well-ventilated, and wear gloves and eye protection when handling sealants or epoxy. Never work on electrical components with the spa powered; if you smell gas or see sparking, evacuate and contact a licensed professional immediately.
Common leak points to inspect first
Start with the most likely spots: pump housing and connections, union fittings, plumbing lines, jets and their gaskets, and the spa shell where two materials meet. Tighten fittings in small increments and recheck for drips. Inspect O-rings or gaskets for cracking or hardening and replace as needed. Check the drain valve, filter housing, and any flexible hoses for soft spots or pinhole leaks. If you detect moisture at a joint, clean both sides, dry completely, and apply the appropriate sealant or patch.
Diagnostics you can perform without specialized tools
A simple dye test around suspect joints can reveal active leaks by showing color migration. Observe whether tightening a fitting reduces moisture or if a jet area remains damp after power-down. Take clear photos of observed leaks for reference, and note the exact location and nature of the drip. If a suspect point remains leak-prone after tightening, move to the next likely point to isolate the source without overdoing a single joint.
Sealing minor leaks around fittings and gaskets
For small drips around fittings or gaskets, start with a high-quality silicone sealant designed for spa use. Clean and dry the area, apply a thin bead around the joint, and re-tighten to the manufacturer’s torque recommendations. If a jet’s O-ring is worn, replace it and lubricate with a silicone-based lubricant. Avoid combining sealants and epoxies in the same spot, and never apply sealant to a crack as a primary fix. Proper surface preparation is critical for lasting results.
Patching cracks or damaged shell areas (when appropriate)
Hairline cracks in the acrylic shell may sometimes be sealed with a two-part epoxy designed for aquatic surfaces, but only when the area is dry, clean, and within the epoxy’s temperature range. Larger cracks or structural damage should not be patched; these issues often require professional repair or shell replacement. If you’re uncertain about shell integrity, consult a spa technician before proceeding with any patch.
Plumbing repairs and re-sealing lines
If leak sources appear to be plumbing joints, re-secure clamps or replace damaged hoses. For PVC lines, use compatible pipe cement or thread sealant in a well-ventilated area, following the product’s instructions. Avoid applying solvent cement in water-filled lines. After any repair, wipe down surfaces, dry thoroughly, and ensure there are no new water paths created by misaligned components.
Testing the repair and re-starting the spa
Refill the tub to the recommended level and run the pump for 15–30 minutes to pressurize the system and expose any remaining leaks. Inspect each repaired area for drips; repeat loosen-and-tighten steps if needed but avoid over-t tightening. Monitor water level and keep an eye on balance chemicals for the first 24–48 hours after repair. If the leak returns or is not resolved, escalate to a professional assessment.
Authority sources
This guidance aligns with best practices from credible sources on water management and home repair. For further reference, see EPA Watersense and university extension resources that cover leak prevention and safe maintenance practices. These sources provide general guidance applicable to hot tub and spa repairs and water conservation.
Tools & Materials
- Adjustable wrench(Choose one that fits common plumbing fittings (around 6–12 mm jaw opening).)
- Screwdriver set(Flathead and Phillips; helpful for jet and cover screws.)
- Silicone sealant (marine-grade)(Use a product rated for wet environments and spa use.)
- Epoxy putty for aquatic use(Only if patching a non-watertight crack on non-structural areas.)
- O-ring and gasket kit(Keep an assortment of sizes on hand for quick replacements.)
- Non-slip towels and absorbent rags(Protect floors and dry surfaces as you work.)
- Non-contact voltage tester(Verify no live current before handling electrical components.)
- Teflon tape (plumbing)(Wrap dry threads before reassembling fittings.)
- Dye test tablets or food coloring(Optional for visual leak tracing.)
- Gloves and eye protection(Wear protective gear when applying chemicals.)
Steps
Estimated time: 2-4 hours
- 1
Power down and prepare
Switch off the spa circuit at the breaker and unplug the control panel. Verify there is no live current before you touch any components. Clear the area and lay towels to catch spills.
Tip: Use a non-contact tester to confirm safety before starting. - 2
Identify the leak source
Visually inspect fittings, jets, and the shell for moisture paths. Use a dye test or light touch to observe dripping; document exact locations with photos for reference.
Tip: Start with the most accessible joints; leaks often originate at the first site you inspect. - 3
Tighten fittings and inspect seals
Gently tighten suspect fittings in small increments. Check O-rings and gaskets for wear; replace if cracked or stiff. Wipe surfaces clean and dry after adjustments.
Tip: Avoid over-tightening; it can damage threads and worsen leaks. - 4
Seal minor leaks
Apply a thin bead of silicone sealant around joints that show dampness. Let it set according to product directions before testing.
Tip: Do not use silicone on cracked shells; reserve this for fittings and gaskets. - 5
Patch cracks when appropriate
For non-structural shell cracks, apply a two-part epoxy designed for aquatic surfaces once the area is dry. Larger cracks require professional assessment.
Tip: Only patch if the surface is stable and dry to ensure adhesion. - 6
Repair plumbing components
If hoses or pipes show leakage, re-secure clamps or replace damaged hoses. Use pipe cement or thread sealant on appropriate joints, in a well-ventilated area.
Tip: Use the correct solvent or cement for the pipe material; mismatches fail to seal properly. - 7
Test the repair with a fill and run
Refill to the recommended level and run the pump for 15–30 minutes. Look for drips at all repaired points and adjust as needed.
Tip: Keep a log of test times and observed leaks for future reference. - 8
Evaluate the outcome
If no leaks are seen after testing and the water level remains stable, monitor over the next 24–48 hours. If leaks persist, escalate to a professional or call the spa manufacturer for guidance.
Tip: Document any lingering issues; it helps the pro diagnose faster. - 9
Decide if professional help is needed
Persistent leaks, shell cracks, or structural concerns are beyond DIY repair. A licensed technician will evaluate structural integrity and warranty implications.
Tip: When in doubt, schedule a professional assessment early to prevent water damage.
Questions & Answers
Can I fix a hot tub leak myself?
Yes, for minor leaks around fittings or gaskets. Significant cracks in the shell or major plumbing issues should be handled by a professional.
You can DIY minor leaks, but large cracks or major plumbing problems should be handled by a pro.
What tools do I need to fix a leak in a hot tub?
A basic toolkit with adjustable wrench, screwdriver set, silicone sealant, spare O-rings, and towels is enough for many small fixes. Keep a non-contact tester for safety.
A wrench, screwdriver set, silicone sealant, spare O-rings, and towels are usually enough for common fixes.
How long does a typical hot tub leak repair take?
Time varies by leak type. Minor gasket leaks can be addressed in under a couple of hours; shell cracks often require more time and professional input.
It depends on the leak—small gasket fixes can be quick, shells may need a pro.
When should I call a professional?
If leaks persist after DIY attempts or if you notice structural cracks in the shell or significant plumbing issues, seek a licensed spa technician.
Call a professional if leaks continue after DIY steps or you notice shell damage.
Will using sealants void my hot tub's warranty?
Warranty terms vary by manufacturer. Check the manual and contact customer support before applying patches that may be considered non-standard repairs.
Warranty terms vary—check the manual before patching, to avoid voiding it.
How can I prevent leaks in the future?
Regularly inspect seals and connections, replace worn gaskets, keep water chemistry balanced, and winterize the spa if unused for long periods.
Inspect seals regularly, replace worn gaskets, and balance water chemistry to prevent leaks.
Watch Video
Main Points
- Identify the leak source carefully before repair.
- Use appropriate sealants and replace worn gaskets.
- Test repairs thoroughly and monitor water level after fixes.
- Know when to call a professional for shell damage or persistent leaks.