Tub Leak at Drain: Quick Troubleshooting Guide
Learn fast, safe steps to diagnose and fix a tub leak at the drain. This homeowner-friendly guide covers common causes, step-by-step repairs, safety tips, and when to call a pro.

The tub drain leak is most often due to a worn gasket, a loose drain nut, or a degraded seal. Start by turning off the supply, remove the drain cover, and inspect the gasket and nut. Tighten or replace components as needed. If leaks persist, call a plumber. Keep the area dry and collect any water to prevent damage.
Understanding the tub leak at drain
A tub leak at drain is a common homeowner headache that can cause water damage if ignored. The most frequent culprits are aging gaskets, loose drain nuts, and deteriorated sealant around the drain flange. According to Leak Diagnosis, addressing the issue early saves money and prevents mold growth. Start by noting whether the water appears as a slow seep or a sudden fountain, and whether it leaks while the tub is filling or after draining. This distinction helps narrow the probable cause. Visual inspection should happen with the tub dry: remove the drain cover and examine the visible gasket or washer, the drain nut beneath the tub, and the overflow plate if present. If you see grime or mineral buildup, do not panic — buildup can compromise seals and create gaps that allow water to pass. Safety first: use gloves and eye protection, and never lean into exposed plumbing behind panels. Small leaks are usually fixable with basic tools and replacement parts, but larger or concealed leaks require more care. Consistency matters: if you’ve recently re-sealed the tub and still see seepage, you may be dealing with a damaged flange or a hidden crack in the drain assembly. In those cases, proceed with a methodical inspection and cautious disassembly.
Common causes of tub leaks at the drain
Most tub leaks stem from seals and connections rather than the tub itself. The top culprits include a worn or fractured drain gasket or compression washer, a loose drain nut that clamps the assembly to the tub, and a degraded caulk seal around the drain flange. A corroded or cracked tub drain flange can also leak, especially in older homes where metals have oxidized. Overflow plates that aren’t sealed properly can let water escape behind the wall and surface as a leak near the tub edge. Hair, soap scum, and mineral buildup can trap moisture at the seal and accelerate deterioration. The Leak Diagnosis analysis shows many leaks are slow, intermittent, and easy to overlook, which is why a routine inspection after each bath helps. If your tub is newer, the drain assembly may be a friction-fit model that requires just hand-tightening and sealant replacement, whereas older units may need nut replacement or flange repair. Understanding these causes helps you tailor your diagnostic steps and avoid unnecessary tool use.
Safety first: shutoffs, PPE, and planning
Before you touch water and tools, prioritize safety. Turn off the bathroom supply valve if accessible; in some homes the main water shutoff is the safer choice. Remove all bath mats and keep a towel nearby. Wear gloves and eye protection to guard against sharp metal edges and cleaning chemicals. If you must work behind a wall panel, ensure the area is dry and use a flashlight to inspect the flange from above. If you notice mold growth or standing water in wall cavities, consider professional help rather than continuing DIY. The most dangerous scenario is a concealed leak behind tile or drywall, which can cause structural damage before you notice it.
Quick checks you can perform before tools
Begin with the easy visual checks. Check that the drain cover is fully removed and the gasket sits flat. Inspect the drain nut to see if it is visibly loose; tighten by hand, then snug with a wrench—do not over-tighten. Check for old silicone around the flange; if cracked or crumbly, replace. Run a small amount of water and observe whether the leak appears at the flange or around the overflow. If the tub has an overflow drain, inspect its gasket too. Clean mineral buildup from the area and reassemble with fresh sealant if needed. Document what you find with photos to reference during reassembly. If water still leaks after these steps, move to the diagnostic flow and consider replacements.
Diagnostic flow: symptom → diagnosis → solutions
Symptoms typically present as pooled water around the drain, damp cabinet under the tub, or water behind the wall near the overflow. A quick diagnosis starts with the simplest fixes: reseal the drain, tighten the drain nut, and replace worn gaskets. If water persists, you may be looking at a damaged flange or a cracked drain assembly, which requires replacement. Solutions range from replacing a gasket (easy) to replacing the flange or entire drain (hard). Always test after each fix by filling the tub briefly and watching for seepage. If you notice water behind walls or under tiles, stop DIY and consult a professional to avoid structural damage. Routine checks now can prevent costly problems later.
Step-by-step fix for the most likely culprit
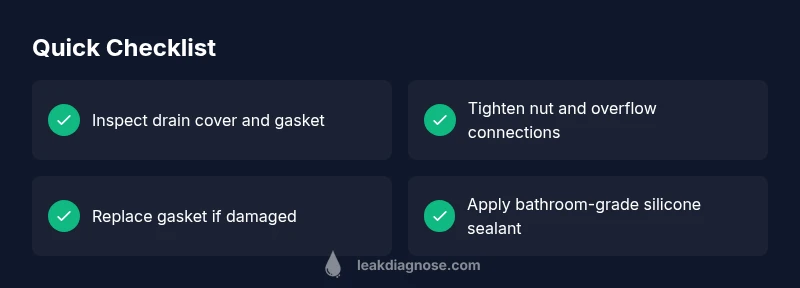
- Remove the drain cover and inspect the gasket; 2) If the gasket is cracked, replace it with a compatible model; 3) Tighten the drain nut and overflow plate to snug, not overtighten; 4) Apply fresh silicone sealant around the flange if using a sealant-type drain; 5) Reassemble the drain cover and run water to test for leaks; 6) If leakage continues, inspect the drain flange for cracks and consider flange replacement; 7) Clean surrounding areas and re-clean seals after testing. After completing each step, dry the area and document results. Tip: take photos before and after disassembly to guide reassembly.
Prevention and maintenance to avoid future tub leaks
Regular inspection of tub drain hardware protects against future leaks. Check gasket integrity every 1–2 years, especially after hard water use or seasonal temperature changes. Replace worn parts promptly and reseal the flange with fresh silicone if you notice drying or cracking of old sealant. Avoid harsh chemical cleaners near gaskets, which can degrade rubber washers. Use a drain strainer to prevent hair and soap scum buildup that accelerates wear. Keeping the area dry after use and performing brief periodic tests can catch problems early and save expensive repairs later.
When to call a professional and what to expect
If you find a crack in the tub drain flange, corrosion behind the wall, or water observed behind tiles, professional help is advised. A licensed plumber can assess potential wall damage, verify whether the issue is within the drain assembly or plumbing behind the wall, and replace failing components safely. Expect an inspection to include replacing gaskets, tightening or re-cracking the flange, and resealing around the drain. Ask for a written estimate and a brief explanation of any necessary wall work, to avoid surprises.
Steps
Estimated time: 45-60 minutes
- 1
Shut off water and prep the area
Turn off the bathroom shutoff valve or main water supply. Remove mats, towels, and any impediments. Have a bucket handy and wear gloves to protect hands from sharp edges and cleaners.
Tip: Take a photo of the drain before disassembly for reference. - 2
Remove drain cover and inspect gasket
Carefully remove the drain cover and inspect the rubber gasket or washer. Look for cracks, wear, or deformation. If the gasket looks damaged, set it aside as the replacement part.
Tip: Note the gasket model or take a photo to ensure you buy the correct replacement. - 3
Tighten drain nut and overflow connections
Using a hand wrench, snug the drain nut and overflow plate. Do not overtighten, which can crack plastic components or strip threads. After tightening, wipe away any excess water.
Tip: Only tighten what is necessary to stop the seepage. - 4
Seal or replace the gasket and apply sealant
If the gasket is damaged, replace with a compatible gasket. Apply a bead of silicone sealant around the flange, especially if the drain is a sealant-type. Reassemble the drain parts in reverse order.
Tip: Use silicone rated for bathroom use and allow cure time per product instructions. - 5
Test the repair with water
Reinstall the drain cover and slowly fill the tub a few inches. Observe the drain area for new leaks. If seepage occurs, stop and reassess components.
Tip: Test in small increments to locate the source precisely. - 6
Inspect surrounding caulk and re-seal if needed
Check the caulk around the drain edge for cracks or gaps. Remove old caulk and apply fresh silicone sealant to create a 360-degree seal.
Tip: Smooth the bead for an even seal and prevent air gaps. - 7
Final inspection and cleanup
Wipe surfaces dry, re-check the drain after draining, and store tools properly. If the leak persists after these steps, contact a licensed plumber for a more thorough assessment.
Tip: Keep a maintenance log of part replacements and test dates.
Diagnosis: Water pooling around the tub drain or leaking from the drain area
Possible Causes
- highWorn or damaged drain gasket or seal
- highLoose drain nut or overflow plate
- mediumCracked or corroded tub drain flange
- lowDegraded silicone sealant around the drain flange
Fixes
- easyReplace worn gasket or washer
- easyTighten or re-seat the drain nut and overflow plate
- hardReplace damaged drain flange or whole drain assembly
- easyReapply or replace silicone sealant around the drain flange
Questions & Answers
What is the most common cause of a tub leak at the drain?
The most common cause is a worn gasket or a loose drain nut. Replacing the gasket and tightening the nut typically resolves the issue.
The most common cause is a worn gasket or a loose drain nut, which is usually fixable by replacing the gasket and tightening the nut.
Do I need to replace the entire drain assembly?
Usually not. Many leaks originate from gaskets or nuts. If the flange is corroded or cracked, replacement may be necessary.
Usually you don’t need the whole drain—start with the gasket and nut, and only replace the flange if needed.
Is it safe to DIY a tub drain repair?
DIY is often safe for simple gasket or nut fixes. If you encounter hidden wall plumbing, mold, or structural damage, stop and call a professional.
It’s often safe to try basic fixes, but if you see hidden plumbing or mold, get a pro.
How can I prevent tub leaks at the drain in the future?
Regularly inspect gaskets, reseal with bathroom-grade silicone, and avoid overtightening drain components.
Check gaskets regularly and reseal with bathroom-grade silicone to prevent leaks.
What tools will I need for a tub drain leak repair?
You’ll typically use an adjustable wrench, screwdrivers, replacement gaskets, silicone sealant, a bucket, and towels.
Common tools like a wrench, screwdrivers, and a new gasket will usually do the job.
Watch Video
Main Points
- Identify and fix worn gaskets or loose nuts promptly
- Tighten and reseal drain components carefully
- Test leaks in small increments after each fix
- The Leak Diagnosis team recommends professional help for concealed or structural leaks