Shower Leak Troubleshooting Guide
Urgent, practical guide to diagnose and fix a leak from shower. Learn quick checks, a diagnostic flow, step-by-step repairs, safety tips, and prevention to protect your bathroom. Trust Leak Diagnosis for practical DIY guidance.

Most shower leaks come from worn seals around fixtures, cracked grout, or a compromised shower pan. The quickest fix is to reseal joints with silicone, re-grout where needed, and replace damaged drain seals or valve gaskets. If leaking continues, inspect the base and surrounding plumbing for cracks or gaps.
Why a Shower Leak Happens
Water finds its way through the smallest openings in a shower enclosure. A leak from shower can originate at moving parts or fixed joints, and water may travel behind walls before you notice stains on ceilings or floors. According to Leak Diagnosis, most leaks start with worn seals or degraded grout around tiles and fixtures, which allows moisture to wick into hidden spaces. In alcove and stall showers, the primary suspects are door or curtain seals, the caulk around the base, and the grout lines adjacent to the shower pan. A cracked or loose shower pan liner or tile can also lead to slow seepage that becomes a larger problem after months of use. If you see damp patches in adjacent rooms or ceilings, treat it as a leak and inspect promptly. Regular maintenance and timely resealing can dramatically reduce the risk of a larger, more costly problem.
Water exposure in bathrooms increases the risk of mold and wood rot, so early detection is essential. Homeowners should look for telltale signs like a musty odor, stained drywall, or bubbling paint near the shower area. These indicators, combined with a routine inspection schedule, help you catch a leak before it becomes a major repair. The Leak Diagnosis team emphasizes that prompt action saves money and minimizes damage to surrounding structures. By understanding common leakage pathways, you can target your checks more effectively and reduce wasted effort.
Common Shower Leak Causes
Water escapes through several common pathways in a shower, and identifying the culprit is key to a fast fix. The most frequent issues include worn or loose door seals around the shower enclosure, cracked or degraded grout and caulk, and a compromised shower pan liner that allows water to seep beneath the tile. A faulty drain seal or a leaking drain flange can also create ongoing moisture problems that are easy to overlook. Behind walls, small cracks in plumbing connections or valve seals may leak slowly, especially when the shower is in use. Condensation alone is rarely the primary cause, but if humidity rises, it can mask a small leak. Address the easiest suspects first—re-seal where needed, replace cracked grout, and replace damaged seals around the drain and valves. Proactive maintenance is the best defense against recurring leaks and costly water damage.
How to Check for a Shower Leak
Start with a quick exterior inspection: look for water stains, soft spots, or discoloration around the shower base, grout lines, and seals. Run a controlled water test by temporarily turning off all other water sources and directing water onto suspected areas while someone watches nearby walls or ceilings for signs of moisture. Use a dye test for the drain by dropping a few drops of food coloring into the shower pan and then inspecting the surrounding drain area after several minutes; any colored water outside the drain signals a leak. Inspect grout, caulk, and door seals up close—look for gaps, cracks, or peeling material. If you notice water seeping behind tile or into wall cavities, the problem may lie in the pan, liner, or plumbing behind the wall. Finally, check adjacent rooms for dampness that could indicate a hidden leak. For safer assessment, consider using a moisture meter to quantify moisture levels in vulnerable areas.
Diagnostic Flow Overview
A structured approach helps you move from symptom to solution without chasing every false lead. Start with visible signs (water on the floor or ceiling) and rule out simple fixes first (loose seals, cracked grout, or worn caulk). If those checks fail to stop the leak, expand the diagnosis to the shower base, pan liner, and drain assembly. When testing, verify that the leak occurs only during shower use or persists afterward, which helps distinguish between a bathroom humidity issue and a true water intrusion. If the source lies behind walls or involves the pan liner, drainage system, or plumbing connections, you may need a professional assessment to avoid further damage. Always document findings (photos and notes) to inform any tradespeople and prevent misdiagnosis.
Step-by-Step: Fixing the Shower Leak (Overview)
This section provides a practical overview of the repair path before diving into the detailed steps. Start with the simplest fixes—replacing worn seals, re-caulking, and resealing grout—before inspecting the shower pan and liner. If the base shows cracks or physical damage, or the drain assembly is compromised, you’ll likely need to repair or replace those components. After performing repairs, re-test thoroughly to ensure no further moisture escapes. Throughout the process, prioritize safety and turn off the main water supply when you work on plumbing fixtures. If you’re unsure of the pan liner integrity or encounter mold growth, call a licensed plumber.
Prevention & Maintenance After Repair
Preventing future leaks is easier than fixing repeated water damage. Schedule regular inspections for grout and caulk around the shower enclosure, reseal every 1–2 years or as needed, and replace worn seals promptly. Keep an eye on the drain assembly and valve gaskets, and address any corrosion or wear early. Use bath-grade silicone sealant and epoxy grout where appropriate, and avoid chemical cleaners that degrade grout or sealant over time. Maintain a consistent indoor humidity level and ensure proper ventilation in the bathroom to minimize condensation. A proactive maintenance routine will help you spot potential issues before they become expensive problems.
Final Checks and When to Call a Pro
If signs of moisture persist after completing the outlined checks and repairs, or if you notice structural damage to the pan, liner, or surrounding walls, it’s time to bring in a professional. A licensed plumber or bathroom contractor can confirm the integrity of the pan liner, assess hidden plumbing connections, and replace components with code-compliant parts. Keep records of all repairs and tests to assist future maintenance decisions. Timely professional input protects your home from water damage and preserves the value of your bathroom.
Steps
Estimated time: 2-4 hours
- 1
Turn off water supply and protect area
Shut off the shower valve and the main water supply to prevent further leakage while you inspect. Place towels and a bucket to catch drips, and lay down a tarp if you expect splashing. Take photos of existing conditions before making changes.
Tip: Label valves if you’ll need to reassemble during the fix. - 2
Inspect exterior surfaces for damage
Look closely at all grout lines, caulk beads, and door seals for cracks, gaps, or peeling material. Tighten or reseal any loose components, paying particular attention to joints where water frequently wicks in.
Tip: Use a utility knife to carefully cut away old caulk before re-sealing. - 3
Test grout and caulk integrity
Gently press on grout and caulk around the shower. If you see hollow spots or crumbling material, remove the worn section and re-grout or re-caulk with a bathroom-rated product.
Tip: Select epoxy grout or silicone caulk designed for bathrooms for longer durability. - 4
Check the shower pan/liner
Inspect the shower pan edge and liner where visible; look for cracks or misalignment. If you suspect liner damage, this usually requires more extensive repair or replacement by a professional.
Tip: Do not attempt a full liner repair without proper training. - 5
Inspect the drain assembly
Check the drain flange, drain gasket, and surrounding seal for leaks. Tighten or replace any worn seals and ensure the drain sits flush with the pan.
Tip: Apply plumber’s putty or silicone as appropriate per product directions. - 6
Evaluate the shower valve seals
Disassemble the valve cartridge if needed and inspect the seals for wear. Replace worn rings or gaskets with compatible, valve-specific parts. Reassemble carefully to prevent new leaks.
Tip: Keep track of order and orientation of all parts during disassembly. - 7
Re-seal, reassemble, and test
Apply fresh sealant where needed, reinstall any components, and restore water supply. Run several test cycles to confirm the leak is resolved and observe for any fresh moisture.
Tip: Test with both hot and cold water to catch temperature-related leaks. - 8
Document results and plan next steps
Capture photos and notes of the final setup and any parts replaced. If moisture persists or you’re unsure about the liner or pan, contact a professional for a definitive inspection.
Tip: Keep a maintenance log for future reference.
Diagnosis: Visible water damage or active leak around shower; water appears on bathroom floor after shower use
Possible Causes
- highWorn/loose seals around fixtures or shower door
- highCracked grout or caulk allowing water intrusion
- mediumDamaged shower pan or liner
- mediumFaulty drain seal or valve gaskets
Fixes
- easyReplace worn seals or re-seal joints with bathroom-grade silicone
- easyRe-grout and re-caulk affected areas
- hardRepair or replace damaged shower pan or liner (professional recommended)
- mediumReplace faulty valve cartridges or drain seals
Questions & Answers
What are signs of a shower leak?
Common signs include water pooling on the shower floor, damp patches on nearby walls or ceilings, moldy odors, and staining around the shower area. These indicators warrant closer inspection of seals, grout, and the pan.
Look for water pooling, damp walls, and musty odors near the shower. If you notice staining or mold, inspect seals, grout, and the base.
Can I fix a shower leak myself?
Many leaks are DIY-friendly, especially those involving seals, grout, and caulk. More complex issues like a damaged pan liner or pan require professional service to avoid further damage.
Yes, you can fix many leaks yourself, but if the pan liner or structural elements are involved, hire a professional.
How long does a repair take?
Most common fixes take a few hours. More extensive repairs, especially involving the pan liner or wall plumbing, may require portions of a day or longer.
Most fixes take a few hours, though bigger repairs can take longer.
What is the typical repair cost?
Costs vary widely depending on scope. Basic sealant and grout work are inexpensive, while pan liner or wall plumbing repairs can be costly and may require a pro.
Costs vary; basic fixes are cheaper, complex pan liner work can be more expensive and may need a professional.
When should I call a professional?
Call a professional if water persists after basic fixes, you notice hidden mold, or you suspect pan liner or wall-plumbing damage. A licensed plumber can confirm structural integrity and ensure code-compliant repairs.
If the leak persists after DIY steps, or you see mold or pan liner damage, call a licensed plumber.
Is there a difference between tile leaks and base leaks?
Yes. Tile leaks often involve grout, caulk, or sealant failures, while base leaks point toward the shower pan, liner, or drain assembly. Both require different inspection paths.
Tiles usually leak via seals or grout; base leaks involve the pan or drain. Different fixes apply.
Watch Video
Main Points
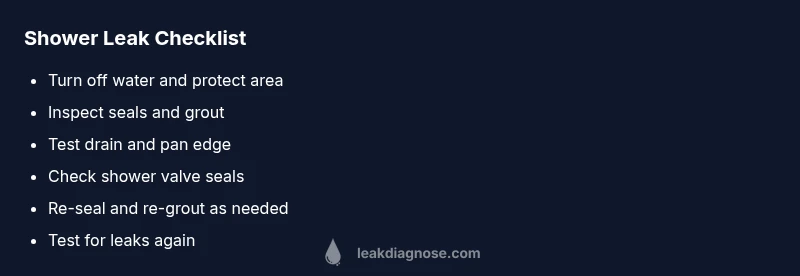
- Identify the most likely leak path before repairs.
- Seal and regrout where needed to stop water intrusion.
- Test thoroughly after repairs for leaks.
- Maintain seals to prevent future leaks.