World of Tanks Leak: An Urgent Home Leak Troubleshooting Guide
Urgent, practical guide to diagnosing and fixing household leaks quickly. Learn safe steps, essential tools, and when to call a pro. A clear, actionable plan for homeowners and DIYers.

If you’re dealing with a visible leak, start by shutting off the main water supply and inspecting for obvious drips from faucets, supply lines, or appliances. The most likely culprit is a loose connection or worn hose; tighten or replace as needed. If no drip is visible after a quick check, move to a controlled diagnostic flow to pinpoint the leak before proceeding.
Understanding the world of tanks leak in Home Plumbing
The phrase world of tanks leak may bring to mind dramatic headlines, but most home leaks are much more routine—and far less dramatic. The essence of effective leak troubleshooting is a calm, methodical approach that minimizes water waste and potential damage. In this guide, you’ll see how to translate that mindset into practical, step-by-step actions you can take today. By integrating a structured diagnostic mindset with safe DIY fixes, you’ll reduce the risk of burst pipes, mold growth, and expensive repairs. The world of tanks leak concept is a useful mnemonic for recognizing that leaks come in varied scales and contexts, yet the same underlying principles apply: identify, isolate, fix, and verify.
Common Sources of Household Leaks
Leaks don’t always announce themselves with a fountain. They often hide in plain sight behind cabinets, under sinks, or along appliance hoses. The most common culprits include dripping faucets, worn toilet flappers, loose supply lines to sinks or dishwashers, and appliance connections (washing machines and refrigerators with water dispensers). Aging rubber seals, corroded copper joints, and damaged pipes near basements or crawl spaces are frequent trouble spots. When you’re troubleshooting, start with the simplest sources first (like a dripping faucet) and then move to less obvious locations. Regular checks can catch shifts in moisture long before they become costly problems. The keyword world of tanks leak will rarely relate to real homes, but the mindset of tracing the path of a leak remains the same: follow the moisture trail.
Safe, Practical Tools and Setup
Before you touch anything, gather the basics: a flashlight, a dry cloth, a bucket, towels, an adjustable wrench, and thread seal tape. Wear gloves and safety glasses if you’re handling unshielded pipes. Set up a dry workspace around the suspected area to catch drips and keep electrical outlets protected—water and electricity can be a deadly mix. If you’re diagnosing under a sink, consider placing a small towel to absorb any errant moisture. For more precise detection, you can use dry-out methods like paper towels or tissue to trace the source, or dye testing for clear dishwasher lines. Remember, in the world of tanks leak or any household leak, a methodical, safety-first approach wins every time.
Diagnostic Flow: Symptom to Diagnosis
Begin with a clear symptom: “Where is the water coming from?” Common symptoms include damp cabinets, water pooling on the floor, or a persistent damp smell. From there, categorize likely causes: a) fixture leaks (high likelihood); b) appliance connections (medium likelihood); c) plumbing joints or pipes (variable likelihood). To narrow down, perform simple tests: inspect hose clamps, tighten visible connections, run water and observe from multiple angles, and use tissue to locate seepage paths. If you suspect hidden leaks, look for unexplained rises in water bill or unseasonal dampness. Each symptom guides you toward a specific fix without resorting to invasive or risky procedures.
Step-by-Step Fixes You Can Try (Most Common Cause)
Step-by-step fixes below target the most frequent leak sources first. Start with the easiest, safest options and escalate only as needed. Always shut off water before touching any fittings, and never use excessive force on pipes.
Prevention and Maintenance to Avoid Future Leaks
Prevention is cheaper than repair. Schedule regular checks on faucet aerators, supply lines, and appliance connections. Replacing worn washers, updating old hoses, and keeping drain traps clean can dramatically reduce leak risk. Insulate exposed pipes to avoid freezing damage in winter, which is a common source of sudden leaks in colder climates. Maintain a simple maintenance log—note dates of hose replacements, fixture reseals, and any odd water usage patterns. A proactive mindset keeps the world of tanks leak fears minimal and your home safe.
When to Call a Pro: Safety, Limits, and Right Timing
Not all leaks are DIY-friendly. If you encounter a leak behind walls, under concrete slabs, or if you smell gas or see discoloration around outlets, evacuate and contact a licensed professional immediately. Structural leaks or sewage-related issues require specialized equipment and safety protocols. If you’re unsure about the severity or feel unsure about a fix, consult a pro. Getting a professional assessment early can prevent bigger problems and save money in the long run. The world of tanks leak troubleshooting mindset still applies—it’s about knowing when to escalate and how to document the issue for quick resolution.
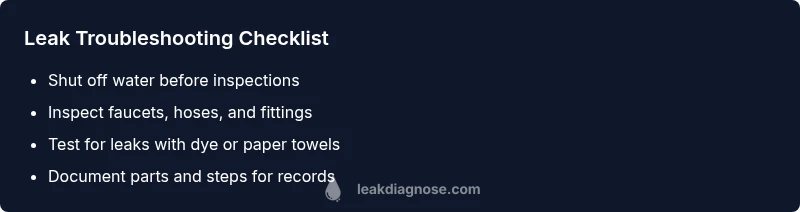
Quick Troubleshooting Checklist (Visual Guide)
- Check visible faucets and supply lines for drips.
- Inspect under-sink areas and appliance connections.
- Look for damp areas on walls or ceilings; note location.
- Run water to test fixtures and observe drainage paths.
- Seal small leaks with appropriate tape or plumbers’ tape if you know what you’re doing.
- Document with photos and rate leak severity to share with a pro.
Safe Cleanup and Documentation
After identifying a leak, clean the affected area to prevent mold and damage. Use towels and a bucket to collect dripping water, then dry the area thoroughly. Take multiple photos from different angles for your records and insurance. Keeping a log of the fix, parts used, and time spent helps you plan for future maintenance and cost estimates. Even small leaks can escalate quickly if ignored—address them promptly to protect your home and health.
Steps
Estimated time: 45-75 minutes
- 1
Shut off the water and power if needed
Locate the main shut-off valve and turn it clockwise until it stops. If the leak is near an electrical outlet or appliance, power off at the breaker before inspecting. This prevents electric shock and further damage while you assess.
Tip: Label the shut-off valve so you or a guest can find it quickly in an emergency. - 2
Identify the leak source safely
Check obvious culprits first: faucet connections, supply lines, and appliance hoses. Look behind appliances and inside cabinets where moisture tends to travel. Use tissue or dye tests to confirm seepage paths.
Tip: Keep a bucket ready to catch drips as you inspect. - 3
Choose the right repair approach
If a hose or fitting is loose, tightening or replacing it is usually enough. For fixtures with worn seals, replace gaskets or washers. If you see roding or corrosion, plan a more thorough repair or replacement.
Tip: Avoid over-tightening; it can damage threads or crush seals. - 4
Execute the fix with care
Install new parts as per manufacturer instructions. Use plumber’s tape on threaded connections and test gently with water on low pressure. Avoid using power tools near water sources.
Tip: Keep tools organized and dry to prevent slips. - 5
Test for leaks and clean up
Restore water supply and observe the repaired area. Check the prior zones for any drips over a 10–15 minute period. Wipe up moisture and dry surrounding surfaces to prevent mold.
Tip: Take photos of the repaired joints for records. - 6
Document results and plan maintenance
Note what was fixed, part numbers, and date. Schedule routine inspections every 6–12 months and replace aging hoses every 5–7 years to reduce future leaks.
Tip: Set reminders to check hose integrity and seals.
Diagnosis: Visible water leak near fixtures or appliances
Possible Causes
- highLoose fittings or connections
- mediumDamaged hose or valve on an appliance
- lowCracked pipe or worn gasket at a fixture
Fixes
- easyTighten accessible fittings with a wrench after shutting off water; replace worn washers if present
- easyReplace damaged appliance hose or valve and reseal connections
- mediumReplace faulty gasket or seal at the suspected fixture; apply thread seal tape if appropriate
Questions & Answers
What are the most common signs of a home water leak?
Watch for damp spots, dripping sounds, low water pressure, and sudden increases in the water bill. These signs often indicate leaks behind walls or under fixtures. Start with visible connections and appliances, then check hidden areas.
Look for damp spots or dripping sounds around fixtures and appliances, and watch your water bill for unusual increases.
How long does a typical leak repair take?
Most small leaks can be fixed in under a couple of hours, including parts replacement and testing. Larger or hidden leaks may require more time and possibly professional service.
Most small leaks take a few hours to fix, but bigger leaks may take longer or need a pro.
Is a small drip always urgent?
Even small drips waste water and can lead to bigger problems over time, including mold and structural damage. Address them promptly to minimize damage and costs.
Even small drips matter—fix them soon to prevent bigger problems.
When should I call a plumber vs DIY?
DIY is fine for simple leaks at exposed fittings. If the leak is behind walls, involves gas, or after basic fixes the leak persists, call a licensed plumber. Complex pipe work or pressure issues require professional skills.
DIY is okay for simple fixes; otherwise, call a professional.
Can I prevent leaks with maintenance?
Yes. Regularly inspect hoses and fittings, replace aging components, and keep a maintenance schedule. Improves longevity and reduces emergency repairs.
Regular checks and replacements prevent many leaks.
What tools should I have for a DIY leak repair?
A basic toolkit with adjustable wrench, pliers, seal tape, a bucket, towels, and a flashlight covers most common leak fixes. For appliances, keep replacement hoses and clamps on hand.
Keep a basic tool kit and spare hoses ready for DIY fixes.
Watch Video
Main Points
- Shut off water before inspection
- Prioritize simple fixes first (loose fittings, hoses)
- Know when to escalate to a pro
- Document fixes for future maintenance
- Regular checks prevent big leaks