Urgent Guide to Detecting and Fixing Household Leaks
Learn fast, reliable steps to identify and repair household leaks. This guide covers common sources, safety tips, and prevention to protect your home from water damage.

Most leaks originate from simple, visible points like faucets, hoses, or toilet connections. Quick fix: tighten accessible fittings, replace worn washers, and shut off the main water supply if you suspect a hidden leak. Use a dye test to pinpoint the source. If that fails, follow the diagnostic flow below.
Why Leaks Happen in Homes
Water leaks in typical homes come from fixtures, joints, and concealed piping. A small drip may seem harmless, but it signals escaped water and growing damage. In a curious twist of search terms, some homeowners have even looked up 'lego one piece leak' while troubleshooting, illustrating how people connect unexpected leaks to everyday objects. The underlying principle remains the same: moisture finds a path, then corrodes, breeds mold, or damages flooring. Common culprits include worn washers, loose hose clamps, cracked seals, and corrosion at soldered joints. Seasonal temperature changes can stress pipes, causing micro-fissures that only appear under pressure. If you notice damp spots on ceilings, walls, or carpets, treat it as a real leak until proven otherwise. A systematic approach—confirm the source, shut off water, and document evidence—will save you time and money. Keep a simple log of dates, sounds, and affected areas to help a plumber or insurance adjuster.
Understanding Your Water Footprint
Household water use fluctuates with seasons and lifestyle. A rising water bill or sudden dampness often signals a leak that requires immediate attention. Start by tracking water usage via your smart meter or monthly bill, then compare to typical patterns for your home. Even a small leak can waste hundreds of gallons annually and cause hidden damage over time. When you investigate a potential leak, look beyond obvious drips: hidden pipes in basements, behind cabinets, and under floors often escape visual detection. By mapping the water footprint and isolating the source, you can decide whether to DIY a quick fix or call a professional. In this context, the exact search phrase lego one piece leak might pop up from curious readers; treat it as a reminder that the mechanics of leaks are consistent across contexts, whether you’re fixing a kitchen faucet or diagnosing moisture behind drywall.
The Diagnostic Mindset: Step-by-Step Flow
Adopt a methodical mindset when leaks appear. Start with the simplest checks and escalate only as needed. Your flow should begin with confirming the symptom, then listing likely causes, and finally applying targeted fixes. This approach minimizes guesswork and accelerates resolution. Use a steady, repeatable process: observe, isolate, test, confirm, repair. Document every finding to help you compare later or share with a plumber. Remember that a tiny, slow drip may be a larger concealed leak, so treat uncertain signals as potential problems. If you search for 'lego one piece leak' you’re seeing how the same diagnostic logic applies to a broad range of moisture questions, from household plumbing to unexpected leaks in toy storage areas.
Quick Checks You Can Do Right Now
Before you dismantle walls, perform these fast checks. Inspect all exposed connections for drips or moisture: faucet supply lines, sink trap, dishwasher hose, washing machine inlet and outlet, and toilet supply. Tighten loose fittings by hand, then snug with a wrench—careful not to over-tighten, which can damage seals. Check under sinks for damp wood or mold; look at ceilings for brown water stains or soft spots. If you have a running clock or meter, watch for movement after a short period; a rising meter implies an active leak somewhere unseen. For toilets, do a simple dye test by adding a drop of food coloring in the tank and watching the bowl; if color appears without flushing, you’ve identified a leak. If any fix requires tools you don’t have, postpone further steps and call a pro.
The Diagnostic Flow: Symptom to Solution
Symptom: Damp spots, moldy smell, or sudden jump in water usage. Diagnosis: Check for dripping fixtures, supply lines, and hidden pipes; isolate sections to narrow down the source. Solution: For visible leaks, replace washers or tighten fittings; for hidden leaks, use dye tests and moisture meters; if a concealed leak is suspected, hire a licensed plumber to avoid structural damage. Re-test after each fix to confirm success. If the symptom persists, repeat the diagnostic loop or escalate to professional help. This flow keeps you focused and reduces wasted effort when lego one piece leak searches pop up online as a distraction.
Step-by-Step: Fix for the Most Common Cause
- Turn off the water supply to the affected area to prevent further damage. 2) Inspect the fixture or appliance connection; check hoses, clamps, and washers. 3) Replace worn washers or cracked gaskets. 4) Reconnect everything snugly but avoid overtightening. 5) Restore water supply and watch for signs of further leakage over 24 hours. 6) If the leak returns or is not clearly localized, contact a licensed plumber. Tip: Keep spare washers and basic tools on hand for quick DIY fixes.
Safety, Warnings, and When to Call a Pro
Water leaks can cause structural damage, mold growth, and electrical hazards. Always shut off power to affected areas when water is present and avoid using electrical outlets near damp surfaces. Wear gloves and eye protection when inspecting plumbing. If you discover a suspected concealed leak behind walls or floors, or if you notice cracking or bowing in walls, floors, or ceilings, stop and call a pro. Do not puncture walls to search blindly. Avoid using bleach or harsh chemicals without ventilation; these can irritate skin and lungs and damage surfaces. In all cases, when in doubt, consult a licensed plumber or building contractor; professional evaluation can prevent costly mistakes.
Prevention Tips to Stop Leaks Before They Start
Regular maintenance is the best shield against leaks. Schedule annual inspections of piping in basements and attics; replace aging hoses on appliances every 5-7 years; install water-softening or filtration if mineral buildup is a recurring issue; protect exterior pipes from freezing; install leak-detection devices near appliances and basements to alert you early; and fix small drips immediately rather than waiting for a dramatic failure. Document your home’s plumbing layout so future DIYs are faster and safer. Consistent vigilance now reduces the risk of lego one piece leak headlines later.
Real-World Examples In Plain Language
Case A: A homeowner notices a damp patch under the kitchen sink. Quick checks reveal a loose faucet supply line; tightening stops the drip and prevents further damage. Case B: A bathroom toilet shows a subtle leak from the tank gasket. A simple dye test confirms the source; replacing the gasket resolves the issue. Case C: A family experiences a rising water bill; after shut-off testing, a concealed leak behind the laundry area is found; a licensed plumber fixes the pipe joint. Each example demonstrates the same core process: observe, isolate, test, repair. The lego one piece leak phrase can pop up in searches, but the actionable steps stay the same: start simple and escalate as needed.
Steps
Estimated time: 60-90 minutes
- 1
Identify the likely source
Scan all areas for dampness; listen for running water; note signs near fixtures and appliances. Mark suspicious spots with tape to compare over time.
Tip: Document every spot with a photo and date. - 2
Shut off water to the affected zone
If you suspect a concealed leak, immediately shut off the main valve to limit damage. If it’s isolated to a single fixture, shut that fixture’s supply valve first.
Tip: Label the shut-off valve near the main if you’ll need it again quickly. - 3
Inspect exposed connections
Check hoses, clamps, and supply lines for drips. Tighten fittings gently and replace worn washers as needed. Look under sinks for pooled water or wood damage.
Tip: Use a flashlight and paper towels to reveal slow drips you might miss. - 4
Use a dye test for toilets and drains
Add food coloring to the toilet tank and watch the bowl for color; for drains, pour a dye solution and check for color downstream. A positive test pinpoints the leak.
Tip: Run the toilet for a few minutes after dyeing to ensure color travels. - 5
Check for hidden leaks with moisture tools
Use a moisture meter or infrared camera to scan walls, ceilings, and floors for hidden moisture. Persistent cold spots may indicate concealed leaks.
Tip: Record readings and compare over a 24-hour period to confirm persistence. - 6
Decide on repair strategy
For visible leaks, replace seals or hoses. For concealed leaks, a professional evaluation is safer to prevent structural damage.
Tip: If in doubt, opt for professional help early to avoid bigger costs.
Diagnosis: Visible water damage or rising water bill
Possible Causes
- highHidden pipe leak behind walls
- highLeaky faucet/toilet connection
- lowCondensation or HVAC drain issues
Fixes
- easyCheck exposed connections and fixtures; tighten or replace washers as needed
- mediumPerform a dye test or moisture measurement to locate concealed leaks
- hardEngage a licensed plumber for concealed leaks or structural damage
Questions & Answers
What is the quickest sign of a leak?
Visible damp spots, an unexplained increase in water bills, or sounds of running water are typical quick signs.
Look for damp spots or a higher water bill to spot leaks quickly.
Can I fix a leak myself?
For simple leaks like a loose faucet or hose, yes. For concealed or complex leaks, or if electrical is involved, hire a licensed plumber.
Yes for simple leaks; otherwise, hire a professional.
How do I find a leak behind a wall?
Use a moisture meter or infrared camera to detect moisture behind walls. Look for cold spots, warped panels, or musty odors.
Use moisture tools and signs like dampness or smells to locate hidden leaks.
When should I call a plumber?
If you suspect a concealed leak, if water damage worsens after fixes, or if you lack the proper tools or confidence to safely repair.
Call a plumber if the leak is concealed or damage continues.
What safety precautions should I take?
Shut off power and water before inspection. Wear gloves and eye protection, and avoid electrical exposure near water.
Turn off power and water, wear PPE, and avoid electrical hazards.
Watch Video
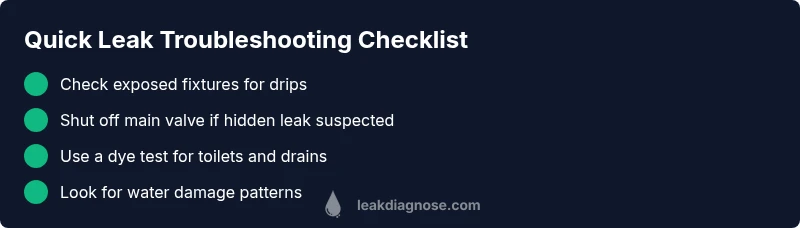
Main Points
- Start with visible fixtures before opening walls
- Use a dye test to locate many common leaks
- Shut off water to isolate the problem
- Call a pro for hidden or complex leaks
- Prevent future leaks with regular maintenance