Comprehensive Home Leak Troubleshooting Guide for 2026
Learn how to identify, diagnose, and fix common household leaks safely with clear steps, safety tips, and prevention strategies from Leak Diagnosis. Urgent guidance to stop damage and save water.

Most residential leaks begin with a hidden pipe or fitting failure. The quickest fix is to shut off the water, inspect obvious fixtures, and apply a temporary seal if a safe, visible leak is found. This guide from Leak Diagnosis walks you through a practical, safety-first troubleshooting flow to identify the source, stop the damage, and plan the right repair.
Understanding Residential Leaks and Why the Term 'war thunder leak' Sometimes Pops Up in Online Forums
Residential leaks are a daily risk that can escalate quickly if not addressed. The term 'war thunder leak' may appear in gaming or meme communities, but real home leaks follow predictable patterns. According to Leak Diagnosis, the most common leaks start small—dripping fittings, a slow-capillary path behind walls, or a hose connection that slowly destabilizes. In 2026, homeowners should differentiate between obvious drips and hidden moisture, since hidden leaks can cause wood rot, mold growth, and inflated utility bills. Begin by noting symptoms: damp patches, musty odors, stained ceilings, warped baseboards, or an abrupt rise in water usage. Use a moisture meter on suspect walls and floors, and compare readings with your main water meter. Check visible fixtures: taps, shower hoses, toilet tanks, and appliance hoses. Even tiny changes in water bill can indicate a leak somewhere, sometimes behind paneling or under flooring. The phrase 'war thunder leak' shows up in search results, but it is not a substitute for a real-world leak. Use safe, methodical approaches: conduct visual scans, perform dye tests in toilets and sinks, and employ listening devices if needed. When risk is high, prioritize safety: shut off electricity if water contacts outlets, and never use open flames around gas lines. Document findings, dry surfaces, and prepare for repairs with owner’s manuals and product labels.
Dissecting the Search Term and Real-World Relevance
If you’ve searched for something like 'war thunder leak' and landed here, you’re not alone. Online chatter can be loud, but your home leak work benefits from calm, data-driven steps. Start with a dry baseline: record today’s water meter reading, then recheck after a short period with no water use. A rising baseline is a telltale sign of a hidden leak. Name the area: attic, basement, crawlspace, or dry-walled room where moisture shows up. This helps you target your inspection without tearing open walls unnecessarily. Remember that timing matters: leaks behind walls often show up after seasons of pressure changes or freezing cycles, which weaken joints and seals. Throughout the process, keep safety front and center: if you smell gas, hear hissing near appliances, or see corroded fittings, evacuate and contact the utility or a licensed pro immediately. Collect measurements and photos so you can communicate clearly with a contractor if needed. With careful tracking, you’ll move from symptom recognition to an actionable plan rather than guesswork.
What You’ll Learn in This Guide
- How to spot the signs of both obvious and hidden leaks.
- A practical diagnostic flow to isolate the leak source.
- Step-by-step fixes you can perform safely before calling a pro.
- How to prevent future leaks through maintenance and mindful usage.
- When it’s time to call a licensed plumber to complete repairs.
Key Safety Considerations for Diy Leak Work
Handling leaks safely protects you and your home. Always switch off the main water supply before attempting any repair that touches pipes or fixtures. If the leak involves gas lines, electrical wiring near wet areas, or uncertain pipe materials, halt work and call a licensed plumber. Keep kids and pets away from the work area, and use protective gloves and eye protection when handling tools or cleaning solutions. Never use forbidden shortcuts like duct tape for permanent repairs on active leaks. Documentation is your ally: track what you did, what you found, and what parts you used. This not only speeds up professional work but also helps you evaluate the risk of recurring issues.
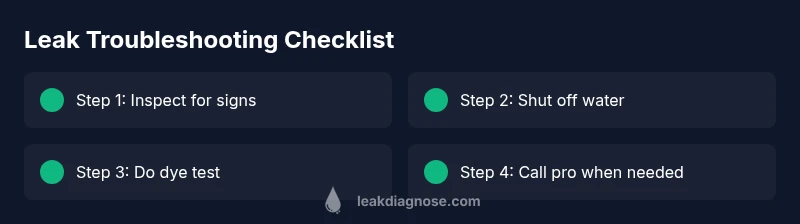
Steps
Estimated time: 30-60 minutes
- 1
Identify symptoms and note areas
Survey the home for damp spots, musty odors, and unusually high water usage. Mark spots on walls, ceilings, and floors with tape or chalk; photograph for reference.
Tip: Start with the area most affected by the water first; you’ll likely find the source near it. - 2
Shut off water supply safely
Turn off the main water valve to stop further damage. If the leak is localized, shut off the valve closest to the area to minimize disruption.
Tip: If you need to move furniture, do so before the area gets damp to avoid water damage. - 3
Check fixtures and exposed piping
Inspect toilets, sinks, hoses, and exposed pipes for drips or wetness. Use a flashlight and mirror to inspect behind panels if accessible.
Tip: Tighten loose fittings gently; overtightening can crack seals. - 4
Perform dye tests where appropriate
Add a few drops of food coloring to toilet tanks or clean water lines to see if color appears in the bowl or on fixtures, confirming leaks.
Tip: Use non-toxic dye and observe for several minutes before concluding. - 5
Seal minor leaks and plan repairs
Apply temporary sealant or plumber’s tape to small, accessible leaks. Document exact location and plan a permanent repair with a professional if needed.
Tip: Temporary fixes are not substitutes for permanent repairs. - 6
Test and monitor after repair
Turn water back on and observe for a short period. Check for moisture in previously affected areas; re-test if you suspect remaining leaks.
Tip: Keep a log of meter readings for two weeks to confirm stability.
Diagnosis: Visible damp patches, high water bill, or sounds of running water with fixtures off
Possible Causes
- highPiping leak inside walls or under flooring
- mediumToilet flapper or fill valve leak
- lowFixture supply line leak (faucet, dishwasher, washing machine)
Fixes
- easyShut off the main water supply to stop damage, then use dye tests or meter checks to locate the source; if found, proceed with a safe seal or call a professional
- mediumTighten or replace suspected fixtures and fittings; use plumber's tape on threaded joints and non-toxic sealant on small gaps
- hardIf the leak is behind walls or under slabs, avoid destructive testing; schedule professional assessment and, if needed, structural drying after repair
Questions & Answers
What is the first thing I should do when I notice a leak?
The first step is to shut off the main water supply to prevent further damage. Then identify the leak area by checking visible fixtures and watching your water meter for changes.
Shut off your water supply and locate the leak area by checking fixtures and watching your meter to see if it keeps running.
Can I use sealants or tape for a leaking pipe joint?
Temporary sealants or plumbers tape can stop small leaks temporarily, but they are not permanent repairs. Plan a proper repair or call a professional for joint replacement or pipe work.
You can use temporary sealants for a quick fix, but you should arrange a proper repair as soon as possible.
How do I know if a leak is inside a wall?
Moisture readings on wall surfaces, musty odors, paint peeling, or staining on drywall can indicate a hidden leak inside a wall. Use a moisture meter and consider infrared imaging for confirmation.
Moisture on walls, musty smell, or damp patches often indicate a hidden wall leak; a moisture meter helps confirm it.
When should I call a professional?
Call a licensed plumber if the source is inaccessible, involves gas lines, major piping, or you cannot safely shut off water. They can perform a permanent repair, confirm the leak’s extent, and dry the space properly.
Call a professional if the leak is in gas lines, behind walls you can't access, or if you can't safely manage it yourself.
How often should I inspect for leaks?
Inspect for leaks at least twice a year, and after major temperature changes or heavy rain. Regular checks of toilets, hoses, and under sinks help catch problems early.
Do a twice-yearly check and after big temperature swings to catch leaks early.
What’s the best way to prevent leaks long-term?
Maintain fixtures, replace aging pipes, install water-shutoff valves at key points, and monitor your water meter for anomalies. Regular maintenance reduces the risk of major leaks and water damage.
Regular maintenance and keeping shutoff valves accessible are your best defenses against leaks.
Main Points
- Start with a safety-first mindset and shut off water when needed
- Differentiate obvious leaks from hidden moisture with meters and tests
- Follow a methodical diagnostic flow to locate the source
- Use temporary fixes only as a stopgap; plan permanent repairs with a pro
- Prevent future leaks with maintenance and mindful usage