Will a Slow Leak Seal Itself? A Practical DIY Guide
Learn whether slow leaks seal themselves, how to diagnose sources, safe immediate steps, and when to call a pro. Practical tips, step-by-step fixes, and prevention to protect your home from water damage.

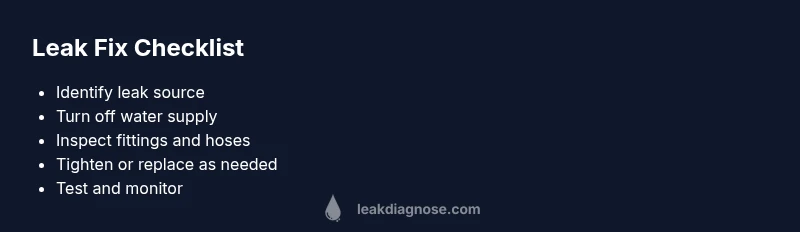
Most slow leaks will not seal themselves. Quick fixes only delay the inevitable; the best approach is locating the source and repairing it. Start by turning off the main water supply, then inspect nearby connections for drips. If you can’t safely stop the leak or pinpoint the source, call a licensed plumber right away to prevent damage.
Understanding the question: will a slow leak seal itself?
For homeowners wondering will a slow leak seal itself, the answer is often no. Leaks happen when a joint, valve, or appliance wears and creates an opening that water can escape through. A true seal usually requires repairing or replacing the faulty component rather than waiting for it to close up on its own. In this guide, produced by Leak Diagnosis for homeowners and DIY enthusiasts, we’ll cover what to check, how to diagnose, and when to call a pro. Expect a practical, safety-conscious approach as you work toward a durable fix.
According to Leak Diagnosis, acting quickly reduces the risk of water damage and costly repairs. This article combines clear explanations with actionable steps you can take now, plus when to escalate to professional help.
Common sources of slow leaks
Slow leaks can stem from a few repeated culprits across homes:
- Worn faucet washers and cartridges, which permit tiny drips even when the handle is off
- Loose or corroded supply-line connections at sinks, toilets, and appliances
- Cracked hoses on dishwashers, washing machines, or ice-makers
- Damaged or degraded O-rings and seals around valves and fixtures
- Toilet flappers that don’t seal properly after flushing
- Hidden leaks behind walls or under flooring where damage hides the evidence
Recognizing these sources helps you target fixes quickly and reduce the risk of water damage.
Immediate safety steps you can take today
When you first notice a leak, safety comes first. Turn off the main water supply to stop the flow. If there is an electrical appliance nearby or water near outlets, switch off the corresponding circuit or unplug devices as needed. Place towels or a basin to catch drips and prevent water damage. Document the situation with photos for your records and for a professional if needed.
Diagnostic flow overview
This section outlines a practical diagnostic flow to help you narrow down the cause without jumping to conclusions. Start with the symptom (where is the drip coming from?) then consider the most likely causes in order of probability. Use the following workflow as a quick-reference guide: 1) fixture-based drips, 2) supply lines, 3) appliance hoses, 4) hidden leaks behind walls. For each step, perform a simple check, then decide whether to tighten, replace, or call a pro.
Step-by-step fix for the most common cause: loose connection at a shut-off valve
- Shut off the main water supply and verify there is no pressure in the line. 2. Inspect the shut-off valve and nearby fittings for looseness or corrosion. 3. Tighten fittings carefully with the appropriate wrench, taking care not to strip threads. 4. Re-test for leaks by slowly restoring water pressure and observing the joint. 5. If the drip persists after tightening, replace the valve or connector.
Tip: Do not over-tighten, as this can crack fittings and worsen leaks.
When to replace vs. repair: evaluating cost and risk
Many slow leaks arise from worn components that are near the end of their service life. If fittings or hoses show cracking, wear, or corrosion, replacement is often more reliable than repeated repairs. Weigh the cost of parts and labor against potential water damage, mold growth, and higher utility bills. In some cases, replacing an appliance or valve bundle yields a safer, longer-lasting fix.
Prevention tips to avoid future slow leaks
- Schedule seasonal inspections of faucets, hoses, and toilets
- Use a moisture detector near appliances and under sinks to catch hidden leaks early
- Replace rubber hoses every 5–10 years and upgrade to stainless steel braided lines where possible
- Ensure fittings are properly tightened during installation and after service calls
- Address small drips promptly to prevent them from becoming larger issues
Quick maintenance routines for homeowners
- Monthly visual checks of under-sink cabinets and toilet bases
- Run water through appliances regularly and inspect hoses for wear
- Replace worn washers and seals as part of routine maintenance
- Keep a simple leak log to track recurring symptoms and improve diagnostics
- Know your shut-off locations and how to access them quickly in an emergency
Steps
Estimated time: 1-2 hours
- 1
Shut off water and safety check
Turn off the main water supply and, if needed, shut off power to nearby appliances. Confirm there is no pressure building in the line by gently opening a faucet at a high point to relieve any residual pressure.
Tip: Locate your main shut-off valve before an emergency to save time. - 2
Inspect for obvious drips
Look at faucets, hoses, and visible fittings for signs of dripping. If you can see a loose connection, gently tighten by hand then with a wrench—careful not to over-torque.
Tip: Use a cloth to wipe the area after tightening so you can see if there is still a leak. - 3
Check appliance connections
Inspect dishwasher, washing machine, and ice-maker hoses for cracks or bulges. Replace damaged hoses with stainless-steel braided lines where feasible.
Tip: Don’t reuse damaged hoses; replacement is safer than patching. - 4
Test the fix
Turn the water back on slowly and monitor the previously affected area for several minutes. If there’s no drip, run the appliance briefly to test under pressure.
Tip: Take photos of the area after testing for your records. - 5
Know when to escalate
If the leak continues after these steps, or if you suspect hidden leaks behind walls, stop and call a professional. A licensed plumber can locate concealed leaks safely.
Tip: Temporary fixes are not substitutes for professional repair.
Diagnosis: Persistent drip at a fixture or appliance
Possible Causes
- highWorn washer or cartridge
- highLoose or corroded supply-line connection
- mediumDamaged hose or valve
- lowHidden leak behind wall or floor
Fixes
- easyTighten or replace the affected connection or valve
- mediumReplace worn washers, cartridges, or hoses
- hardCall a licensed plumber for concealed leaks or hard-to-access areas
Questions & Answers
Will a slow leak seal itself?
No. Most slow leaks won’t seal themselves; you need to locate and repair the source.
No—the leak usually won’t seal by itself; you should locate the source and fix it.
What are common causes of a slow leak?
Worn washers, loose connections, cracked hoses, or degraded seals are typical sources.
Common causes include worn washers, loose fittings, and damaged hoses.
When should I call a plumber?
Call a plumber if you can’t locate the leak, can’t safely stop it, or the leak behind walls.
If you can’t locate or safely stop the leak, call a licensed plumber.
Can leak sealants work as a temporary fix?
Sealants may temporarily slow a leak, but they’re not a long-term fix and aren’t suitable for all leak types.
Sealants can be temporary, but they aren’t a substitute for proper repair across most leaks.
How can I prevent future leaks?
Regular maintenance, tightening fittings, and replacing worn hoses reduce future leak risk.
Regular checks and timely hose replacement help prevent leaks.
Is it safe to DIY a leak behind a wall?
Leaks behind walls can be dangerous and require specialized tools; assess safety and call a pro if unsure.
Leaking behind walls can hide hazards; it’s safer to call a pro when unsure.
Watch Video
Main Points
- Shut off water promptly at the first sign of a leak
- Identify the source before attempting repairs
- Call a pro if you can’t locate the leak safely
- Prevention reduces future leak risk
- Temporary fixes are not a substitute for proper repair