Pool Leak Troubleshooting: Quick Fixes & Prevention
Learn how to identify, diagnose, and fix a pool leak safely. This guide offers quick checks, step-by-step fixes, and safety reminders from Leak Diagnosis to help you save water and protect your pool.

Pool leaks are most often caused by worn fittings, cracked plumbing, or equipment failures. According to Leak Diagnosis, start with simple checks and safe tests before digging or draining. This quick, 2–3 sentence guide helps you identify the likely cause and begin practical fixes you can do today, while planning professional help if needed.
Why a Pool Leak Happens: Common Causes
Pool leaks are rarely mysterious. Most residential leaks stem from wear and tear on fittings, piping joints, or equipment components, rather than dramatic structural failures. In many cases, a simple tighten or replacement of a seal stops the loss in minutes. But it's important to differentiate a true leak from normal evaporation or splash-out, especially with hot summer weather or windy days. According to Leak Diagnosis, the most frequent culprits include worn seal rings around pumps and filters, loose or cracked plumbing connections, and gaps in vinyl liners that have become brittle over time. Skimmers, return lines, and light niches can develop hairline cracks that allow slow seepage. Debris buildup can mask early leaks by creating false impressions of drowning or pooling. Regular maintenance—checking the equipment pad, testing pressure, and observing the pool’s water level over 24–72 hours—helps catch problems before they escalate. Early detection saves water, reduces chemical waste, and prevents expensive repairs later on.
Reading Signs: How to Detect a Leak
Detecting a pool leak begins with careful observation. A drop in water level that isn’t explained by weather or usage should trigger a closer look. Check the pool deck and surrounding soil for damp patches, which may indicate underground lines. Use the bucket test: place a marked bucket inside the pool and compare water loss in the bucket to the pool level over 24 hours. If the pool drops more than the bucket, you’re likely dealing with a leak. Look for wet spots at pool equipment, near the pump, filter, and heater; inspect vinyl liner seams for cracking or separation; and examine the skimmer and main drain areas for moisture and corrosion. If you have a spa or attached features, leaks can travel and mimic issues elsewhere, so track water loss over time. The Leak Diagnosis team notes that early signs often appear as damp soil near the foundation or a persistent puddle on the equipment pad.
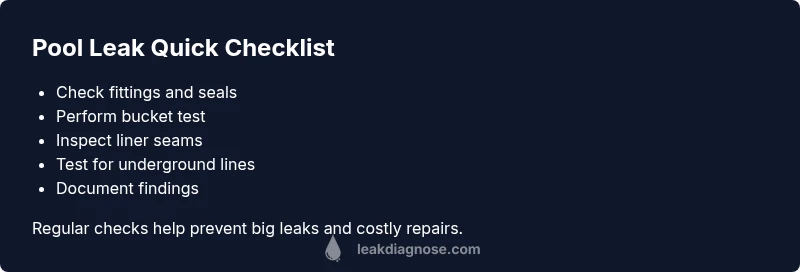
Quick On-Site Checks to Do Right Now
Start with the low-hanging fruit: turn off the pool pump and all related equipment to rule out active flow as the source of water loss. Inspect fittings at the pump, heater, filter, and valves for moisture, corrosion, or cracked seals; tighten any loose connections by following the manufacturer’s torque specs. Check the pool’s plumbing for visible cracks or damaged pipes, especially near elbows and unions. Examine the vinyl liner for punctures and look for cracks around the skimmer, lights, and return jets. Don’t forget to check for overflows from the spa or deck drains that could mislead you into thinking the pool itself is leaking. If you have a solar heating system, inspect its panels and connections for pooling or dampness. After basic checks, re-fill to normal levels if needed and monitor daily. These steps can save you time and keep you from overreacting to minor fluctuations.
Visual Inspection: Fittings, Valves, and Surfaces
This section focuses on the parts most likely to fail: gaskets, O-rings, and threaded fittings. Inspect the pump seal and hoses for any dampness or crusty mineral deposits that signal a slow leak. Check the cold-water inlet, return lines, and the hands-on connections to the filter and heater. Look for cracks around the vinyl liner seams where the structure expands and contracts with temperature. If you see salt buildup, that can indicate a leak in a chlorination system or a leaking valve. For concrete or gunite pools, check plaster joints and coping for cracks that allow water seepage behind walls. For above-ground pools, inspect the liner’s top rail and plate for tears. Document any suspect spots with photos and measurements so you can present a trackable history if a professional evaluation becomes necessary.
Diagnostic Tools You Can Use
Leaking water can be elusive; use simple tools first. The bucket test is a quick differentiator between evaporation and a leak. A simple water level gauge or marked ruler placed on the pool edge helps track depth changes over a day or two. Use a dye test at suspected joint areas by dripping a few drops of dye near seams or fittings; if dye is drawn toward a crack, you’ve likely found the source. A watchful eye on the water chemistry and evaporation rate, along with a careful water level log, gives you a reliable baseline. For underground lines, a pressure test of the piping using safe air or water pressure can reveal leaks at joints; this should be attempted only if you’re comfortable with basic plumbing and safety practices. The Leak Diagnosis guidance emphasizes documenting results and, when in doubt, consulting a professional.
Step-By-Step Fixes for the Most Common Causes
Step 1: Power down and prepare. Turn off the pool pump and any solar or auxiliary equipment, and disconnect power to avoid shocks. Gather basic tools, such as wrenches, replacement gaskets, and sealant recommended by equipment manufacturers. Step 2: Tighten and reseal fittings. Inspect all visible joints around the pump, filter, heater, and valves. Replace worn gaskets or O-rings and re-torque to the manufacturer’s specs. Step 3: Patch liner punctures. For small tears, apply a vinyl repair kit following kit instructions; avoid solvents that can weaken the lining. Step 4: Replace damaged pipes or connections. If you locate cracked or severely corroded pipes, replace the affected sections and test for leaks after each repair. Step 5: Refill and monitor. Restore water to the proper level and recheck for any new signs of leakage over the next 24–72 hours. Step 6: Schedule a professional assessment if needed. Some leaks require underground diagnostics or liner replacement that goes beyond DIY capability.
When to Call a Professional and What to Expect
If basic checks do not locate the leak, or if the source appears to be underground lines, a professional is warranted. A licensed technician can perform pressure testing, trenching if necessary, and liner or pipe repairs with appropriate safety measures. Expect a thorough assessment that includes dye tests, pressure readings, and equipment inspection. Document all findings and photos to share with the pro. The goal is to isolate the leak quickly, minimize water loss, and prevent structural damage from long-term moisture exposure. The Leak Diagnosis team emphasizes that professional help often saves money by preventing over-repairs and reducing water waste.
Prevention: Reducing Future Pool Leaks
Prevention starts with proactive maintenance and smart design choices. Regularly inspect fittings, seals, and gaskets; winterize properly to prevent freeze-thaw damage; use pool covers to reduce evaporation and debris intrusion; and schedule annual leak testing as part of routine pool care. Keep an eye on pump seals and valve integrity, and replace worn parts before they fail. A well-maintained system not only reduces leak risk but also improves energy efficiency and chemical balance. The Leak Diagnosis guidance highlights a preventive approach as the most effective long-term strategy.
Safety Essentials and Maintenance Routine
Safety is nonnegotiable when dealing with pool leaks. Always disconnect power before inspecting electrical components and wear eye protection when handling pool chemicals. Keep children and pets away from the work area, use non-slip footwear on wet surfaces, and avoid climbing on equipment pads. Maintain a simple maintenance calendar: weekly visual checks, monthly fittings inspection, quarterly liner integrity tests, and yearly professional audits. This routine minimizes serious damage and ensures you respond quickly when a leak appears.
Steps
Estimated time: 2-4 hours
- 1
Power down and prep safety
Turn off the pool pump and all electrical equipment. Lock out power to prevent shocks. Gather basic tools and replacement parts. Review manufacturer guidelines for torque specs and sealants.
Tip: Always verify the power is off at the breaker before touching any equipment. - 2
Inspect and tighten fittings
Check all visible fittings around the pump, filter, heater, and valves. Tighten loose connections to the specified torque. Replace worn O-rings or gaskets as you go.
Tip: Do not over-tighten; overtightening can crack plastic fittings and worsen leaks. - 3
Check liner and seals
Examine vinyl liner seams for cracks and look for punctures. Patch small tears with a repair kit designed for pool liners. Inspect skimmer and light niches for seal integrity.
Tip: Use a patch that matches liner material and follow cure times exactly. - 4
Test plumbing and pipes
If accessible, test fittings with water pressure or dye near suspected joints. Look for dye movement toward cracks as a sign of leakage. Document results for future reference.
Tip: Only perform pressure tests if you are comfortable with basic plumbing safety. - 5
Replace damaged components
Install new pipes, fittings, or gaskets as needed. Recheck all joints after replacement and flush lines to remove debris.
Tip: Keep spare O-rings and gaskets on hand to speed up the repair. - 6
Refill and monitor
Restore water to the proper level and monitor for 24–72 hours. Record water loss and any new signs of dampness to determine if the leak is resolved.
Tip: Take photos of the repaired areas for your maintenance log.
Diagnosis: Persistent water loss (visible water drop) or damp spots around pool equipment
Possible Causes
- highWorn or damaged O-rings/seals on pump or valves
- highCracked or loose plumbing joints
- mediumPuncture or seam failure in vinyl/plastic liner
Fixes
- easyTighten and reseal joints, replace worn seals
- mediumReplace damaged liners or cracked pipes
- hardProfessional pressure-test underground lines and repair if needed
Questions & Answers
What is the most common sign of a pool leak?
Unexplained water loss is the most common sign. Use the bucket test to verify whether evaporation or a leak is responsible.
Look for unexplained water loss and try the bucket test to verify.
How do I know if water loss is evaporation or a leak?
Compare pool water loss to a bucket test. If the pool lowers at about the same rate as the bucket, evaporation is likely. If the pool loses faster, a leak is probable.
Use the bucket test to tell evaporation from a leak.
Can I fix a pool leak myself?
Many minor leaks can be repaired by homeowners, especially fittings and liners. Underground lines or major structural issues may require a professional.
Some leaks you can fix yourself, but others need a pro.
What tools do I need to diagnose a pool leak?
A bucket, marker, basic wrenches, dye testing kit, and a level help diagnose most leaks and track progress.
You’ll want a bucket, dye, and basic tools.
When should I contact a professional?
If basic checks don’t locate the source, or you suspect underground piping or liner damage, a professional evaluation is advised.
If you can’t locate the source after basic checks, call a pro.
How can I prevent pool leaks?
Regular maintenance, proper winterization, and using quality seals and gaskets reduce leak risk and protect your pool structure.
Maintain and winterize to prevent leaks.
Watch Video
Main Points
- Begin with simple checks before complex repairs
- Use the bucket test to distinguish evaporation from leaks
- Inspect fittings, liners, and visible pipes first
- Document findings for professionals
- Prevention reduces water waste and repair costs