How to Get Rid of Oil Leak: A Safe DIY Guide
Learn practical, safe steps to locate, contain, clean, and prevent oil leaks in your home. This guide covers safety, tools, disposal, and expert tips from Leak Diagnosis.

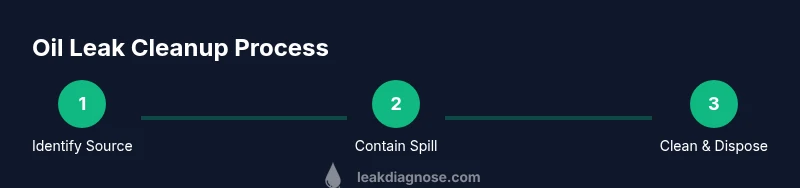
Identify the leak source, contain and clean the spill safely, and implement preventive steps to stop future leaks. For persistent or high-risk leaks, consult a professional and follow the full step-by-step guide below. This quick answer tells you what you’ll do, why each action matters, and what safety measures to follow.
What counts as an oil leak and common sources
According to Leak Diagnosis, oil leaks in homes most often originate from engines, appliances, or kitchen setups. A leak may present as dark stains, slick patches, or a persistent odor. Common sources include automotive engine oil that drips from a parked vehicle, cooking oils that spill during food prep, and lubricants used in garage door systems or small appliances. Even small drips can lead to slippery floors and stains if not addressed promptly. Identifying the source early helps you choose the safest cleanup method and prevents unnecessary repairs. This section lays the groundwork for understanding where leaks originate, so you can respond quickly and prevent long-term damage to floors, cabinets, and nearby electronics. By recognizing patterns—such as oil accumulating near a specific appliance or vehicle—you can narrow down the likely culprit and act more confidently in the next steps.
Safety first: protect yourself and your home
Safety should come before any cleanup. Petroleum-based oils can irritate skin and odors can irritate the lungs, especially in poorly ventilated spaces. Wear non-slip, chemical-resistant gloves, safety goggles, and a mask if fumes are noticeable. Ensure proper ventilation by opening windows and turning on a fan. Keep ignition sources away, and never use open flames or heat near an oil spill. If the spill involves fuel or solvents, contact your local hazardous waste program for disposal guidance. This block emphasizes avoiding risk while you manage the situation, reinforcing that your first action is to secure people and pets from exposure and to reduce fire hazards.
Identify the source: tracing the leak
Start by outlining the area where the leak is most concentrated. Look for fresh oil trails or pooled liquid with a consistent color and texture. Check hoses, gaskets, seals, and containers around the suspected source—car motors, appliances, and storage bins are common culprits. Use a flashlight and, if needed, a UV dye kit designed for oils to highlight the flow path. Mark the likely origin so you can plan containment and cleanup. A precise identification saves time and helps prevent over-cleaning or unnecessary replacement parts. This step sets the stage for effective containment and ensures you address the root cause rather than just the symptom.
Contain the spill immediately
Containment minimizes spread and protects surfaces from staining. Surround the spill with disposable absorbent pads or cat litter, working from the outside toward the center. Place a plastic sheet or tray under the spill area to catch any runoff. Collect dirty absorbents in a labeled, sealed bag or container for proper disposal later. If the spill is large, evacuate nearby occupants and contact a professional if you cannot safely contain it. Effective containment is a quick, practical measure that buys you time for thorough cleaning and prevents cross-contamination to cabinets, appliances, or carpets.
Clean up and disposal: tools, steps, and rules
After containment, scrub the area with a degreasing cleaner or dish soap and warm water. Rinse with clean water and blot dry with paper towels or clean cloths. For porous floors or concrete, repeat cleaning and allow the surface to dry completely. Do not mix cleaners with bleach or ammonia. Place all contaminated materials in sealable bags and follow your local rules for hazardous waste disposal. Keep a log of where the spill occurred and what was used to clean it for future reference. This step ensures you remove both visible residues and microscopic traces that could attract pests or cause odors, while complying with local disposal guidelines.
Preventive maintenance to reduce future leaks
Preventing leaks is easier than cleaning them. Regularly inspect seals, gaskets, and hoses on vehicles and appliances, replacing worn parts before they fail. Store oils and lubricants in closed containers on a high, ventilated shelf to prevent accidental spills. Use drip trays under machines and keep a small supply of absorbent material handy. Schedule routine maintenance checks and create a quick response plan for future spills. Consistent preventive care reduces emergency cleanup needs and extends the life of your equipment.
When to call a professional
If the leak is large, involves fuel, or you cannot safely stop the flow, call a professional plumber, mechanic, or hazardous waste specialist. Do not attempt advanced repairs if you are unsure about the source, especially around electrical wiring or gas lines. A professional can perform leak testing, pressure checks, and proper disposal of contaminated materials. Knowing when to escalate to pros protects your home from widespread damage and ensures compliance with safety and environmental regulations.
DIY fixes vs replacement parts: what you can do
Small, accessible leaks from hoses or seals may be addressed with tightening, replacement of worn gaskets, or applying manufacturer-approved sealant. Avoid jury-rig fixes that could fail suddenly. For leaks involving gas, fuel, or internal engine components, rely on trained technicians. When in doubt, replace the part rather than applying a temporary patch that could lead to a bigger leak later. This section helps you evaluate whether a repair is within your skill set or if it demands professional attention to ensure lasting results.
Authority sources
- U.S. Environmental Protection Agency (EPA): Oil spills and cleanup guidelines. https://www.epa.gov/oil-spills
- Occupational Safety and Health Administration (OSHA): Oil spill safety. https://www.osha.gov/SLTC/oilspill
- Extension services (educational resources): https://extension.psu.edu/oil-spills-cleanup
Tools & Materials
- Absorbent pads or cat litter(Enough to cover spill area; aim for 2-3 layers of material)
- Disposable gloves (chemical-resistant)(Nitrile or neoprene preferred)
- Safety goggles(Protect eyes from splashes)
- Face mask or respirator(Use if fumes are strong)
- Plastic sheeting or old towels(Contain spread and protect surfaces)
- Plastic bags and sealed container(For disposing soiled absorbents)
- Grease-cutting degreaser or dish soap(For cleaning hard surfaces)
- Bucket, scrub brush, and rags(For cleaning and drying)
- Trash can with liner(For disposal of waste)
Steps
Estimated time: 2-3 hours
- 1
Power down and secure the area
If safe to do so, turn off the source (vehicle, appliance, or equipment) and unplug electrical devices nearby. This prevents ignition and stops the flow if possible.
Tip: Ensure you are not standing in a pool of oil; back away if you sense a strong odor or have concerns about fumes. - 2
Put on PPE
Wear gloves, goggles, and a mask if fumes are present. PPE protects your skin and eyes from irritation and reduces inhalation risk.
Tip: Nitrile gloves provide good chemical resistance and dexterity for handling small items. - 3
Contain the spill
Place absorbents around the spill and build a barrier to prevent spread. Work from the outside in to corral the liquid.
Tip: Avoid creating a larger spill by sweeping materials across the floor during containment. - 4
Mark and isolate the source
Trace the stain or trail back to its origin. If you can access the leak area safely, mark the point of origin for targeted repair.
Tip: Use tape or chalk to mark the source without damaging surfaces. - 5
Clean the affected area
Apply a degreaser or dish soap and scrub the area. Rinse with water and dry thoroughly. Repeat as needed for stubborn residues.
Tip: Avoid mixing cleaners; use one cleaner at a time. - 6
Dispose of waste properly
Place used absorbents and tools in sealed bags and dispose of according to local rules for hazardous waste.
Tip: Label bags clearly to prevent mistaken disposal. - 7
Inspect for lingering leaks
Recheck the source area after cleaning to ensure the leak is stopped or reduced. If the liquid continues to flow, escalate to professional help.
Tip: Take photos of the area to document the leak for future reference. - 8
Prevent future leaks
Implement the prevention steps described above and schedule regular checks for hoses, seals, or gaskets.
Tip: Consider a drip container or tray under equipment to catch future leaks.
Questions & Answers
What counts as an oil leak in a home?
A detectable release of oil from vehicles, appliances, or storage that leaves stains or a slick. Common sources include engines, gear oil, or cooking oil spills. Even small leaks deserve prompt attention to prevent damage.
Oil leaks show as stains or drips from a vehicle or appliance; clean them promptly to prevent damage.
Is it safe to clean up oil leaks myself?
Yes for small, contained spills when you use PPE and proper cleaners. For larger leaks or fuel/oil mixtures, seek professional help.
Yes for small spills if you wear PPE and follow cleanup steps; contact a professional for bigger leaks.
What tools are essential for cleanup?
Absorbent materials, gloves, goggles, a degreaser or soap, a bucket, rags, and sealable bags for disposal. Having a plan helps you work quickly and safely.
Have absorbents, gloves, goggles, and cleaners ready for spills, then dispose properly.
When should I call a professional?
Call a professional if the spill is large, if fuel or gas lines are involved, or if the leak persists after initial cleanup. They can test and repair safely.
Call a professional if the leak is large or persistent or involves fuel or gas.
How can I prevent leaks in the future?
Regular maintenance of hoses, seals, and containers; proper storage of oils; and using drip trays or mats to catch spills.
Prevent leaks by maintaining equipment and storing oils properly.
What should I do with oil-contaminated rags?
Seal oil-contaminated rags in a metal container and follow local hazardous waste disposal rules to prevent combustion risk.
Seal oily rags in a metal container and dispose of them per local rules.
Watch Video
Main Points
- Identify the leak source and contain quickly
- Use proper PPE and avoid ignition sources
- Clean with approved degreasers and dispose properly
- Implement preventive maintenance to reduce recurrence
- Consult a professional for persistent or large leaks