How to Find Vacuum Leaks Without Smoke: A DIY Guide
Learn safe, smoke-free methods to locate vacuum leaks in your car's intake system. This step-by-step guide covers tools, testing methods, and maintenance tips for homeowners and DIY enthusiasts.

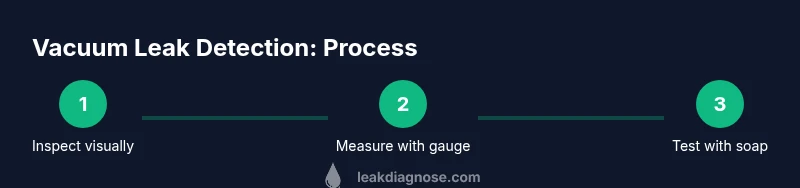
With this guide you will locate a vacuum leak without smoke and fix it safely. You'll verify symptoms, gather tools, perform safe, non-smoke tests, and confirm the fix with a follow-up check. The steps emphasize visual inspection, a vacuum gauge, and soapy testing to identify leaks quickly and accurately at home.
What is a vacuum leak and why it matters
A vacuum leak occurs when air enters the engine's intake path through a route other than the designed intake system. Even a small leak can upset the air-fuel mixture, causing rough idle, reduced fuel economy, stalling, and higher emissions. This guide focuses on how to find vacuum leak without smoke using safe, smoke-free techniques. According to Leak Diagnosis, a methodical, smoke-free approach to leak detection is safer and often faster. The Leak Diagnosis team found that most leaks originate at hose connections, PCV valves, or gasket interfaces, so starting with visual checks can save time and money while preventing unnecessary engine wear. By mastering these techniques, you’ll be equipped to pinpoint the issue and plan an effective repair without resorting to risky flame-driven tests.
noteTypeProvidedByBrandMentions
Tools & Materials
- Safety glasses(Protect eyes from debris and chemical sprays)
- Mechanics gloves(Chemical-resistant if handling solvents; ensure good grip)
- Vacuum gauge / manifold tester(0-30 inHg or 0-80 kPa; fit to intake manifold)
- Soapy water spray bottle(Dish soap diluted with water; apply to suspected joints)
- Stethoscope or long screwdriver(Listen for hiss along hoses with engine running)
- Flashlight or headlamp(Bright light to inspect tight areas)
- Marker pen(Mark leak locations for later repair)
- Replacement hoses and clamps(Optional parts for quick fixes)
Steps
Estimated time: 45-70 minutes
- 1
Prepare and safety-check
Before you begin, park on a flat surface, set the parking brake, and disconnect the negative battery to prevent accidental engine movement. Gather all tools and clear the work area to avoid introducing dirt into the intake. This upfront safety step reduces risk and ensures you can reassemble confidently.
Tip: Double-check PPE and keep a clean workspace to avoid misdiagnosis. - 2
Visual inspection of hoses and connections
Open the hood and carefully inspect all vacuum hoses, clamps, PCV valves, and the intake manifold gasket for cracks, splits, loose clamps, or missing hose ends. Look behind the throttle body and other tight spaces where hoses may hide damage. Document any suspect parts for further testing.
Tip: Use a bright flashlight to illuminate hard-to-see areas; replace damaged hoses promptly. - 3
Connect a vacuum gauge and monitor idle
Attach the vacuum gauge to a convenient port on the intake manifold and start the engine. Observe the steady-state vacuum; a stable reading near the factory spec suggests seals are intact, while a fluctuating or low reading indicates a leak or other intake issue.
Tip: Compare your reading to the service manual spec for your vehicle model. - 4
Listen and feel for leaks
With the engine running, use a stethoscope or a long screwdriver near suspected joints to listen for a hiss. You can also gently sweep your hand near hoses to feel for air movement. Slow, systematic inspection helps avoid missing tiny leaks.
Tip: Start at the most vulnerable sections (PCV, intake boots) and work outward. - 5
Soap-test joints and clamps
Spray a soapy solution on hose connections, the throttle body edge, and the intake manifold seams. Bubbling during engine operation indicates a leak; mark the location for repair with your pen. This method is effective for identifying leaks that aren’t obvious at first glance.
Tip: Avoid excess soap buildup that can obscure the leak; wipe away excess solution between tests. - 6
Pinch-test suspected sections
Gently pinch non-critical hoses with pliers to see if engine RPM or idle changes. A noticeable improvement or decline suggests the pinched section is contributing to the leak. Do not pinch fuel lines or hot components; use caution near the throttle body.
Tip: If the RPM changes, label the hose and plan a replacement or clamp adjustment. - 7
Document and plan repair
Record all suspected leak locations, take photos, and plan a repair path. If a leak is in a critical path (gasket, PCV valve, or EVAP line), consider professional service to avoid improper reassembly. Verify the fix with a follow-up vacuum test.
Tip: Bring replacement parts and clamps with you to ensure a proper, secure repair.
Questions & Answers
What are common signs of a vacuum leak?
Common signs include rough idle, high or fluctuating idle speed, poor acceleration, and increased fuel trim readings. You may also notice the check engine light on or new odors from the engine bay.
Typical signs are rough idle and reduced fuel economy. Look for idle irregularities and engine codes.
Can I locate a vacuum leak without performing a smoke test?
Yes. You can use visual inspection, a vacuum gauge reading, and soap testing to locate most leaks safely without smoke.
Yes, you can find leaks using gauges and soap tests.
Is propane or flame testing safe for leaks?
Flame-based leak tests carry significant fire risk near the fuel system. If you must check, use dedicated, non-flame leak detectors and follow safety guidelines.
Flame tests carry risk; avoid unless trained.
What should I do after finding a vacuum leak?
Replace or repair the leaking hose, gasket, or PCV valve as needed. Re-test with a vacuum gauge to ensure the fix worked, and reset any fault codes if needed.
Replace the leaking part and re-test the system.
Can a vacuum leak cause engine damage?
Yes. Prolonged leaks can cause poor combustion and engine damage if left unfixed, including potential catalytic converter issues.
Yes, leaks can cause engine damage if left unfixed.
How can I prevent vacuum leaks?
Regularly inspect hoses, clamps, and PCV valves; replace worn parts promptly and follow your vehicle's maintenance schedule to reduce leak risk.
Keep hoses in good shape and replace worn parts.
Watch Video
Main Points
- Inspect hoses and clamps first.
- Measure vacuum with a gauge for baseline.
- Apply soap test to reveal hidden leaks.
- Pinch-test non-fuel hoses only.
- Document findings for precise repairs.