How a Leak-Down Test Works: A DIY Guide for Engines
Learn how a leak-down test works, how to perform it safely, interpret results, and next steps for engine diagnostics. A practical, DIY-friendly guide for homeowners and DIY enthusiasts.

How does a leak-down test work? It pressurizes a cylinder with regulated air and measures how much leaks past the piston, rings, valves, or head gasket. This quick DIY guide explains the setup, interpretation, and next steps for engine diagnostics.
What is a leak-down test and when to use it
If you’re wondering how does a leak down test work, this diagnostic method evaluates engine cylinder sealing by introducing regulated air into a cylinder while the piston is positioned to close the valves. The test measures how much air escapes, which helps identify leaks around piston rings, intake or exhaust valves, or a compromised head gasket. This approach is commonly used after a compression test when the numbers don’t tell the full story, or when symptoms point to airflow issues such as misfires, rough running, or blue smoke. The Leak Diagnosis team emphasizes that this test is most effective when paired with other diagnostics and a careful interpretation of the gauge readings and audible cues. By following a structured process, homeowners and DIY enthusiasts can locate the likely source of failure and plan targeted repairs.
How the test works: principles and setup
Here is the core principle behind any leak-down test. A regulated air source is connected to the cylinder via a spark plug port or a dedicated adapter. When the engine is at or near top dead center with both valves closed, the majority of the air should remain inside the cylinder; whatever leaks into the intake, exhaust, crankcase, or cooling system indicates a leak path. A listening tool (stethoscope) or a soapy-water test on external seals can help locate the exact source. The Leak Diagnosis team notes that proper setup—engine at rest, ignition disabled, and a known fresh air supply—improves accuracy and repeatability.
Safety and prerequisites before you start
Safety first: handling pressurized air requires precautions. Park the vehicle or engine on a stable surface, remove the key, disconnect the battery, and ensure the engine is cool. Work in a well-ventilated area and wear safety glasses and hearing protection. Keep bystanders away and secure loose clothing and hair. Confirm the tester’s pressure rating matches the port and never exceed manufacturer’s limits. Before connecting, read the tester manual and verify all hoses and fittings are in good condition. Finally, label the cylinders to avoid confusion during step-by-step testing.
Step-by-step overview
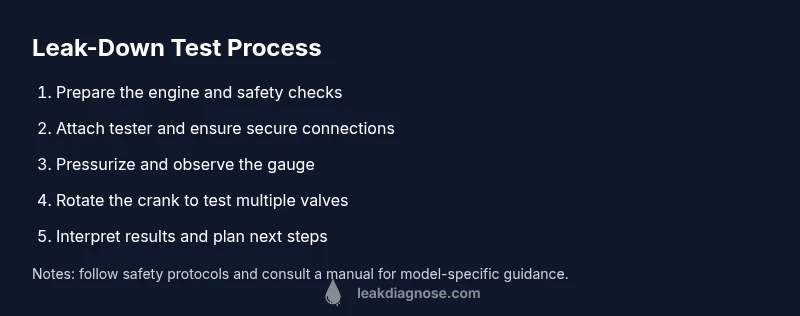
Before you perform step-by-step actions, review the overall flow: locate a test port, attach the tester, disable ignition, pressurize, observe gauges, and interpret results. This section gives a high-level map that the detailed steps will flesh out.
Interpreting results and common leak paths
Leak-down results are most meaningful when you know which component is most likely failing. A higher rate of leakage with the intake side often points to a faulty intake valve or a seat issue, while the exhaust side suggests the exhaust valve seal. Leakage into the crankcase may indicate piston-ring wear, and gas escaping into the cooling system can signal a blown head gasket. External leaks around valve cover gaskets, spark plug wells, or adapters should also be considered. Comparing multiple cylinders helps distinguish a localized problem from a broader issue.
Troubleshooting and practical tips
Start with the simplest explanations first—check for loose fittings or adapter leaks, then verify the engine’s position and valve state. If you suspect a valve or ring problem, follow up with targeted tests such as a standing compression check or a dedicated cylinder leakage test. Document readings carefully and repeat measurements to confirm consistency. Remember that test timing, ambient conditions, and port cleanliness can affect results, so standardize conditions as much as possible.
What to do after the test and next steps
Once you’ve completed the leak-down test, compare readings against the engine’s documented baseline or a service manual guideline. If leaks are detected, decide whether you can perform repairs yourself or if professional service is warranted. For DIYers, plan a staged repair process, starting with the simplest components (valves or gaskets) and moving toward more involved work (rings or bore resurfacing) as needed. A well-documented test log will help you track improvements after repairs and assist with future maintenance decisions.
Authoritative sources and continuing learning
For a deeper understanding of leak-down testing concepts and validated procedures, refer to established engineering and automotive testing resources. The quick reference below highlights credible sources and guidance used to shape this guide. Remember, always cross-check with your engine’s service manual for model-specific instructions.
Tools & Materials
- Leak-down tester kit(Includes regulator, gauges, adapters, and O-rings)
- Air supply with regulated pressure(An inline regulator or air compressor with adjustable output)
- Spark plug socket and extensions(For accessing test port(s))
- Stethoscope or listening device(To locate leaks by sound)
- Soapy water spray or leak-detection spray(To reveal external leaks around seals)
- Rags, wipes, and solvent for cleaning(Keep fittings clean and dry)
- Marker labels(Label cylinders/ports to avoid mix-ups)
- Safety gear(Safety glasses and hearing protection)
Steps
Estimated time: 30-60 minutes
- 1
Prepare the engine and workspace
Set up a clean, well-ventilated area and ensure the engine is cool. Remove the keys, disconnect the battery, and clear away clutter. This helps prevent accidental starts and keeps the work area safe while you connect the tester.
Tip: Wear eye protection and gloves; keep hoses untangled to avoid kinks. - 2
Disable ignition and remove the spark plug
Disable the starting circuit and remove the spark plug or install a compatible adapter to access the cylinder. This prevents engine cranking during pressurization and ensures the test is isolated to the cylinder being tested.
Tip: Label the plug so you know which cylinder you’re testing later. - 3
Attach the leak-down tester
Thread the tester into the spark plug bore or designated test port and snug fittings to prevent air leaks during pressurization. Verify all connections are clean and secure before applying pressure.
Tip: Hand-tighten first, then snug—over-tightening can damage threads. - 4
Pressurize and observe the gauge
Open the regulator to apply air to the cylinder and watch the gauge. A slow, steady drop indicates minor leakage, while a rapid drop points to a significant leak path. Note where the air appears to escape.
Tip: If the gauge bounces or fluctuates, double-check fittings for leaks. - 5
Rotate the crank to evaluate all paths
Carefully turn the crank by hand or with a wrench to seat valves and expose different leakage paths. Re-test each position to see if readings change with valve timing.
Tip: Do not force the crank; move slowly to avoid bending valves. - 6
Identify leak sources
Use your listening device and soapy water if needed to determine whether leaks are through valves, piston rings, or external seals. External leaks often reveal loose fittings or worn gaskets.
Tip: Audible cues combined with visual evidence provide the strongest clues. - 7
Document readings and plan next steps
Record cylinder number, readings, and observed leak paths. Use this data to decide whether to perform targeted repairs, run additional tests, or consult a professional.
Tip: Keep a dedicated test log to compare progress after repairs. - 8
Cleanup and reset
Release pressure safely, remove the tester, restore spark plugs and wiring, and tidy the workspace. Store equipment properly for the next diagnostic.
Tip: Purge residual air slowly to avoid a sudden release.
Questions & Answers
What does a leak-down test measure?
It measures how well an engine cylinder seals by pressing air into the cylinder and detecting where that air escapes. Reading the gauge helps identify leaks through valves, rings, or the head gasket.
A leak-down test measures cylinder sealing by pressurizing with air and noting where it escapes.
Can I perform this test on any engine?
The test works on most internal combustion engines with accessible test ports, but some engines or sealed units may require special adapters or professional equipment.
This test works for most engines with accessible ports, but some engines need special adapters or professional help.
Do I need to remove spark plugs?
Yes, to access the cylinder and ensure an accurate seal, most tests involve removing the spark plug or using a compatible adapter. Always follow the tester’s instructions.
Usually you remove the spark plugs to access the cylinder for testing.
What leak paths indicate a bad head gasket?
Leaks detected that route air into the cooling system or across multiple cylinders with inconsistent readings can indicate a head gasket issue, but confirm with additional tests.
Leaks into the cooling system or across cylinders can signal a head gasket problem, with further tests needed.
What safety precautions should I take?
Work in a well-ventilated area, wear eye protection, and avoid pressurizing a hot engine. Ensure hoses are rated for the pressure used and keep bystanders away.
Safety first: ventilate, wear protection, and avoid pressurizing a hot engine.
What if I detect a leak?
Document readings, identify likely leak sources, and plan the next steps, which may include targeted valve or ring testing or consulting a professional.
If you find a leak, record the readings and decide whether to re-test or seek professional help.
Watch Video
Main Points
- Understand what a leak-down test assesses and why.
- Use proper safety steps to prevent injury during pressurization.
- Interpret results by the location of leakage.
- Combine with other tests for a complete diagnosis.