Fix Refrigerant Leak: Safe, Step-by-Step Guide
Learn how to fix refrigerant leak safely with our practical, DIY-friendly guide. This article covers safety, tools, steps, and when to call a licensed HVAC professional.

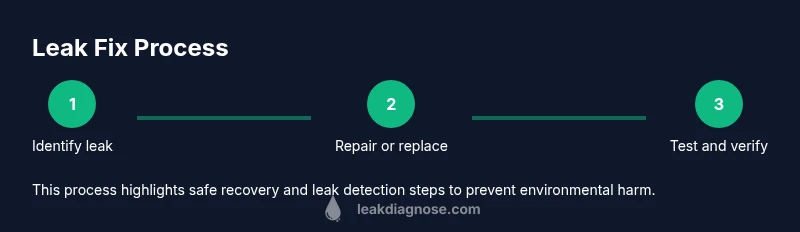
According to Leak Diagnosis, this guide helps you safely fix refrigerant leak with a clear, step-by-step approach. You’ll identify leak sources, determine safe repair paths, and test the system after work. The process emphasizes safety, environmental responsibility, and staying compliant with local regulations. It also covers DIY options, common mistakes to avoid, and when to call a licensed technician.
What is a refrigerant leak and why it matters
According to Leak Diagnosis, refrigerant leaks in cooling systems occur when the sealed circuit for refrigerant develops a crack, joint leak, or failed fitting. Even small leaks can reduce cooling efficiency, drive up energy use, and shorten equipment life. For homeowners, addressing a leak isn't just about comfort—it's about safety and environmental responsibility. Refrigerants can deplete ozone or contribute to climate change if released, and handling them improperly can create hazards for you and others. This guide explains how to approach a suspected leak, what you can safely check at home, and when to call a professional. When you set out to fix refrigerant leak, start with a plan, power down as advised, and avoid charging or venting refrigerants yourself. The goal is to locate the source, determine if repair is feasible, and preserve system performance without unnecessary risk.
Safety first: risks and precautions
Refrigerant leaks pose multiple hazards, from cold burns to asphyxiation in poorly ventilated spaces and chemical exposure in some refrigerants. Always prioritize personal safety: wear protective goggles and gloves, ensure adequate ventilation, and shut off equipment if instructions require it before inspecting. Use approved leak detectors designed for refrigerants, and never breathe vapors from unknown chemicals. Keep children and pets away from work areas, and follow local regulations on recovery and disposal. If you smell strong chemical odors or hear hissing from lines, stop and call a professional.
How refrigerants work in cooling systems
Refrigerant cycles move heat from indoor spaces to the outside, using compression, condensation, expansion, and evaporation. When the circuit is intact, the system maintains a closed loop. A leak breaks that loop, lowers pressure, reduces cooling capacity, and forces the compressor to work harder. Over time, this can lead to higher energy costs, reduced comfort, and potential damage to components like coils and seals. Understanding this helps you evaluate repairs and discuss options with a technician.
When to DIY vs call a pro
Fix refrigerant leaks is often beyond routine home maintenance. If you don’t hold the required refrigerant-handling certification, or if the system uses high-pressure lines or complex brazing, professional service is strongly advised. DIY attempts without the proper equipment and recovery methods can release refrigerant to the atmosphere, damage the system, or create safety hazards. For minor, non-pressurized seals in older units, a cautious, well-documented approach may be possible, but you should confirm local laws and warranty terms first.
Common leak sources and symptoms
Leaks most often originate at seams, joints, and fittings in copper tubing, brazed connections, coil edges, service ports, and valve stems. Visible signs include oily residue around joints, hissing sounds, ice formation on coils, or reduced cooling performance. If you notice a drop in system performance, use a leak detector or soapy-water solution along the suspected lines to pinpoint the source. Document suspicious areas with photos for later reference.
Tools and protective gear you'll need
Before you start, gather the essential tools and safety gear. A refrigerant leak detector (or bubble test with soap and water), a manifold gauge set, and a calibrated scale for charging are critical. Protective gloves, goggles, and long sleeves protect you from splashes and cold burns. Have a clean, well-lit workspace and a pressure-rated recovery connection. If you aren't sure of the location or method, don’t improvise a fix — consult a professional.
Legal and environmental responsibilities
Refrigerant leaks are regulated because releasing refrigerants can harm the environment. In many places, venting, releasing, or dumping refrigerants is illegal and subject to penalties. Recovered refrigerants must be captured using approved equipment by trained technicians and disposed of following authority guidelines. Always label cylinders, keep records of refrigerant types and amounts recovered, and ensure proper disposal of any waste oil or contaminated materials.
Testing and verification after repair
After completing a repair, perform a careful leak test and system recharge. Use an electronic refrigerant leak detector to sweep joints and lines, then apply a soapy-water solution to confirm a complete seal. Monitor pressure readings and ensure appropriate subcooling or superheat as recommended by the manufacturer. If a leak reappears, stop and reassess rather than repeatedly charging in vain.
Maintenance to prevent future leaks
Schedule periodic inspections and leak tests, especially after weather or vibration events that stress joints. Use proper torque on fittings and avoid overtightening, which can crack joints. Replace aging seals, service ports, and coils before they fail. Keep service records and maintain clear documentation for warranty coverage and future troubleshooting.
Tools & Materials
- Electronic refrigerant leak detector(Choose a model compatible with the refrigerant type in your system)
- Soapy-water spray bottle and brush(For visual confirmation of slow leaks on lines and joints)
- Manifold gauge set(Needed to measure pressure and diagnose operating ranges)
- Vacuum pump and refrigerant recovery system(Required by standards to evacuate and recover refrigerant before repairs)
- Torque wrench or adjustable wrench(Use correct torque to avoid over-tightening fittings)
- Safety goggles(Protect eyes from refrigerant spray and sharp edges)
- Chemical-resistant gloves(Protect skin from contact with refrigerants and oils)
- Copper brazing kit or replacement coils/parts(Only if you’re trained to braze or replace coils; otherwise call a pro)
Steps
Estimated time: 2-4 hours
- 1
Identify leak sources and safety setup
Power down the unit if required by your procedure and set up your work area. Use a leak detector or soapy-water test to locate potential leak points. Mark the suspected areas clearly for a focused inspection.
Tip: Have a partner verify readings to avoid missing a subtle leak. - 2
Shut down and isolate the system
Turn off the thermostat and disconnect power to the outdoor unit if applicable. Isolate the refrigerant circuit using the service valves and ensure there is no pressure build-up during work.
Tip: Never work on live electrical components around a pressurized system. - 3
Access the leak area and document
Carefully remove panels to access joints and coils. Photograph or video suspect joints from multiple angles to aid post-repair verification.
Tip: Label each suspected joint with a brief note and marker color for quick reference. - 4
Choose an appropriate repair method
Decide whether to seal a minor leak, replace a faulty fitting, or replace a damaged coil. Large or uncertain leaks typically require professional repair and refrigerant recovery.
Tip: If a leak is near brazed joints or structured coils, professional service is recommended. - 5
Perform repair or part replacement
Carry out the repair using the appropriate tools. If brazing, ensure you follow safety guidelines and local regulations. Replace seals as needed and verify connections are tight.
Tip: Avoid improvising with temporary fixes that don’t restore the sealed loop. - 6
Evacuate and recharge the system
Use a recovery machine to evacuate air and non-condensables, then recharge with the correct refrigerant amount per the manufacturer. Do not vent refrigerant to the atmosphere.
Tip: Check for any signs of re-leakage after charging; if detected, stop and re-test before returning to service. - 7
Test, verify, and monitor
Perform a final leak test with detector and soap test. Monitor operating pressures and temperatures and confirm there are no cold spots where leaks could remain. Document the results for future maintenance.
Tip: Keep a maintenance log with dates, readings, and photographs for traceability.
Questions & Answers
Is it safe to fix a refrigerant leak myself?
Fixing refrigerant leaks often requires certified handling and specialized equipment. DIY attempts should be limited to basic checks if locally permitted, but professional service is recommended for most leaks.
DIY refrigerant work is risky and often requires certification and proper equipment; consult a licensed HVAC technician for most leaks.
What are common signs of a refrigerant leak?
Common signs include reduced cooling performance, longer cycle times, ice formation on coils, hissing noises, and oily residue around joints or connections.
Look for less cooling, longer cycles, and visible leakage signs like ice or oil near joints.
How long does a typical refrigerant leak repair take?
Repair time varies with leak location and system complexity. Complex repairs plus recovery and recharge can take several hours and may require scheduling with a licensed technician.
Time depends on leak complexity; call a pro to get an accurate schedule.
Can leaks be prevented?
Regular maintenance, prompt inspection after vibrations or weather events, and using quality fittings help reduce leak risk. Keeping records aids future troubleshooting and warranty claims.
Regular maintenance and quality parts help prevent leaks.
Will fixing leaks affect warranties?
Warranty terms vary by manufacturer and region. Many warranties require service by authorized technicians for refrigerant repairs to remain valid.
Check your warranty terms; many require licensed technicians for refrigerant work.
Watch Video
Main Points
- Identify all leak sources before attempting repairs.
- Prioritize safety and proper recovery of refrigerants.
- Use the right tools and follow manufacturer guidelines.
- Verify the repair with leak tests and monitoring after recharge.