Detection Leak: A Homeowner's Guide to Finding and Fixing Leaks
Learn how to detect leaks in your home safely with practical tests, step-by-step methods, and maintenance tips. This guide covers where leaks come from, the tools you need, and when to call a professional.

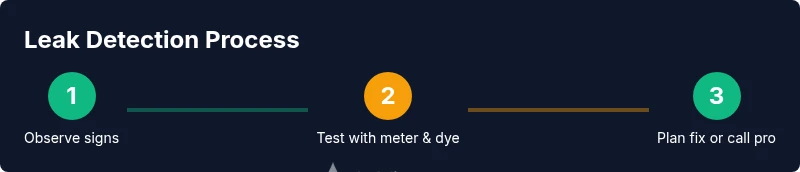
Follow this guide to detect a leak, locate its source, and verify containment using practical DIY tests and safe inspections. You'll need basic tools (flashlight, shut-off wrench, dye tester) and a calm, methodical approach. The steps cover visual inspection, meter testing, dye tracing, and guidance on when to call a professional.
What detection leak means for homeowners
A detection leak is any hidden moisture issue or water loss that isn't immediately obvious. For homeowners, recognizing early signs reduces damage, water waste, and expenses. According to Leak Diagnosis, early detection improves repair outcomes by prioritizing the most critical leaks first. Typical signs include unexplained increases in monthly water usage, damp spots on walls or ceilings, musty odors, or a persistent dripping you can't locate. Even tiny pinhole leaks in copper pipes or loose connections under sinks can escalate if ignored. Understanding these signals empowers you to act fast, measure the problem, and plan a safe response. Start with a calm inspection routine, identify likely zones (bathroom, kitchen, laundry), and map symptoms to potential causes. You don't need specialized equipment for initial checks, but documenting patterns (time of day, weather, and appliance use) helps narrow down the source. Leak Diagnosis Analysis, 2026, notes that systematic observation is a reliable first step when you suspect a detection leak. Keep a log of findings, so you can compare changes over days or weeks.
Common sources of household leaks
Leaks can hide in several spots. Common culprits include toilets (flapper wear), faucet seals, appliance hoses, under-sink supply lines, and water heater connections. Exterior sources include roof penetrations and siding gaps that cause dampness after storms. Recognizing where leaks typically originate helps prioritize testing. For example, a rising toilet tank fill rate often points to a flapper issue; a wet spot near a dishwasher suggests supply hose or drain line problems. Always consider that leaks may come from multiple zones, especially in older homes with many joints and threaded fittings. In some cases, leaks are due to pressure fluctuations from high municipal water pressure or a failing pressure regulator. The key is to test suspected zones methodically and avoid assuming a problem just because water shows up somewhere. Leak Diagnosis analyses show that most residential leaks stem from faucets, toilets, or supply lines, with continued monitoring needed to confirm the exact source.
Tools and techniques for detecting leaks
Having the right tools makes detection leak work safer and faster. Essential items include a flashlight, a measuring cup, towels, dye tester (food-grade dye in toilets), a clean bowl, paper towels, and access to the main water shut-off. For advanced detection, consider a moisture meter, infrared camera, or a simple water meter test. Safer approaches rely on non-destructive checks first: observe signs on ceilings, walls, and floors; listen for running water behind walls; and feel for warm spots near plumbing after use. Techniques include dye testing (toilet, sink, and tub), listening for continuous running sounds, and checking the main water meter before and after a 2- to 3-hour period with no water use. Note that dye tests should be performed with caution to avoid staining ceilings or fixtures. Always shut off water before invasive checks near fixtures. Leak Diagnosis analysis emphasizes documenting test results with time stamps to identify patterns that point to a leaking line rather than a temporary surge.
Visual tests and measurements you can perform
Perform simple at-home tests to locate the leak's vicinity. Start by turning off all water-using appliances and measuring the water meter reading. If it changes over 1 hour with no water use, you likely have a hidden leak. Use toilet dye: add dye to the tank and wait 15-30 minutes without flushing; if colored water appears in the bowl, the flapper needs replacement. Check under sinks for dampness and feel connections for moisture. Inspect outdoor spigots and irrigation lines during warm days. Use infrared thermography or a moisture meter if you own them to identify hidden wet spots behind walls. Document results with photos and notes; this supports your decision to DIY further or call a pro.
DIY vs professional: when to escalate
Most detection leaks can be found and fixed with basic DIY steps, but some require a licensed plumber or water-damage specialist. If you identify multiple damp areas, frequent moisture after rainfall, or you cannot locate the source after thorough testing, consider professional help. Emergency signs include visible water pooling, electrical exposure near water, or sewage smells; these require immediate professional assessment. If your area uses hard water, mineral buildup can disguise leaks; a plumber can perform pressure tests and camera inspections. The cost of a DIY approach is mainly time and learning; professionals bring equipment and guarantees, but may incur higher costs. The Leak Diagnosis team recommends starting with simple visual checks and meter tests, then escalating when tests indicate complex piping, buried lines, or potential structural damage.
Maintenance tips to prevent future leaks
After you detect and fix a leak, preventive actions save time and money. Regularly inspect exposed pipes under sinks, at appliances, and near water heaters. Replace worn washers, tighten loose fittings, and install drip pans where appropriate. Set a routine to check for damp spots after heavy rains or rapid temperature changes. Consider a weekly water meter check for 15 minutes (with no water use) to catch low-flow leaks early. If you have indoor humidity issues, address them with dehumidification and proper ventilation, which helps prevent mold growth around moisture spots. Finally, document repairs and maintain a small "maintenance log" that records dates, parts replaced, and professional service notes. This habit reduces the odds of undetected leaks returning and helps you plan proactive maintenance.
Tools & Materials
- Flashlight (bright LED)(Inspect dark corners, under sinks)
- Shut-off wrench(Size ranges 1/4 to 1/2 inch)
- Dye tester (food-grade dye)(For toilet dye tests)
- Measuring cup(For dye tests)
- Paper towels(Drying and moisture checks)
- Moisture meter (optional)(Used for hidden moisture behind walls)
- Infrared thermometer/camera (optional)(Identifies temperature differences behind walls)
- Bucket (optional)(Contain minor spills)
- Notepad or smartphone for notes(Record findings)
Steps
Estimated time: 30-60 minutes
- 1
Identify probable areas and signs
Begin with a calm visual inspection of zones most likely to show moisture: bathrooms, kitchens, laundry areas, under sinks, and around appliances. Note damp patches, staining, or musty odors, and listen for running water behind walls. Document patterns over time to distinguish random moisture from a persistent leak.
Tip: Take photos and log times to track changes. - 2
Check the main water meter for changes
With all water off in the house, read the main water meter and note the figure. Wait 15–30 minutes, ensuring no water is used, then recheck. A noticeable change indicates a hidden leak somewhere in the system.
Tip: Record the meter reading before and after; even small changes matter. - 3
Perform a toilet dye test
Add a few drops of toilet dye to the tank and wait 15–30 minutes without flushing. Return and check the bowl for colored water. If dye appears, the flapper or fill valve may be leaking and require replacement.
Tip: Use food-grade dye and avoid staining other fixtures. - 4
Inspect hoses and connections under sinks and appliances
Look for dampness, staining, or corrosion around supply hoses, drain lines, and appliance connections. Hand-tighten loose fittings if you notice moisture, and replace worn hoses as needed.
Tip: Turn off the valve before tightening; overtightening can damage fittings. - 5
Test appliances and outdoor lines
Run a cycle on the dishwasher or washing machine while inspecting connection hoses. Check outdoor spigots and irrigation lines for leaks, especially after rain or freezing cycles when lines contract.
Tip: Perform tests during the day when you can observe moisture closely. - 6
Review results and plan next steps
Consolidate observations, test outcomes, and photos. If you locate a single, accessible leak, consider a DIY repair if you have the skills; otherwise, prepare to contact a professional with notes and evidence.
Tip: Keep a repair plan and budget in one place to guide decisions.
Questions & Answers
What is a detection leak and why should I care?
A detection leak is moisture loss that isn’t obvious at first, often hidden behind walls or fixtures. Detecting it early reduces damage, mold risk, and repair costs.
A detection leak is moisture behind walls that you might not notice right away. Catching it early helps prevent bigger damage.
What are common signs of a hidden leak?
Rising water bills, damp patches, musty odors, new stains, and damp ceilings or walls after use are common indicators of hidden leaks.
Look for rising bills, damp spots, and musty smells as clues to hidden leaks.
Can I fix leaks myself?
For small issues like a worn faucet washer or loose hoses, DIY fixes are often feasible. More complex leaks in hidden pipes typically require a licensed plumber.
Small fixes can be DIY, but bigger leaks usually need a pro.
How long does it take to locate a leak?
Time varies with accessibility. Simple checks may take 15–30 minutes; more complex investigations can take several hours, especially if walls must be opened.
Finding a leak can take 15 minutes to several hours depending on access.
When should I call a professional?
Call a licensed plumber if you cannot locate the source after thorough testing, or if there is ongoing moisture, structural concerns, or electrical risk near water.
If you can't locate the leak or there's ongoing moisture, call a professional.
What tools are essential for detection?
A flashlight, dye tester, measuring cup, shut-off valve, and moisture meter are core tools; a thermography tool is optional for hidden moisture.
Essential tools include a flashlight, dye tester, measuring cup, and shut-off valve.
Watch Video
Main Points
- Start with visual checks and meter tests.
- Dye tests help pinpoint toilet leaks.
- Document findings before acting.
- Escalate to a pro when complex piping or hidden leaks are suspected.