Data Leak Check: A Practical Home Privacy Audit
Learn how to perform a data leak check in your smart home. Inventory devices, review permissions, monitor traffic, and secure data flows with this practical guide.

A data leak check helps you audit your home network and devices for privacy risks by inventorying gear, reviewing permissions, and testing data flows. Start with your router, then verify each smart device's data-sharing settings and firmware. Use a repeatable, safety-first process to protect personal information. Include steps for logging findings, establishing a baseline, and implementing fixes. This quick answer showcases a practical approach you can start today.
What is a data leak check?
A data leak check is a proactive privacy audit focused on identifying when and how data flows from your home network and connected devices to external services, cloud accounts, or unintended endpoints. The goal is to detect leakage before it leads to privacy compromise or unexpected costs. The process considers all data paths: IoT sensors, mobile apps, cloud integration, DNS requests, and even ad-tracking scripts embedded in devices.
According to Leak Diagnosis, data leak checks begin with mapping your digital surface: every device that touches your network, every app that has permission to access data, and every cloud service you rely on. By cataloging these elements, you create a baseline that helps you spot anomalies later. The Leak Diagnosis team found that most households overlook passive data channels, such as periodic telemetry, background sync, and push notifications, which can cumulatively leak a surprising amount of information.
Next, you define success criteria: what counts as a leak for your household depends on the devices you own, your privacy expectations, and your tolerance for risk. For many households, a safe data leak check means no unexpected transmissions during idle moments and no opaque data-sharing agreements that you cannot review. This section lays the groundwork for the rest of the guide, ensuring you can distinguish normal device activity from potential leakage. By starting with a clear definition of data leak check, you can apply targeted fixes later and maintain momentum over time.
Why data leak checks matter for homeowners
In modern homes, data leaks can occur even when you’re not actively using devices. Unsecured Wi‑Fi, outdated firmware, and apps with excessive permissions can quietly share information with third parties. A data leak check helps you identify these risk factors before they escalate into privacy breaches or unexpected charges. For homeowners, the value is practical: you gain visibility, control, and a plan to secure devices and data paths. The process also reduces exposure to targeted advertising and potential identity risks.
Leak Diagnosis analysis shows that many households underestimate the data that travels from smart TVs, voice assistants, cameras, and connected appliances. Even devices that seem benign can create blind spots when data outflows are encrypted but still accessible to cloud analytics. By conducting a data leak check, you build a defense-in-depth approach: you segment devices, tighten permissions, and minimize data sharing to what is necessary for function.
A key consideration is how you handle cloud services tied to home devices. Many ecosystems default to data collection for convenience, but you can dial back telemetry and aggregate data locally where possible. Privacy is not a one-time fix; it’s an ongoing practice. A data leak check is the starting line, not the finish line, for responsible digital living in a connected home.
Scoping your data leak check: setting boundaries
Before you dive into testing, set clear scope boundaries. Decide which devices you’ll include (router, IoT devices, smartphones, tablets, laptops), which networks you’ll monitor (home network vs. guest network), and what data you consider sensitive. Establish success criteria and a remediation plan so you can measure progress.
Begin with your router as the central control point. Ensure you have admin access, review firewall rules, and disable features you don’t need such as remote management if you don’t require them. Add your main IoT devices to the inventory, including cameras, smart speakers, thermostats, and security systems. For each item, record data types involved (e.g., location, usage data, voice recordings) and where that data could flow (to cloud services, to third-party analytics, or to local storage).
Finally, define baselines for traffic. A baseline is a calm state where devices should maintain predictable network activity. If you notice deviations—like unusual outbound connections or sudden spikes in DNS queries—you’ll know where to focus remediation. This stage creates the framework for efficient testing and reduces noise during later steps.
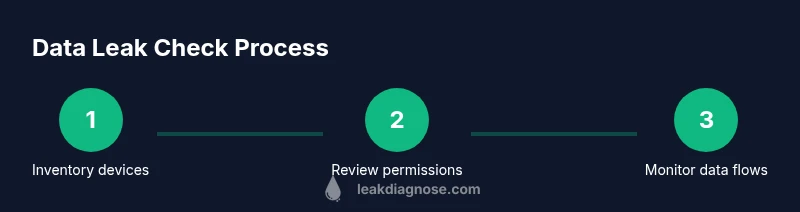
The data leak check workflow: a repeatable method
Adopt a repeatable workflow so you can track progress over time. The workflow generally follows these phases: inventory, observation, evaluation, remediation, and verification. Start by compiling a complete inventory of devices and permissions. Then observe data flows using network monitoring tools to identify any traffic to unfamiliar domains or cloud endpoints. Evaluate whether those endpoints belong to legitimate services or suspicious third parties. Remediation includes changing default passwords, updating firmware, revoking unnecessary permissions, and, if needed, network isolation.
In this guide we emphasize safety and privacy. Avoid capturing sensitive data during tests; instead, look for indicators of data movement, such as unusual domains, outbound ports, or multiple devices contacting the same endpoint. After changes are made, verify by repeating the checks to confirm that adjustments reduced leakage potential. A solid data leak check becomes part of your routine, not a one-off task.
Practical tests you can run today
Here are practical checks you can perform without specialized equipment. Start with your router: review DNS settings for unknown entries and ensure that firmware is up to date. Move to devices: review app permissions, disable unnecessary data sharing, and revoke access you don’t recognize. Use network monitoring to observe traffic for unfamiliar endpoints and confirm that data flows align with each device’s legitimate function. If a device consistently communicates with untrusted domains, isolate it, change credentials, and consider a factory reset if necessary. Finally, test cloud account connections by signing out of unused services and reviewing recent connections for suspicious activity.
Interpreting results and remediation
If you detect unexpected traffic, treat it as a red flag rather than noise. Begin with the simplest fixes: update firmware, change passwords, and remove unnecessary permissions. For devices that persistently show anomalous activity, isolate them from the main network and run a fresh check after updates. Review account security settings for cloud services linked to your devices—enable two-factor authentication where possible and audit device access lists. If you uncover persistent data-exfiltration indicators you cannot resolve, seek professional privacy guidance and consider a full device replacement or network segmentation to limit potential leakage.
Ongoing maintenance and best practices
A data leak check is not a one-time operation. Schedule quarterly reviews, maintain an up-to-date device inventory, and enforce a standardized privacy policy for your household. Keep firmware current, monitor for new privacy controls offered by manufacturers, and routinely revoke unused permissions. Document changes and findings to track improvements over time. Finally, foster safe testing habits: never disclose credentials during checks, and use a separate testing network when experimenting with new configurations.
Tools & Materials
- Router admin access (web interface or app)(Have admin credentials; disable remote management if not needed)
- Network monitoring software or app(Choose reputable tools to observe traffic patterns on your home network)
- Device inventory sheet(List all devices connected to the network, including guest devices)
- Smartphone privacy settings checklist(Review app permissions and data-sharing toggles)
- Updated firmware for routers and devices(Check vendor sites or official app stores for updates)
- Strong, unique passwords or a password manager(Enable 2FA where available)
- Optional: Safe testing environment (guest network)(Isolate experiments from your main network)
Steps
Estimated time: Total time: 2-3 hours
- 1
Inventory devices and data points
Create a complete list of all devices on your network and note the types of data each device can access or generate. This establishes the scope for your data leak check and helps you identify potential leakage paths.
Tip: Start with the router and all IoT devices; add PCs and smartphones next. - 2
Review router settings and logs
Access the router's admin panel, verify firmware version, and audit firewall rules. Check logs for unfamiliar connections, DNS queries, or remotely accessible services that you did not enable.
Tip: Disable remote management if you don’t require it to reduce exposure. - 3
Audit app permissions and data-sharing
Go device by device and review which apps have data access. Revoke unnecessary permissions and disable telemetry when possible. Note any permissions that seem excessive for the function of the app.
Tip: Document each permission change for accountability. - 4
Monitor data flows with network tools
Use network monitoring to observe traffic patterns and identify connections to unknown endpoints. Look for repetitive requests to unfamiliar domains or cloud services not claimed by the device.
Tip: Focus on metadata like destinations and frequency rather than trying to capture sensitive payloads. - 5
Isolate suspicious devices and apply updates
If a device shows persistent odd activity, isolate it on a guest network, update firmware, and reset credentials. Re-test after updates to verify leakage reduction.
Tip: If the device cannot be secured, consider replacement or disabling its data-sharing features entirely. - 6
Check cloud services and account security
Review linked cloud accounts for devices, revoke unused connections, and enable two-factor authentication. Audit recent activity for signs of unauthorized access.
Tip: Keep separate passwords for cloud services and device accounts. - 7
Document results and plan remediation
Record findings, actions taken, and remaining risks. Create a remediation timeline and schedule a follow-up check to verify improvements.
Tip: Maintain a living document you can update with each quarterly review.
Questions & Answers
What is a data leak check?
A data leak check is a process to identify whether sensitive data leaves your devices or network unintentionally. It includes inventorying devices, reviewing permissions, monitoring traffic, and applying remediation.
A data leak check identifies whether private data is leaving your devices or network unintentionally, by looking at devices, permissions, and traffic.
How often should I perform a data leak check?
Perform a baseline check after setting up a new device or network, then schedule quarterly reviews. Re-run checks after major updates or adding new devices.
Do a baseline check after setup and then quarterly; run another check after big updates or new devices.
Can I rely on router logs to identify leaks?
Router logs are helpful but don’t show all data flows. Pair them with traffic monitoring and device-level checks for a complete picture.
Router logs help, but you need traffic monitoring and device checks for a full view.
What are common signs of data leaks in a smart home?
Unusual data usage, unfamiliar devices, unexpected account logouts, or unexplained cloud activity can indicate data leaks. Investigate these indicators promptly.
Look for unusual data use, unknown devices, or strange cloud activity as signs of data leaks.
What should I do if I find evidence of a data leak?
Isolate affected devices, change credentials, update firmware, and revoke suspicious permissions. If the leak persists, seek privacy guidance or consider device replacement.
Isolate the device, update credentials and firmware, and revoke permissions. Seek help if leaks persist.
Are there safety risks when conducting at-home data leak checks?
There is minimal physical risk if you follow steps correctly. Handle credentials carefully and avoid exposing admin data during testing.
No major safety risks if you follow the steps and keep credentials secure.
Watch Video
Main Points
- Audit your home network for data leaks regularly.
- Inventory devices and review data-sharing permissions.
- Keep firmware updated and use strong authentication.
- Document findings to track improvements over time.
- Adopt a proactive, routine data leak check approach.