Check for Vacuum Leak: DIY Car Diagnostic Guide
Learn how to check for vacuum leaks in your car, identify common sources, and safely fix them. This step-by-step guide covers tools, tests, and when to seek expert help.

By the end of this guide, you will be able to check for a vacuum leak in your vehicle, identify likely sources, and safely perform basic fixes. You'll learn simple diagnostic steps, the tools you need, and how to interpret symptoms like rough idle or poor acceleration. This process helps protect fuel economy and engine health.
What is a vacuum leak and why it matters
A vacuum leak happens when unmetered air enters the engine's intake, bypassing the mass air flow sensor. This extra air skews the air-fuel ratio, often causing rough idle, stalling, surging, or reduced fuel economy. In modern engines, even small leaks can trigger lean conditions and put extra stress on the catalytic converter over time. Understanding vacuum systems and common failure modes helps you diagnose issues quickly and repair them safely. A methodical approach saves money and prevents misdiagnosis. By learning how to check for vacuum leaks, you can keep your engine running smoothly and extend its life.
Common sources of vacuum leaks in vehicles
Vacuum leaks originate from several parts that connect to the intake manifold:
- PCV valve and hose: a common source when cracked, disconnected, or clogged
- Worn or cracked vacuum hoses and connectors: often near the throttle body or intake runners
- Intake manifold gaskets and throttle body gaskets: leaks at corners or near the plenum
- Brake booster hose: a collapsed or disconnected line can draw extra air
- Vacuum fittings near sensors: loose clamps or damaged ports
- Vacuum-operated actuators and manifolds: worn diaphragms or damaged seals Symptoms include rough idle, inconsistent engine speed, lean fault codes, poor acceleration, and occasional stalling. A careful visual and functional inspection helps identify which part is failing.
Tools and safety before you start
Before you begin, assemble essential safety gear and common tools:
- Safety glasses or goggles and mechanic gloves to protect eyes and skin
- Flashlight or work light for shadows and tight spaces
- Basic hand tools (screwdrivers, pliers, and a small mirror for hard-to-see hoses)
- Vacuum gauge or pressure tester (for measuring baseline vacuum)
- Soap and water spray or carb cleaner for leak testing
- Optional: smoke machine or bottle of propane/air for a controlled leak test (use with extreme caution)
- Work in a well-ventilated area; never run engines in confined spaces
- Disconnect the battery if you're performing tests that require electrical components to be powered off
Visual inspection: what to look for
Carefully inspect the entire vacuum system while the engine is off:
- Hoses and connectors: look for cracks, stiffness, or soft spots; check for bulges
- PCV valve and hose condition: ensure connections are snug and the valve moves freely
- Clamps: verify all clamps are tight and nothing is cracked
- Brake booster hose: inspect for splits or disconnections
- Intake manifold and throttle body seals: search for signs of oil seepage or damaged gaskets
- Sensor lines: ensure there are no pinched or kinked lines A clean, well-lit workspace makes spotting these issues easier. Replace damaged hoses with OEM-compatible parts and recheck connections after any work.
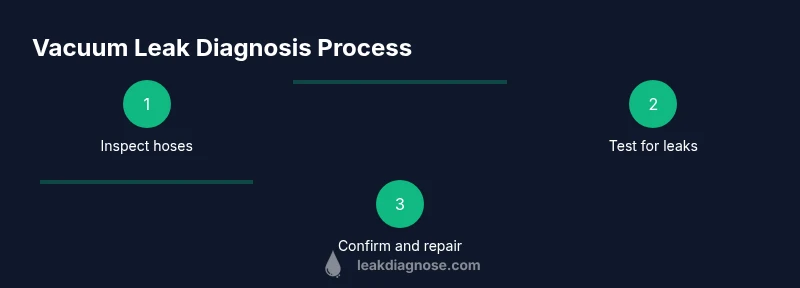
Diagnostic approaches you can perform
Most homeowners start with a visual and listening check, then use testing methods to confirm leaks:
- Smoke test (preferred): Introduce a light, non-toxic smoke into the vacuum system and watch for smoke escaping at cracks or holes
- Spray test: With the engine running, lightly spray around suspect joints with a propane or carb cleaner solution; a momentary rise in RPM indicates a leak
- Vacuum gauge method: Measure steady vacuum at idle; a lower-than-expected reading suggests a leak or weak intake suction Always perform tests in a ventilated area and never spray near hot exhaust components or open flames. If the test is inconclusive, proceed to isolate sections or seek professional help.
Verifying fixes and testing the repair
After replacing hoses, seals, or the PCV valve, recheck the system:
- Re-run the smoke or spray test to ensure no leaks remain
- Re-measure vacuum at idle to confirm baseline readings have returned to expected levels
- Take a cautious test drive to confirm smooth acceleration and stable idle
- Clear any fault codes with your OBD-II scanner if the ECU stored lean or misfire codes Document the parts replaced and the date of service for future maintenance notes.
When to seek professional help
If you cannot locate the source or the leak persists after replacements, professional help is advised. Brake booster issues can affect braking safety, while intake manifold gasket failures may require advanced torque and sealing procedures. An experienced technician can perform advanced leak testing, check for related engine codes, and ensure the repair meets manufacturer specifications. Regular maintenance and timely inspections prevent recurrence and protect engine health.
Tools & Materials
- Safety glasses(Impact-rated; keep on during inspection)
- Mechanic gloves(Nitrile or latex-free)
- Flashlight or headlamp(Bright, focused beam)
- Assorted vacuum hoses(Various diameters (6-12 mm common))
- Screwdrivers, pliers, and a small mirror(Flathead/Phillips; needle-nose pliers)
- Vacuum gauge or pressure tester(Baseline vacuum check)
- Soap and water spray(Bubble test for leaks)
- Smoke machine (optional)(For a thorough leak search)
- Carb cleaner spray or propane (small amount)(Used cautiously; keep away from flames)
Steps
Estimated time: Total time: 45-90 minutes
- 1
Park and prepare the vehicle
Park on level ground, engage the parking brake, and ensure the engine is cool before touching hoses or components. This reduces burn risk and makes clamps easier to remove.
Tip: Set the parking brake and wear safety glasses before you begin. - 2
Locate major vacuum components
Identify the PCV valve, brake booster line, intake manifold connections, and throttle body hoses. Knowing where these parts live speeds up inspection.
Tip: Take a quick photo to reference layout during reassembly. - 3
Perform a visual inspection
With engine off, inspect hoses for cracks, cracks, bulges, or loose clamps. Check gaskets around the intake and throttle body for damage.
Tip: Use a mirror to view hard-to-see areas. - 4
Choose a diagnostic method
If you have a smoke machine, run a leak search. If not, perform a careful spray test around suspect joints while the engine runs.
Tip: Keep spray away from hot surfaces and open flames. - 5
Isolate and confirm the leak
If a suspected area is found, isolate it by temporarily sealing the joint and re-testing. A change in engine behavior confirms the leak.
Tip: Work in stages—start with the most likely culprits first. - 6
Repair or replace components
Replace damaged hoses, clamps, or PCV valve as needed. Use correct sizes and tighten clamps to the manufacturer’s torque specs.
Tip: Use OEM parts when possible for a reliable seal. - 7
Test again and verify
After repairs, re-run the diagnostic method and confirm the vacuum reading is normal. Take a short test drive to verify smooth operation.
Tip: Document the repair for future reference. - 8
Report persistent issues
If you still detect a leak, or if the engine shows abnormal codes, seek professional help.
Tip: Professional labs can perform advanced leak testing safely.
Questions & Answers
What is a vacuum leak in a car?
A vacuum leak is extra air entering the intake system, bypassing the mass air flow sensor. This disrupts the air-fuel balance and can cause rough idle, poor acceleration, and decreased fuel economy.
A vacuum leak is when extra air sneaks into the engine, causing rough idle and reduced performance.
What are common signs of a vacuum leak?
Common signs include rough idle, high or unstable idle, hissing sounds from the engine bay, misfires, and reduced power during acceleration.
Look for rough idle, hissing noises, and sluggish acceleration as typical signs.
Can you drive with a vacuum leak?
Small leaks may allow continued driving but can cause worsening fuel economy and engine damage over time. Larger leaks pose safety risks and should be repaired promptly.
You can drive short distances with a small leak, but it's not safe or ideal for long trips.
What tools help diagnose vacuum leaks?
A vacuum gauge, smoke machine, or a careful spray test around joints can help locate leaks. An OBD-II scanner can reveal related fuel and misfire codes.
Tools like a vacuum gauge or smoke tester are great for locating leaks.
Is the PCV valve a common leak source?
Yes, a failing PCV valve or its hose is a frequent cause of vacuum leaks and should be checked early in diagnostics.
The PCV valve is a common culprit for vacuum leaks.
What should I do after replacing hoses?
Recheck the vacuum system with tests, clear codes if needed, and take a cautious test drive to ensure the issue is resolved.
After replacements, re-test and take a short drive to confirm the fix.
Watch Video
Main Points
- Know common vacuum leak sources and inspect those areas first.
- Use a smoke test or spray test to locate hidden leaks safely.
- Replace faulty hoses, clamps, or PCV components with OEM parts.
- Re-check vacuum levels and drivability after repairs.