What to Do If a Leak in Your House
Learn step-by-step how to respond to a household leak: safety first, shut off water, contain damage, decide DIY vs pro, and prevent future leaks with expert guidance from Leak Diagnosis.

Act quickly when you suspect a leak. If you're wondering what to do if leak in house, begin with safety: keep children and pets away, and avoid contact with standing water near electrical outlets. Locate the main water shut-off valve and turn it clockwise until it stops; this stops the flow to the entire home. If the main valve is difficult to reach, shut off the valve closest to the leak. After cutting the water, document the scene and plan your next steps. According to Leak Diagnosis, a planned, methodical response reduces downstream damage, confusion, and cost. If you cannot reach the valve safely or the area continues to flood, call your local emergency plumber for urgent guidance.
Immediate Safety: Shut Off the Water and Scene Safety
If you're wondering what to do if leak in house, act quickly to protect people, property, and structure. Safety comes first. Keep children and pets away from the affected area and avoid contact with standing water near electrical outlets. Locate the main water shut-off valve and turn it clockwise until it stops; this stops the flow to the entire home. If the main valve is hidden or hard to reach, shut off the valve closest to the leak (for example under a sink or near the washer). Once water is halted, move valuables away from the water and start documenting the scene with photos and notes for your records and insurance. This information will help you later with repairs and claims. The Leak Diagnosis team notes that a planned, methodical response minimizes downstream damage and costs. If you cannot reach the valve safely or the area continues to flood, call a licensed plumber for urgent guidance.
Identify Likely Leak Sources and Signs
Most household leaks originate in fixtures, appliance supply lines, or concealed pipes. Common culprits include faucet supply lines under sinks; toilet supply lines and flapper valves; washing machine hoses; dishwasher hoses; water heater connections; and corroded pipes in basements or crawl spaces. Roof or attic leaks may manifest as ceiling stains after rain. Signs to watch for include persistent dripping, damp patches on walls or ceilings, water stains, warped flooring, a warm spot on a wall, or an unexplained rise in the water bill. If you suspect a hidden leak, check the water meter: turn off all fixtures for an hour and observe whether the meter dial moves. A moving dial indicates a leak somewhere in the system. If you can determine a source at a fixture, isolate it by closing its local valve and see if the flow stops. Early identification helps guide safe repairs and reduces risk of mold and structural damage, according to the Leak Diagnosis team.
Contain and Minimize Damage
Containment is essential to prevent water from spreading to other rooms and to minimize mold risk. Start by laying towels or a mop on the floor, placing a bucket under drips, and moving valuables to a dry area. If safe, unplug nearby appliances and remove electrical items from the damp zone. Use plastic sheeting to isolate the wet area from unaffected spaces and improve ventilation with fans positioned to direct air across the wet surface. Avoid using heat sources that could damage delicate materials, and never mix cleaning chemicals with standing water that could create hazardous fumes. Document the area with photos before any cleanup so you have a baseline for repairs and insurance. The goal is to reduce secondary damage while you decide on next steps. Leak Diagnosis emphasizes prompt containment to protect both the structure and occupants.
DIY vs Professional Repair: How to Decide
DIY fixes can be appropriate for small, accessible leaks, especially at shutoff valves or easy-to-reach supply lines. If you can reach the area, turn-off valve, and apply plumber’s tape to seal minor thread leaks, you may fix temporarily. However, many leaks are behind walls or in concealed pipes where specialized tools and knowledge are required. Signs that you should call a pro include persistent leaks after a basic fix, water pooling behind walls or ceilings, or corrosion and rust around joints. For major leaks, leaks in gas lines, or structural damage, contact a licensed plumber immediately. The sooner you involve a professional, the quicker you can stop the leak and prevent mold growth. The aim is to restore safety and function, not to pursue risky DIY experiments. Use this guide to decide if a DIY repair is appropriate; otherwise schedule a visit.
Tools, Materials, and Safe Practices
Before you start any repair, gather essential tools and materials to avoid mid-task trips to the hardware store. A basic leak-response kit should include a main shut-off wrench or lever, adjustable wrench, pliers, screwdrivers (Phillips and flathead), PTFE plumber’s tape, a roll of duct tape for quick temporary fixes, a bucket, towels, a flashlight, and a notepad for documenting what you see. Always test the area after applying a temporary fix and never work on live electrical components in damp conditions. If the leak involves a gas line or a damaged structural component, stop and call a professional. This section aligns with practical guidance from Leak Diagnosis and emphasizes safety, steps, and proper tools.
Long-Term Prevention and Maintenance
Preventing leaks is easier than repairing them. Schedule annual inspections of plumbing lines, fixtures, and appliances. Replace aging hoses on washing machines and dishwashers every 3–5 years and install affordable leak detectors near vulnerable areas like basements, under sinks, and behind appliances. Maintain modest water pressure to reduce stress on pipes and fittings, and insulate exposed pipes in unheated spaces to prevent freezing. Fix small drips promptly rather than letting them worsen, and keep a small supply kit ready for quick responses. According to Leak Diagnosis, regular maintenance and early detection are the best defenses against costly water damage and mold growth, especially in areas with older plumbing or heavy rainfall.
Insurance, Documentation, and Next Steps
After you have contained the leak and initiated repairs, document every step for insurance and records. Take clear photos of the source, the affected areas, and any damage to appliances or structures. Note the date and time of the incident, the actions you took, and the immediate costs. Contact your homeowner’s insurer to report the claim and request guidance on required documentation. If a professional was brought in, obtain a written estimate and, after work is completed, invoices and warranty information. This final block emphasizes the administrative side of leak response and helps ensure you are prepared for any claim. The Leak Diagnosis team recommends keeping these records organized for future maintenance and potential coverage questions.
Tools & Materials
- Main water shut-off valve (manually operated)(Know exact location in your home; practice turning it off safely.)
- Adjustable wrench(Use to tighten/loosen fittings without overtightening.)
- Pliers(Grip hoses and clamps; avoid damaging fittings.)
- Screwdrivers (Phillips and flathead)(Remove covers and clamps as needed.)
- PTFE plumber’s tape(Seal threaded pipe connections to stop minor drips.)
- Bucket(Place under leaks to catch water.)
- Old Towels/Rags(Absorb moisture and protect floors.)
- Flashlight(Inspect dark spaces like under sinks and behind appliances.)
- Waterproof plastic sheeting or drop cloth(Contain spill during cleanup or repairs.)
Steps
Estimated time: 60-120 minutes
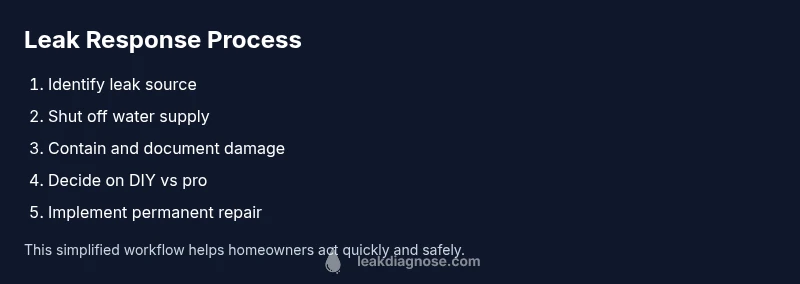
- 1
Locate and shut off the main water supply
Find the main shut-off valve for your home and turn it clockwise until it stops to halt the flow of water. If the main valve is inaccessible, shut off the valve that feeds the area where the leak is originating (for example, under a sink or near the washing machine). This is the most critical first action to prevent further damage.
Tip: If you can’t locate the main valve in the first minute, move to the nearest available local shut-off valve and proceed from there. - 2
Identify the source of the leak
Trace the leak to its source by inspecting fixtures, hoses, fittings, and exposed pipes. Check under sinks, around toilets, behind appliances, and near the water heater. If you detect dampness but cannot pinpoint the source, proceed to containment while you continue the search.
Tip: Shut off individual supply valves (toilets, sinks, appliances) one at a time to see if the flow changes. - 3
Contain the water and protect belongings
Place towels, a bucket, and plastic sheeting to minimize spread. Move valuables away from the wet area and unplug nearby electrical devices if it’s safe to do so. Improve ventilation with a fan aimed at the wet area, but avoid creating electrical hazards.
Tip: Do not mix cleaning chemicals or run fans if water is in contact with electrical outlets. - 4
Document damage and collect information
Take clear photos and notes of the leak, damaged areas, and any affected appliances. Record make/model numbers and the dates you observed damage. This will help with insurance claims and repair planning.
Tip: Video can be more informative than photos for documenting progress and severity. - 5
Decide between DIY or professional repair
If the leak is simple and easily accessible, a DIY fix may be possible. For hidden pipes, gas lines, or leaks involving critical infrastructure, call a licensed plumber immediately. Do not delay if the leak worsens or if water damage extends beyond a small area.
Tip: When in doubt, choose safety and professional assistance. - 6
Implement a temporary fix if safe
For small, accessible leaks, apply plumber’s tape to threads or a temporary rubber patch to slow the leak, then arrange a permanent repair. Temporary fixes are not substitutes for professional repairs when required.
Tip: Temporary fixes should be replaced with a proper repair as soon as possible. - 7
Plan for permanent repair and prevention
Coordinate with a licensed plumber for a long-term fix and discuss preventive measures, including regular inspections, upgraded hoses, and leak detectors. Schedule follow-up checks to ensure the leak is fully resolved and no new issues have emerged.
Tip: Ask about warranties and maintenance plans to extend the life of repaired components.
Questions & Answers
What should I do first when I discover a leak in my house?
Shut off the main water supply if safe, locate the leak source, and contain the area to prevent further damage. Then assess whether DIY fixes are appropriate or if a professional is needed.
Shut off water, locate the leak, contain the area, and decide whether to DIY or call a pro.
Can I fix a leak myself, or do I need a plumber?
Small, accessible leaks may be DIY if you have the right tools and know-how. Hidden leaks, gas lines, or leaks behind walls require a licensed plumber to avoid causing more damage.
It depends on where the leak is and your tools; complex leaks usually need a pro.
How can I prevent leaks from happening again?
Regular inspections, replacing aging hoses, installing leak detectors, and maintaining proper water pressure can prevent many leaks. Address any minor drips promptly to stop them from becoming bigger problems.
Regular checks and quick fixes help prevent future leaks.
What are safe temporary fixes for a leak?
Temporary fixes include applying plumber’s tape to threads or using a rubber patch for a quick slowdown. These are not permanent solutions and should be followed by a proper repair.
Temporary fixes are short-term; get a real repair soon.
When should I contact my insurance company?
If water damage occurs, document it with photos and notes and contact your insurer promptly to understand coverage and claim requirements.
Document the damage and contact your insurer to check coverage.
Are there safety concerns with electrical systems during a leak?
Yes. If water is near outlets or panels, shut off power to the affected area only if safe. Do not touch electrical devices with wet hands.
Water and electricity are a dangerous mix—safety first.
Watch Video
Main Points
- Shut off water immediately to stop the flow
- Identify the leak source before attempting fixes
- Contain water to minimize damage and mold risk
- Document damage for insurance and repairs
- Know when to call a licensed plumber for safety and proper repair