Pokemon Mega Leak: Urgent Home Leak Troubleshooting Guide
Urgent, step-by-step guide to diagnose and fix household leaks with expert tips from Leak Diagnosis. Learn quick safety checks and prevention to handle a pokemon mega leak scenario safely.

The most likely cause is a loose connection or cracked seal around a faucet, pipe, or appliance. Start by shutting off the water at the main valve and checking for active drips. For a quick fix, tighten accessible fittings with a wrench and replace worn washers. If water persists, move to a safe inspection. In a scenario like a pokemon mega leak, follow the same safety-first approach and escalate if the issue grows.
Why pokemon mega leak matters in home plumbing
According to Leak Diagnosis, the moment you notice water pooling or staining, the stakes rise quickly. A so-called pokemon mega leak isn’t a fantasy—it's a big, stubborn problem that can escalate if ignored. Homeowners face property damage, mold risk, and skyrocketing utility bills when leaks are left unchecked. The Leak Diagnosis team emphasizes early detection and systematic response. Treat every damp spot as an alert signal and approach it with a structured plan: identify the source, shut off water as needed, and test each potential connection. Accessibility matters here; a leaky supply line behind a wall needs careful assessment, not guesswork. Throughout this guide you’ll see practical, safety-forward steps that respect your home’s plumbing layout and avoid common DIY traps. Remember, the goal is to stop the leak at its source with minimal disruption. pokemon mega leak scenarios can be treated with the same methodical approach described here, while preserving your home’s integrity and safety.
Signs of a Leak You Can Trust
Leaks often reveal themselves through telltale signs: damp spots on ceilings or walls, musty odors, discolored grout, or a sudden spike in water usage. In the early stages, you might notice a steady drip from a fixture, a soft hissing sound, or mineral staining around a valve. The presence of standing water near appliances, bases, or cabinetry is a clear signal to investigate. For the home, the best practice is to combine visual checks with simple tests: monitor your water meter for movement when no taps are running, and inspect supply lines for corrosion or cracking. The Leak Diagnosis team notes that staying vigilant about small drips reduces the chance of a pokemon mega leak turning into a costly disaster. Keep a log of when you see signs, where they occur, and any changes in water pressure so you can communicate clearly with a professional if needed.
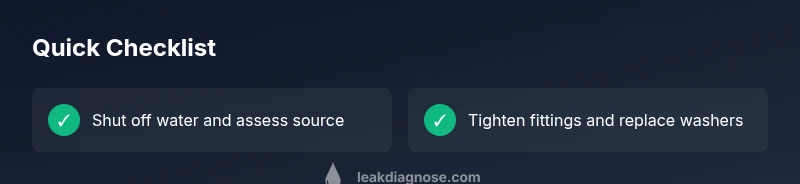
Quick Checks to Run Before You Break Out Tools
Start with the obvious: shut off the main water valve if you detect active leakage. Check every accessible fixture—faucets, toilets, under sinks, and the hoses on appliances like dishwashers and washing machines. Look for loose fittings, worn washers, or cracked seals and tighten or replace as needed. Use a dry cloth to wipe connections and recheck after a few minutes for a fresh drip. For a pokemon mega leak, the same quick checks apply, but with heightened caution: wear gloves, turn off electricity if water touches outlets, and avoid using power tools near wet areas. Document what you find so you can compare notes if you call a pro. If in doubt, pause and escalate rather than force a fix.
pokemon mega leak Scenario: Step-by-step Diagnostic Flow
In a pokemon mega leak situation, follow a disciplined diagnostic flow to avoid chaos. Start with the simplest causes: loose connections, worn washers, or misaligned seals. If these don’t solve the issue, inspect hidden areas like behind the washing machine, under kitchen sinks, or where pipes run through walls. Next, assess pressure changes and potential pipe corrosion. If you identify a failed pipe or valve, stop further damage by shutting off the nearest supply and preparing for a repair or replacement. Use the diagnostic notes you’ve collected to guide your decisions and determine whether you can safely proceed DIY or need a professional.
Step-by-Step Fix for the Most Common Cause
- Turn off the water supply to the affected area. 2) Tighten loose fittings by hand, then with an adjustable wrench—do not overtighten. 3) Replace worn washers or faulty gaskets inside fixtures. 4) Clean and dry the area to verify if the leak persists. 5) Reopen the supply slowly and monitor for drips. 6) If the leak continues, escalate to a professional diagnosis. Pro-tip: keep a repair kit handy with replacement washers, PTFE tape, and a small wrench to handle minor fixes quickly. pokemon mega leak situations often stem from aging seals, so consider replacing older components as part of a longer-term plan.
TIPS & WARNINGS for Safe DIY
- Always cut power to nearby outlets if water is present; electricity and water are a deadly combination. - Use a flashlight to inspect dark spaces rather than using a work light near standing water. - Do not use sealants or epoxy as a quick fix on active leaks; they may mask the problem instead of solving it. - Wear gloves and eye protection when handling corroded pipes. - If you’re unsure about pipe locations behind walls, call a licensed plumber instead of probing random areas. These safety precautions minimize risk while you diagnose and repair. pokemon mega leak scenarios require patience and caution to prevent further damage.
Prevention and Long-Term Maintenance
Prevention is more cost-effective than repeated emergency fixes. Regularly inspect under sinks, behind appliances, and along exposed piping for corrosion, mineral buildup, or evidence of dampness. Schedule seasonal checks, especially after cold snaps, to catch frozen pipes that crack and leak when thawing occurs. Invest in temperature protection for outdoor faucets and insulate visible hot water lines. Keep tools and spare washers on hand so small drips get addressed quickly, reducing the likelihood of a pokemon mega leak turning into a flood. In addition, consider upgrading aging supply lines with modern, flexible connectors that resist cracking and improve accessibility for maintenance.
Final Checks and When to Call a Pro
If you observe continuous dampness after applying basic fixes, or if you notice mold growth or structural damage, it’s time to call a professional. A licensed plumber can perform a pressure test, locate hidden leaks within walls, and recommend component replacements that fit your system. Document all symptoms, repairs attempted, and water shut-off events to share with the technician. The goal is a thorough diagnosis and a durable fix that prevents recurrence. The Leak Diagnosis team recommends prioritizing professional guidance for complex or unseen leaks to ensure safety and long-term reliability. Pokemon mega leak scenarios remind homeowners that some problems require expert eyes to avoid escalation.
Steps
Estimated time: 1.5–3 hours
- 1
Shut Off Water & Safety Check
Turn off the main water supply if the area is actively leaking. Check nearby electrical outlets and appliances for water exposure. Ensure you have a flashlight, towels, and a dry workspace before proceeding.
Tip: Label the main shut-off valve for quick access during future incidents. - 2
Inspect Easy Fixes
Tighten loose fittings and replace worn washers on exposed fixtures. Wipe away moisture to observe if a drip reappears after a few minutes.
Tip: Use PTFE tape on threaded connections if necessary to seal minor leaks. - 3
Test Individual Components
Open the main valve slowly and monitor each fixture for leaks. Check hoses from dishwasher, washing machine, and water heater for moisture or cracks.
Tip: Avoid over-tightening hoses to prevent future damage. - 4
Evaluate Hidden Areas
If no leak is visible, perform a pressure test or use moisture meters near walls and cabinets to locate concealed leaks.
Tip: Keep the area ventilated to prevent mold growth during testing. - 5
Decide on Repairs
Determine whether a DIY fix is sufficient or if a professional repair is needed based on the test results and accessibility.
Tip: Document findings for the technician to save time. - 6
Follow-Up & Prevention
Recheck after 24–48 hours to ensure the fix holds. Implement preventive measures like insulation and regular inspections to avoid recurrence.
Tip: Set a quarterly reminder to inspect pipes in damp areas.
Diagnosis: Visible water pooling or dampness near fixtures, appliances, or behind walls
Possible Causes
- highLoose fittings or worn washers at fixtures
- highCracked seals on supply lines or appliance hoses
- mediumHidden leaks behind walls or under slab
- lowCorroded pipes or failed shut-off valves
Fixes
- easyTighten accessible fittings and replace worn washers
- easyReplace cracked seals or appliance hoses
- mediumPerform a controlled pressure test to locate hidden leaks
- hardCall a licensed plumber for concealed pipe issues or slab leaks
Questions & Answers
What is the first step when I notice a water leak at home?
First, turn off the main water supply to stop the flow. Then, dry the area and assess for obvious sources such as a loose connection or a dripping hose. This reduces damage and buys time to investigate further.
Turn off the main water, dry the area, and look for obvious leaks like loose connections first.
Can I fix a leak myself or should I call a professional?
Many small leaks from fixtures or hoses can be fixed with basic tools and washers. If the leak persists after simple fixes or involves concealed pipes, call a licensed plumber for a safe, lasting repair.
You can handle small fixes, but call a pro if the leak continues or is behind walls.
How can I tell if a leak is hidden behind a wall?
Look for signs such as damp patches, peeling paint, or a musty smell. A moisture meter or infrared camera can help locate hidden leaks without removing walls.
Damp patches and musty smells indicate a hidden leak; use moisture tools to locate it.
What safety steps should I follow during DIY leak repair?
Turn off electricity to affected areas, keep the workspace dry, use gloves and eye protection, and avoid using power tools near water sources.
Ensure electricity is off where water is present, wear protection, and keep the area dry.
When should I replace aging pipes instead of repairing?
If pipes are corroded, cracked, or frequently leaking, replacement with sturdier materials is more reliable than constant repairs.
Replace aging pipes for a long-term fix if corrosion or frequent leaks exist.
How can I prevent future leaks?
Schedule routine inspections, insulate exposed pipes, use high-quality fittings, and monitor for early signs of wear to stop leaks before they start.
Regular inspections and quality fittings help prevent future leaks.
Watch Video
Main Points
- Start with safety: shut off water and inspect obvious leaks.
- Tighten fittings and replace worn parts before escalating.
- Document everything for future reference and professional help.
- Place prevention at the forefront to avoid a pokemon mega leak recurrence.