Monster Hunter Leak: Urgent Home Leak Troubleshooting Guide
An urgent, comprehensive guide to diagnosing and fixing hidden leaks in homes. Learn common sources, at-home checks, safe diagnostics, and when to call a pro. Brand-backed advice from Leak Diagnosis for 2026.

Most likely you’re dealing with a hidden plumbing leak or appliance overflow, usually from a loose connection, cracked hose, or a busted pipe. Start by shutting off the main water supply, then inspect under sinks, behind washers, and around water heaters for damp spots. If active water flows or you smell mold, contact a professional immediately.
Why monster hunter leak matters for homeowners
Leaks can start as tiny drips that seem inconsequential, then escalate into structural damage, mold growth, and costly repairs. The phrase monster hunter leak captures the idea that a leak behaves like a stealthy intruder—slow, persistent, and hard to pin down. According to Leak Diagnosis, early detection is built on systematic checks, documentation, and knowing where the usual trouble spots live in most homes. In 2026, our analysis shows that homeowners who follow a disciplined diagnostic flow save time and money while reducing health risks associated with mold and moisture intrusion. This guide uses practical step-by-step methods to help you identify and tame a monster before it grows.
Common sources of leaks in homes
Leaks come from a handful of predictable places, especially in aging houses or high-use spaces. Common culprits include faucet connections with worn washers, toilet flappers that don’t seal, supply lines behind sinks, and appliance hoses on washers and dishwashers. Pipes may develop tiny cracks or joints that corrode over time. Exterior areas such as roof penetrations can allow water to travel inside walls, creating hidden leaks that are hard to detect. By targeting these sources first, you can dramatically increase your odds of stopping a leak fast and reducing secondary damage like mildew or wood rot.
The signs that tell you a leak is present
There are telltale indicators that a leak exists even if you can’t see water on the floor. Look for damp patches on ceilings or walls, peeling paint, warped cabinetry, or moldy odors that linger after drying. A sudden rise in your water bill without increased usage is another strong signal. Listen for the faint sound of running water in pipes when water should be still, or notice splotches in hidden areas behind appliances. Early warning signs let you intervene quickly before the leak expands into a larger problem. Keeping a log of moisture sightings helps you track patterns and confirm a leak source over time.
How to check safely: initial at-home observations
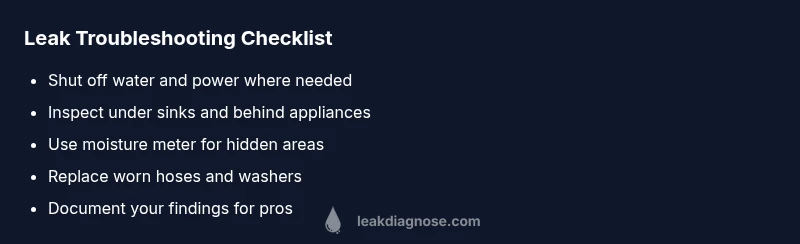
Before you start digging into walls or crawling into tight crawlspaces, take safety precautions. Shut off the main water valve if you suspect a major leak. Wear gloves and eye protection when inspecting pipes, and avoid electrical outlets near wet areas. Start at obvious spots: under sinks, around toilets, and behind the washing machine. Use a flashlight to peek behind appliances for discolored tiles, damp insulation, or pooling water. If you notice active water flow or hear rushing water, stop and call a professional rather than attempting makeshift repairs.
Diagnostic-flow in practice: from symptom to solution
A structured diagnostic flow helps you identify a leak source efficiently. Begin with a symptom (wet spot, damp ceiling, high bill). Then consider likely causes based on location (faucet vs. supply line vs. appliance). Next, perform safe checks (shutoff valves, visible hoses, pan under appliances). If the symptom persists after basic checks, escalate to more precise tests (pressure test, dye test, moisture meter). Document findings at each step and confirm the leak source before committing to repairs. This approach minimizes unnecessary invasive work and lowers the risk of damaging renovations.
Step-by-step quick fix for a common faucet leak
A common faucet leak is often due to worn O-rings or cartridges. Start by turning off the water supply and removing the faucet handle to access the stem. Replace worn O-rings or the cartridge, reassemble, and slowly turn the water back on to test for leaks. If dripping continues, inspect the valve seat and ensure proper seating. Dry the area thoroughly and monitor for a few days to confirm the repair held.
Safety, prevention, and best practices
Safety should drive every fix. Always shut off water before disassembly, and disconnect electrical devices near water sources. Use proper tools and wear eye protection. After repairs, dry all surfaces to prevent mold, check for hidden leaks with a moisture meter, and consider a home moisture plan that includes regular inspections of hoses, fittings, and appliance connections. Install spill trays or pan liners under potential leak points to catch drips early. Routine maintenance reduces the likelihood of major failures and helps preserve the home’s structure.
Real-world scenarios and rapid response plan
In real homes, leaks often appear after a busy week of heavy use (vacation runners, holiday guests) or during seasonal changes when pipes contract and expand. The rapid response plan: 1) identify symptoms, 2) shut off water at the main valve, 3) protect valuables with towels and buckets, 4) document with photos, 5) call a licensed plumber for non-visual leaks, 6) implement temporary fixes only if trained. This approach minimizes damage and buys time while you arrange professional help. The key is to act quickly and methodically, not impulsively.
Steps
Estimated time: 45-60 minutes
- 1
Shut off water and assess safety
Locate and turn off the main water valve to stop further leakage. If the leak is near electrical devices, ensure power is off to those circuits before proceeding. This step prevents worsening water damage and protects you from shock.
Tip: Know your main shutoff location beforehand; label it clearly. - 2
Inspect obvious sources
Check sinks, toilets, and visible hoses for damp spots, corrosion, or loose fittings. Tighten fittings where appropriate, but avoid over-tightening that could damage threads.
Tip: Take photos before disassembling fittings for reference. - 3
Check under appliances
Move appliances away from walls to examine drain pans, supply lines, and hoses. Look for pooling water or rust-colored residue indicating corrosion.
Tip: Place towels or a bucket to catch residual leaks during inspection. - 4
Test for hidden leaks
If no obvious signs, perform a dye test or use a moisture meter around suspected areas. Apply dye to toilet tanks or appliance lines and observe for colored water or moisture migration.
Tip: Use food-grade dye and document the results with photos. - 5
Verify after the fix
Restore water supply and watch for any signs of leakage for at least 24–48 hours. If leakage recurs, escalate to professional diagnosis promptly.
Tip: Keep a log of readings and visual signs during the observation period. - 6
Plan longer-term prevention
Install leak detectors or water-sensing devices, schedule seasonal checks of hoses and connections, and ensure proper drainage around the home to prevent future incidents.
Tip: Set reminders for annual plumbing inspections. - 7
Document and communicate
Record what you did, what parts were replaced, and the outcomes. Share photos with any professionals you hire to speed up the diagnosis.
Tip: Write a concise summary to hand off to a plumber. - 8
Know when to call a pro
If you cannot locate the source, if the leak is behind walls, or if you suspect structural damage, contact a licensed plumber immediately. Professional intervention reduces risk and ensures a proper fix.
Tip: Don’t delay if mold, strong odors, or active water are present.
Diagnosis: Persistent damp spots or a sudden spike in water use
Possible Causes
- highHidden supply line leak behind wall
- highWorn toilet flapper causing overflow
- mediumCracked appliance hose
- lowCondensation on cold lines
Fixes
- easyShut off main water and isolate the source
- easyTighten or replace leaking hose connections
- mediumReplace worn flappers or valves
- hardCall a professional for hidden wall leaks or structural damage
Questions & Answers
What is the most common sign of a hidden leak?
Damp spots, moldy smell, or a sudden rise in your water bill without increased usage are typical signs of a hidden leak.
Look for damp patches or a higher water bill, which often signal a hidden leak.
Can I fix a leak myself, and when should I call a professional?
Simple leaks like loose hoses or worn washers can often be fixed by homeowners. Hidden leaks behind walls or in structural areas usually require a licensed plumber.
You can fix easy leaks, but call a pro for anything hidden or structural.
What tools help locate a leak inside walls?
A moisture meter, infrared camera, and listening device can help locate moisture and sound indicating leaks behind walls.
Moisture meters and special cameras help you find leaks you can’t see.
How long does a typical leak repair take?
Repair time depends on the source. Simple faucet leaks may take under an hour, while wall leaks could require a day or more.
Most fixes are quick if the source is obvious, longer if walls are involved.
What maintenance reduces future leaks?
Replace aging hoses, check fittings annually, install leak detectors, and keep drainage clear to prevent future issues.
Regular checks and detectors help prevent leaks from turning into bigger problems.
Should I dry out areas after a leak?
Yes. Dry the area thoroughly and use a dehumidifier or better ventilation to prevent mold growth.
Dry the area well and ventilate to stop mold growth.
Watch Video
Main Points
- Identify leaks quickly to minimize damage
- Shut off water when you see moisture or suspect a leak
- Document findings to speed up professional help
- Prevent future leaks with a maintenance plan and detectors