Urgent Troubleshooting for Leaking: Quick Fixes and Safe Steps
Urgent guide for resolving leaking issues at home. Learn quick checks, a step-by-step diagnostic flow, safety tips, and when to call a pro to prevent water damage.

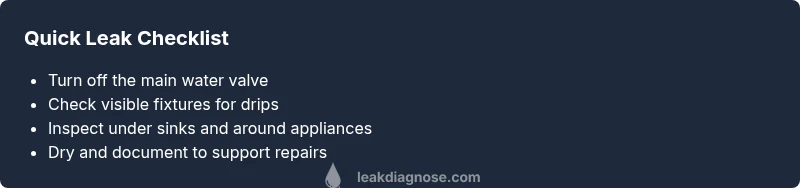
Most leaking issues begin with a dripping faucet, a loose connection, or a hidden pipe fault. Start by turning off the main water shutoff to stop further damage. Inspect visible fixtures for looseness, corrosion, or mineral buildup, then check beneath appliances and along walls for damp spots. If the source remains unclear, call a licensed plumber for a professional assessment.
Why Leaks Happen and Why They Demand Urgent Action
According to Leak Diagnosis, leaking problems in homes are often caused by aging fittings, hidden corrosion, or shifting plumbing that creates tiny, persistent drips. The moment you notice leaking, you’re facing a risk that isn’t just about wasted water; unchecked leaks can lead to structural damage, mold growth, and higher utility bills. In the first 24 to 48 hours, small leaks can escalate into significant water loss, so quick, systematic checks are essential. By understanding common failure points and acting fast, you can minimize damage and protect your home. This guide is written for homeowners and DIY enthusiasts who want practical, safe steps to identify the source, stop the flow, and plan the right fix. The Leak Diagnosis team emphasizes safety first and clear documentation to avoid costly mistakes.
Common Plumbing Leak Scenarios and Quick Checks
Leaking can show up in several predictable ways. A faucet that drips after turning it off is often a worn washer or seat; a kitchen sink supply line may leak from a loose compression fitting; toilets leak if the flapper or fill valve is failing; appliances like dishwashers and washing machines can leak from hoses or connections. Water stains on ceilings or walls may indicate a hidden pipe issue or a roof leak that travels inside walls. In every case, start with the simplest checks: inspect exposed joints, tighten fittings gently, and look for damp patches. If you find mineral buildup or corrosion, address it early to prevent further damage. Throughout, keep notes and photos for your records and insurance.</br>
Visual Cues and Safety First: Spotting Leaks Early
Early detection relies on visual and auditory cues. Look for telltale signs like white mineral deposits around joints, dark damp rings under sinks, or warped baseboards near a wall. Listen for constant dripping or a faint hissing from pipes. Safety is paramount: never touch electrical outlets or devices with wet hands, and avoid using extension cords near water. If you see visible moisture behind walls or under appliances, treat it as a leak with high priority. In these cases, turn off the affected area’s water supply and ventilate the space to reduce mold risk. The presence of moldy odors or staining should trigger an immediate inspection by a professional if you can’t identify the source right away.
Diagnostic Flow Overview: From Symptom to Solution
A systematic diagnosis helps you avoid guesswork. Start with the symptom (drip, wet patch, running toilet), map it to the most likely cause (faucet washer, supply line, valve), then verify with a simple test (tighten or replace the suspect part, observe for changes). If the leak persists, expand the search to hidden areas: behind cabinets, under flooring, or inside walls where moisture meters or infrared cameras are useful. Document findings as you go, and prioritize safety. This flow aligns with best practices in home maintenance and is supported by insights from Leak Diagnosis.
Minimizing Damage: Immediate Actions After a Leak
First, shut off the main water supply if the leak is significant or cannot be isolated quickly. Move valuables away from the water path and place towels or a basin to catch drips. If the leak is near electrical equipment, switch off the circuit or unplug devices from a dry location. Ventilate the space to reduce humidity and prevent mold growth, especially in kitchens and bathrooms. Once the water is controlled, mop up standing water and dry the area to prevent damage to floors and walls. Keep detailed notes and photos for future repairs or insurance purposes, and plan a repair strategy that scales with severity.
Tools, Parts, and Safety Essentials You May Need
Preparing the right tools makes the fix smoother. A basic toolkit with adjustable wrench, screwdrivers, pliers, and a flashlight helps you reach tight spots. Have replacements on hand: faucet washers, compression rings, Teflon tape, pipe sealant, and repair clamps for temporary fixes. Always wear gloves and eye protection when working with water and metal fittings. If you’re uncertain about pipe material (copper, PEX, CPVC), or if the leak involves the main supply line, avoid DIY repairs and contact a licensed plumber. Safety and proper identification of the material reduce the risk of further damage.
How to Document Leaks for Insurance or Home Repairs
Documenting leaks supports claims and future work. Take timestamped photos of the area, the water source, and any damage to walls, floors, or ceilings. Note dates, observed symptoms, and the steps you took to mitigate the leak. Save receipts for any parts you purchased and record the professional’s assessment if one is called. Clear documentation helps you communicate with insurers and contractors, and it can speed up repairs and approvals. Leak Diagnosis emphasizes keeping a copy of your notes in a digital and physical file for quick access.
Common Myths About Leaking and Fixes Debunked
Myth: All leaks stop with a quick tighten. Reality: many leaks require parts replacement or a trained eye to locate hidden damage. Myth: Sealing products cure everything. Reality: sealants can slow a minor drip but rarely fix structural leaks. Myth: Leaks are always due to broken pipes. Reality: leaks often come from faulty fittings, worn washers, or aging appliances. Reality check: safer, longer-lasting fixes come from proper diagnosis and, when needed, professional help.
Steps
Estimated time: 60-90 minutes
- 1
Shut off water and assess safety
Locate and turn off the main water valve if the leak is significant. If the area is electrical near the leak, switch off the corresponding circuit at the breaker. Remove standing water with towels and place a bucket for any remaining drip. Once safe, document the area with photos before touching any components.
Tip: Keep footwear dry and avoid touching metal parts with wet hands. - 2
Identify the obvious source
Inspect faucets, toilets, and appliance connections for visible drips or dampness. Tighten fittings gently with the appropriate wrench; replace washers or gaskets if you see wear. Run water briefly to observe whether the drip stops and note the time and location of any new leaks.
Tip: Use a flashlight to illuminate dark corners and behind cabinets. - 3
Check hidden areas
Look behind walls, under sinks, and in ceilings for signs of moisture, staining, or mold. If you suspect a wall leak, do not cut into drywall until you confirm with moisture readings or a professional. Consider renting a moisture meter or hiring imaging tools to confirm hidden damage.
Tip: Avoid drywall intrusion until you’ve confirmed the source to prevent unnecessary repairs. - 4
Evaluate appliances and main lines
Inspect appliance supply hoses (dishwasher, washing machine) and their connections. Check the main supply line for corrosion or loose clamps. If a leak is suspected behind walls, do not attempt a major removal without turning off power and water to the area.
Tip: Replace old hoses with reinforced stainless-steel hoses where possible. - 5
Choose a fix path and test
For minor leaks, replace the worn component and re-test. For complex or uncertain leaks, plan professional help. Always test the fix by running water and watching for drips over a few minutes.
Tip: Document the repair steps for future maintenance records.
Diagnosis: Visible leak/soaked area or persistent damp patch
Possible Causes
- highWorn faucet washer or seat
- highLoose or damaged supply line connections
- mediumClogged or faulty toilet flapper/fill valve
- mediumAppliance hoses or connections
- lowHidden pipe damage behind walls
Fixes
- easyTighten or replace leaking fittings; replace worn washers/seals
- easyShut off water, drain line, then reseat or replace faulty valve
- mediumReplace toilet flapper or fill valve; test with dye test
- easyInspect appliance hoses; replace damaged hoses and tighten clamps
- hardUse professional tools (e.g., infrared camera) to locate hidden leaks
Questions & Answers
What should I do immediately if I discover a major leak in my home?
Shut off the main water supply, call for help if the leak is large, and begin mopping and removing items at risk. Document the damage with photos and avoid turning on power to wet areas until inspected.
Shut off water, document damage, and call for help if the leak is large. Do not use power near wet areas.
How can I tell if the leak is from a pipe or an appliance?
Trace the water path from the source. Drips near a sink or toilet usually indicate fittings or valves. Leaks near appliances often come from hoses or supply lines. If uncertain, isolate sections and test one area at a time.
Trace the path from the source. If it’s near a sink, check fittings; near appliances, check hoses.
Are sealants or leak-stop products a good long-term fix?
Sealants can slow minor drips but are not a substitute for replacing worn parts or fixing structural leaks. Rely on mechanical fixes ( washers, valves, hoses) and professional repair for persistent leaks.
Sealants aren’t a long-term fix for serious leaks; replace worn parts or call a pro.
How often should I inspect for leaks in a typical home?
Perform a basic look-over monthly, with a thorough inspection of under sinks and appliances every 6 months. Immediate checks are warranted after major weather events or freezing conditions.
Check monthly and do a deeper look every six months, especially after weather events.
Can leaks cause mold or structural damage?
Yes. Prolonged leaks create moisture that can lead to mold growth and wood/structural damage if left unresolved. Address leaks promptly and dry affected areas thoroughly.
Yes. Leaks lead to moisture, which can cause mold and structural damage if not fixed quickly.
When should I call a professional for a leaking issue?
If the source isn’t easily identified, if there’s hidden moisture, or if electrical components are involved, call a licensed plumber. For urgent leaks, don’t delay yellowing; seek immediate assistance.
Call a plumber when the source isn’t clear or if there’s hidden moisture or electrical risk.
Watch Video
Main Points
- Stop the water source quickly to minimize damage
- Document leaks with photos for records
- Start with simple checks before complex fixes
- Call a pro if you face hidden leaks or electrical risk
- Keep spaces dry to prevent mold growth