Leak of Water: Fast Home Diagnosis & Fix Guide
Urgent, step-by-step troubleshooting guide to diagnose and fix a leak of water at home. Learn safe shut-offs, common causes, and prevention to protect your property.

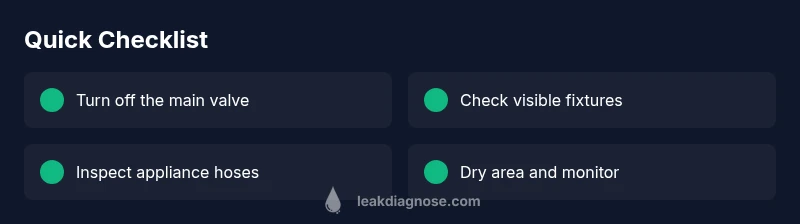
Most often, a water pool or damp spots come from a dripping faucet, loose supply line, or faulty appliance connection. Start by inspecting visible fixtures, tighten loose fittings, and shut off the main valve if needed. If the leak persists, check behind walls and call a professional.
Understanding the Impact of a Leak of Water
A leak of water in a home can cause more than just a wet patch on the floor. Even small drips waste hundreds of gallons over weeks and can invite mold, wood rot, and high utility costs. According to Leak Diagnosis, addressing a leak early protects your home’s structure, reduces damage to belongings, and minimizes insurance hassles. Start by noting where water is appearing most recently, whether it’s a steady drip under a sink, damp wallpaper, or water staining on ceilings. Documenting the location and time of discovery helps you track progress after you fix it. In many cases, rapid action buys you time to make a temporary fix before a permanent repair, especially in cold climates where frozen pipes can burst if left unchecked. The most important thing is to act calmly, isolate the area if possible, and plan a safe repair workflow rather than panicking.
Common Sources of a Leak of Water in Homes
Most residential leaks originate at fixtures or hoses. The top culprits include dripping or loose faucet connections, worn washers, and corroded supply lines. Toilets are a common source when the flapper or wax ring fails, causing constant damp patches around the base. Appliances with water hoses—dishwashers and washing machines—can leak from hoses, fittings, or pump seals. Piping in basements, crawl spaces, or behind walls can develop leaks due to corrosion, shifting foundations, or freezing in winter. Exterior sources, such as a hose bib or cracked roof flashing, can also contribute. Finally, overlooked slow leaks inside walls or under floors often go undetected until mold or high water bills reveal the issue. Regular quick checks help catch these problems before they escalate.
Safety First: Immediate Actions for a Leak of Water
Safety comes first when a leak is discovered. If water is actively spraying, shut off the main water supply from the street or meter box if accessible. If that’s not possible, close the shut-off valve closest to the affected fixture. Avoid stepping into pooled water near outlets and appliances; turn off power to affected areas if you can do so safely. Use towels to contain drips and place buckets to catch water. Do not attempt makeshift repairs that involve sealing pipes with duct tape; these are temporary at best and can fail. After the initial shut-off, document the scene with photos for records and insurance.
Tools, Tests, and Safe DIY Checks
You don’t need to be a licensed plumber to start. Gather a flashlight, towels, containers, and a basic wrench. Inspect accessible connections: faucet lines, toilet supply hoses, and appliance hoses. If a visible leak is found, tighten or replace washers and hoses carefully. For toilets, consider replacing a worn flapper or wax ring if you notice a poor seal. If the area remains damp after basic checks, move to more thorough tests such as measuring moisture behind walls with a meter or calling a professional for a pressure test.
Documenting and Monitoring the Leak Over Time
Take clear photos from multiple angles and note the date and time of discovery. Record water meter readings before and after a suspected leak to gauge consumption changes. Use a simple notebook or digital log to track repairs, parts replaced, and the dates of any professional visits. If possible, place containers under drips with a towel to minimize damage while you test fixes. Re-check after 24 hours to confirm whether the area remains dry. If the leak returns or worsens, you’ll have a detailed history to share with a plumber.
Prevention and Maintenance for a Leak of Water
Create a monthly routine: inspect under sinks, check hose connections, and look for damp spots on walls. Replace aging hoses (washing machine, dishwasher, and fridge ice-maker hoses) every 3–5 years or per manufacturer guidance. Install leak detectors near water heaters, under sinks, and behind appliances to catch slow leaks early. Seal penetrations where pipes pass through walls or cabinets to prevent drafts and moisture intrusion. Finally, maintain proper water pressure; excessive pressure stresses pipes and fittings and can accelerate leaks.
Steps
Estimated time: Total time: 45-75 minutes
- 1
Identify the leak source
Carefully inspect visible fixtures, connections, and appliances for moisture, pooling water, or corrosion. Note the symptoms and where they appear first. This initial scan helps you decide whether a quick DIY fix is enough or if a professional is needed.
Tip: Use a flashlight to inspect dark corners and behind appliances. - 2
Shut off the water supply
If water is actively leaking, shut off the main valve first if accessible. If not, close the valve closest to the affected fixture. This limits damage while you plan repairs.
Tip: Keep a wrench handy for tight valves and label the shut-offs for future emergencies. - 3
Dry the area and monitor
Towel the wet area and place a bucket under drips. After drying, monitor for 30–60 minutes to confirm whether moisture returns. This helps verify if the fix is holding.
Tip: Take photos for your records before testing repairs. - 4
Apply safe, simple fixes
If the leak is at a simple, accessible connection (like a loose nut or worn washer), perform the fix carefully. Do not force fittings; if resistance is felt, stop and reassess.
Tip: Always wear gloves and eye protection when handling water lines. - 5
Escalate if unresolved
If water continues after basic checks or you suspect hidden pipes, contact a licensed plumber. Hidden leaks can require professional pressure tests and leak detection.
Tip: Provide the plumber with photos and a log of measurements and fixes attempted.
Diagnosis: Persistent water pooling or damp spots after basic checks
Possible Causes
- highLeaking faucet or loose supply line
- mediumToilet flapper leak
- mediumAppliance hose or connection leak
- lowHidden pipe leak behind walls
Fixes
- easyTighten fixtures and replace worn washers
- mediumReplace toilet flapper or wax ring
- easyInspect and replace appliance hoses; check pump seals
- hardConduct a pressure test or call a plumber to locate hidden pipe leaks
Questions & Answers
What is the first thing I should do if I notice a leak of water?
Turn off the water supply to prevent further damage and inspect the area for obvious leaks.
First, shut off the water and check for obvious leaks.
How can I tell if a leak is behind a wall?
Look for damp patches, musty odor, bubbling paint, or a sudden rise in your water bill.
Look for damp patches and a rising bill to spot hidden leaks.
Are there DIY fixes for small leaks?
Yes, for minor leaks like loose connections or worn washers; replace parts and tighten fittings. If in doubt, stop and call a professional.
You can fix small leaks by tightening or replacing washers; if unsure, call a pro.
When should I call a professional?
If water keeps pooling after basic checks or you suspect hidden pipes, there may be a larger issue requiring professional attention.
If it keeps leaking after checks or you suspect hidden pipes, call a pro.
What preventive steps reduce future leaks?
Do routine maintenance, replace aging hoses, install leak detectors, and fix drips promptly.
Do regular maintenance and install detectors to catch leaks early.
Watch Video
Main Points
- Turn off water at the first sign of a leak.
- Document the scene with photos for records and insurance.
- Check fixtures and hoses first before assuming a pipe problem.
- Call a professional for hidden or complex leaks.