Leak Bathtub Troubleshooting: Quick Fixes and Safe Repairs
Urgent, practical guide to diagnosing and repairing bathtub leaks. Learn common causes, quick checks, step-by-step fixes, safety tips, and prevention strategies from Leak Diagnosis.

Common bathtub leaks arise from worn caulk around the tub, a loose drain flange, or deteriorated faucet seals. Start by inspecting the caulk along the tub edge, the drain assembly, and the faucet connections. Reseal or tighten as needed, then monitor for additional seepage. If water leaks behind walls, shut off the water and call a licensed plumber.
Why bathtub leaks happen
Bathtub leaks are a common homeowner challenge, and they rarely come from a single dramatic event. In most cases, the leak starts at joints and seals that seal water from the bathroom behind the wall or under the tub. According to Leak Diagnosis, aging caulk around the tub edge, a loose drain flange, or worn faucet seals are the typical culprits. Over time, silicone and acrylic caulks lose elasticity, allowing water to seep into gaps. The drain flange can corrode or loosen, creating a path for water from the tub to travel into the substrate. Faucet stems and O-rings also degrade with use, leading to persistent dripping that can pool and migrate under fixtures. Understanding these common failure points helps homeowners prioritize quick checks and safer fixes without turning a minor drip into a major water-damage incident.
Quick checks you can do today
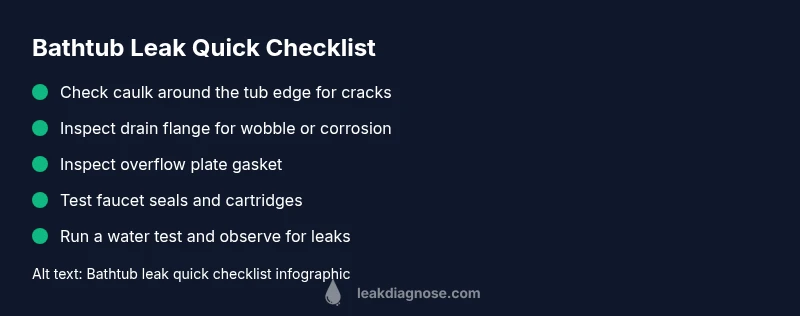
If you notice a slow drip or damp spots after baths or showers, you can perform some noninvasive checks before calling a plumber. Start with the obvious edges:
- Inspect the caulk or silicone seal around the bathtub edge for cracks, gaps, or peeling paint. Gently press along the seam with a gloved finger; if you feel a void, it’s time to recaulk.
- Look at the drain flange area beneath the tub (or at least the visible portion in the drain assembly). A loose flange will wobble when touched and may show rust or corrosion.
- Remove and inspect the overflow plate if accessible. A loose or cracked overflow gasket can channel water into the wall cavity.
- Check faucet connections and supply lines for moisture or staining around the fixtures. A drippy faucet can overwhelm seals elsewhere and cause pooling near the base.
- Check for signs of mold, musty odors, or soft spots on the surrounding wall, which can indicate water is migrating behind finishes.
If you see water actively leaking from behind walls or under the tub, turn off the main water supply and contact a professional promptly to prevent further damage. The goal is to stop the water source and prevent mold growth and structural deterioration.
Common causes in detail
There are several primary causes of bathtub leaks, each with distinct repair paths. The sealant or caulk around the tub is the first line of defense; when it fails, water seeps into the substrate and walls. A corroded or loose drain flange creates a direct channel from the tub bowl to the drain line, producing visible leakage at the base. Worn faucet seals or worn stems lead to continued drips that accumulate over time. In some cases, the overflow gasket or plate can crack, allowing water to bypass the tub and travel down the wall cavity.
Less common but equally important are cracks in the tub shell or grout joints in tiled surrounds, which can radiate water into structural spaces. Finally, improper installation or settling of the tub and plumbing can create misaligned joints that gradually leak after use. Each cause requires a different approach, from resealing to replacing hardware to more extensive plumbing work.
How to fix: sealing and replacing components
Fixing a bathtub leak starts with simple, reversible steps and progresses to more involved tasks if needed. The sequence below reflects practical, safety-conscious priorities:
- Recaulk the tub edge: Remove old caulk with a plastic blade, clean the joint, dry completely, apply a high-quality silicone sealant designed for bathrooms, and smooth with a caulk tool. Allow curing time per product instructions.
- Tighten or replace the drain flange: If the drain flange wiggles, tighten the mounting nut from underneath or replace the flange if corroded. Apply plumber’s putty or a gasket as directed, then re-test.
- Inspect and replace faucet seals: Turn off water, disassemble the faucet if needed, replace O-rings or cartridge seals, and reassemble. Test for drips with the water on.
- Check the overflow assembly: If the gasket is worn, replace it and reseal the plate to the wall.
- Re-test for leaks: Run a controlled water test, observe at 10-15 minutes and again after several hours to ensure the leak is resolved.
- If the leak persists: A licensed plumber may need to evaluate hidden plumbing behind walls or under the tub, especially if water appears behind surfaces.
When to bring in a professional
Some leaks are straightforward, but others involve hidden damage that isn’t safe to address without training. If you notice damp studs, soft drywall, bubbling paint, or standing water behind the tub, it’s essential to stop work and call a professional. A qualified plumber can perform a more thorough drain repair, verify the integrity of the tub supports, and ensure there’s no risk of mold growth or structural compromise. Remember: attempting complex plumbing work without proper tools can worsen the problem and create additional safety hazards.
Preventing future bathtub leaks
Prevention is more cost-effective than repair. Implement these practices to minimize leak risk:
- Re-caulk every 3-5 years or whenever you see cracks or peeling around the tub edge. Choose a silicone-based caulk rated for bathrooms.
- Inspect the drain area during routine cleaning; replace the drain seal or flange if you detect looseness or corrosion.
- Check faucet seals every six months and tighten or replace worn washers and cartridges as needed.
- Maintain good ventilation in bathrooms to prevent humidity-induced mold growth that can hide leaks behind walls.
- Schedule professional inspections after major renovations to ensure that new materials and joints are properly sealed and installed.
By adopting these habits, homeowners can catch problems early and avoid costly water damage.
Quick diagnostic flow snapshot
To help you navigate a leak efficiently, use this quick mental flow:
- Is there visible water at the tub edge? If yes, inspect caulk first.
- Does the water originate from the drain area? Check drain flange and packing nut.
- Is the water dripping from the faucet or overflow? Inspect faucet seals and overflow gasket.
- Water behind walls or under the tub? Shut off water and call a pro.
Following these steps helps you triage the issue quickly and avoid unnecessary demolition.
Steps
Estimated time: 60-120 minutes
- 1
Turn off water supply and assess safety
Before touching any fittings, shut off the bathroom water supply and drain excess water from the tub. Wear protective gloves and eyewear if working with caulk or solvents. Take photos of the current setup for reference.
Tip: Safety first: don't force fittings; use gentle tools to avoid damaging the tub. - 2
Remove old caulk and clean joint
Use a plastic scraper to remove old caulk from the tub edge and any joints around the drain and overflow. Clean with mineral spirits or isopropyl alcohol; let dry completely before applying new sealant.
Tip: Avoid metal tools that can scratch porcelain or fiberglass surfaces. - 3
Apply new silicone sealant
Apply a steady bead of bathroom-grade silicone along the tub edge; smooth with a caulk finishing tool for a neat seal. Allow cure time per manufacturer instructions before exposing to water.
Tip: Use masking tape to create clean edges while caulking. - 4
Inspect/repair drain flange
From underneath (or as accessible), check the drain flange for wobble. Tighten mounting nut or replace flange as needed; apply plumber’s putty or gasket as recommended.
Tip: A secure drain flange prevents most base leaks. - 5
Check overflow assembly and faucet seals
Inspect the overflow gasket and faucet seals. Replace worn O-rings or cartridges and reassemble; test with water to confirm.
Tip: Keep spare O-rings on hand for future maintenance. - 6
Test and monitor
Run a controlled water test for 15-20 minutes and observe. Check for new damp spots around joints and under the tub after a few hours.
Tip: Document results with photos to track improvement.
Diagnosis: Water pooling near the base of the tub after showering or filling the tub
Possible Causes
- highWorn or cracked tub caulk/sealant around the rim
- mediumLoose or cracked drain flange allowing water to seep into the drain area
- lowWorn faucet seals or cartridge allowing slow drips
Fixes
- easyRe-caulk the tub edge with bathroom-grade silicone; ensure the joint is dry before application
- easyTighten or replace the drain flange; reseal with plumber's putty if required
- mediumReplace faucet seals or cartridge seals; reassemble and test for leaks
Questions & Answers
What is the most common bathtub leak?
The most common bathtub leak is usually caused by aging or cracked caulk around the tub edge, which allows water to seep into the surrounding substrate. A thorough recaulk typically resolves this issue.
The most common bathtub leak is usually from old caulk around the tub edge; recaulk to fix it.
Can I fix a bathtub leak myself?
For small, straightforward leaks at the edge or drain, a DIY reseal and minor parts replacement can be effective. If water is behind the wall or the tub structure is compromised, hire a professional.
Yes, you can fix simple leaks yourself, but call a pro if water is behind the wall.
What tools do I need to fix a bathtub leak?
Common tools include a plastic putty knife, caulk gun with bathroom silicone, a scraper, isopropyl alcohol, and replacement drain seal or faucet O-rings as needed.
You'll typically need a putty knife, silicone caulk, and replacement seals.
How long does caulk take to cure?
Cure time depends on the product; follow the manufacturer's guidance, typically ranging from several hours to 24 hours.
Let the caulk cure according to the product guidelines before testing for leaks.
Should I replace the overflow gasket?
If the overflow gasket is cracked or discolored, replace it and resecure the overflow plate to stop leaks through the wall cavity.
Replace a cracked overflow gasket to stop leaks through the wall.
When is it necessary to call a professional?
Call a professional if water damage is behind walls, the drain flange is severely corroded, or you are unsure about plumbing safety. A licensed plumber protects your home from further damage.
Call a pro if water is behind the walls or you’re unsure about safe repairs.
Watch Video
Main Points
- Identify caulk, drain, and faucet as primary leak sources
- Follow a safe, stepwise repair process
- Test thoroughly after repairs to confirm success
- Prevent future leaks with regular maintenance