Bathtub Leak Through Ceiling: Quick Diagnosis & Fixes
Learn fast, practical steps to identify and stop a bathtub leak that appears as a ceiling stain. This guide covers safety, likely sources, and when to call a plumber for durable repairs.

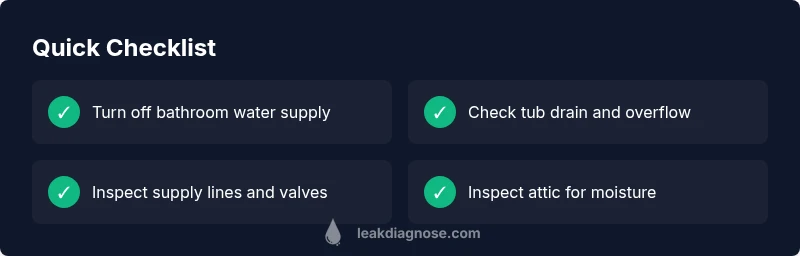
Bathtub leak through ceiling is a warning sign of water traveling from a tub or connected pipes into your attic or ceiling. According to Leak Diagnosis, start by turning off the main water supply and the affected circuit if needed, then remove ceiling drywall if safe. Check the tub drain, overflow gasket, supply lines, and shower valve for obvious leaks.
What a bathtub leak through ceiling really means
Water leaking from a bathtub can travel through framing, joists, and insulation, eventually showing up as a stain or dripping ceiling in rooms below. The moment you notice a ceiling stain after running a bath, you should treat it as an active leak until proven otherwise. In residential homes, this pattern often indicates water is escaping from tub-related connections—such as the drain seal, overflow gasket, or supply lines—and is seeping into the attic or ceiling cavity. Acting quickly reduces the risk of mold growth and structural damage. The Leak Diagnosis team notes that most ceiling leaks linked to bathtubs originate at fixtures rather than from the ceiling itself, which means the fix is typically mechanical rather than cosmetic. Start with safety: turn off water to the bathroom, dry the visible area, and assess for any signs of electrical risk before touching fixtures. Document everything with photos as you go; this makes the later repair steps easier and more likely to be covered by insurance if applicable.
Early warning signs you should not ignore
A bathtub leak through ceiling rarely appears out of the blue. Look for a combination of indicators: wet spots in the ceiling below the bathroom, staining that widens after a bath or shower, musty smells from damp insulation, peeling paint, warped drywall, or soft spots in the attic flooring. You may also notice higher humidity in adjacent rooms or a sudden rise in your water bill. If you hear drips or see water pooling on joists, treat it as active leakage. These signs help you distinguish between a long-standing moisture issue and a fresh spill from a tub connection. By identifying the symptom cluster early, you can halt a bigger problem before drywall rot or mold establishes itself.
Note: Leak Diagnosis Analysis, 2026 notes that bathroom-related ceiling leaks commonly originate from tub connections like drains, overflow gaskets, or supply lines rather than the ceiling material itself.
Immediate safety steps you must take
Safety first. If you see active dripping, especially near electrical outlets or wiring, shut off the main electrical supply to the affected area and avoid standing water. Then shut off the bathroom's water at the valve or main line to stop more water from entering the ceiling. Use buckets or towels to catch drips and dry the area as much as possible. Open windows or use fans to improve airflow, which helps reduce mold risk. Do not attempt to peel away large sections of ceiling while water is still leaking; this can expose live wiring or cause a structural collapse. After securing the scene, photograph damage, check the attic for ongoing leaks, and prepare to call a professional. This early pause helps minimize damage and sets the stage for a safer, faster repair.
Common sources of bathtub leaks that reach the ceiling
Most bathtub ceiling leaks stem from tub fixtures rather than roof issues. The most frequent culprits are a worn or loose tub drain seal (wax ring), a faulty overflow gasket, cracked or loose water supply lines, or a malfunctioning shower valve. Corrosion, mineral buildup, or improper installation can accelerate these failures. Less common but possible are cracked supply lines behind walls or a compromised joist/insulation cavity that allows hidden leaks to travel upward. Understanding these sources helps you test the right components first and avoid unnecessary wall demolition.
Locating the leak origin from tub to attic
Begin at the tub: inspect the drain, overflow, and any visible piping. If these look dry, check the supply lines and valve connections behind the wall. In the attic, look for damp insulation, staining along pipes, or dripping from joints. Use a flashlight to trace dampness along pipes and fixtures, and perform the bathtub fill test in short intervals while observing the ceiling for new leaks. Keep a log of where moisture appears and when. A systematic approach minimizes guesswork and speeds up the repair.
DIY fixes you can attempt (and when to stop)
If you can clearly see a faulty drain seal or overflow gasket, replacing it is a common, straightforward fix. Similarly, resealing a loose supply connection or replacing worn washers is typically doable for a handy homeowner. However, if water continues to travel after addressing these areas, or you locate a hidden pipe leak behind walls or in the attic, stop and call a licensed plumber. Do not attempt to cut into ceiling framing or electrical wiring yourself; this work requires trained professionals to prevent fire and mold risk. Document all steps and keep receipts for potential insurance claims.
Steps
Estimated time: 1-3 hours
- 1
Power down and secure area
Shut off the bathroom water supply and the nearby electrical circuit if moisture is near outlets. This prevents further damage and reduces shock risk. Keep everyone out of the area until it’s inspected.
Tip: Label the circuit in the main panel so others know it’s off for repairs. - 2
Stop the water source
Close the shutoff valve for the bathroom or main supply to stop new water from entering the tub area. This helps prevent additional leakage while you inspect.
Tip: If you’re unsure of the valve location, consult a plumber before proceeding. - 3
Inspect the tub drain and overflow
Check the drain seal and overflow gasket for moisture, corrosion, or looseness. Tighten connections if safe, and replace seals if they show wear.
Tip: Take photos before removing parts to aid reassembly. - 4
Check supply lines and fixtures
Look for drips or damp spots on hot/cold lines behind the tub wall. Re-seat or replace fittings if necessary and safe.
Tip: Do not force fittings that feel stuck; this can worsen damage. - 5
Assess attic and ceiling area
From the attic, inspect insulation for dampness and follow the moisture trail to locate the source. If drywall is sagging, do not press on it.
Tip: Document the area with notes and photos for insurance. - 6
Mitigate and plan repairs
Place towels or a plastic barrier to catch drips and reduce water damage in the short term. Schedule professional repair if the leak persists.
Tip: Keep a log of all observations and actions. - 7
Engage a professional if needed
If you cannot locate the leak or if electrical risk is present, call a licensed plumber or contractor for a thorough diagnosis and structural-safe repair.
Tip: Ask for a written assessment and a scope of work before agreeing to repairs.
Diagnosis: Ceiling stain or dripping water below bathroom after using bathtub
Possible Causes
- highLeaking tub drain seal or wax ring
- highFaulty overflow gasket or drain connection
- mediumCracked or disconnected water supply line to tub/shower
- lowConduit or elbow joint leakage in attic plumbing from other fixtures
Fixes
- easyShut off water to bathroom, drain remaining water, and dry affected area
- easyReplace tub drain seal or wax ring if leaking from drain
- easyReplace or reseal overflow gasket
- hardRepair or replace leaking supply lines or valves with proper fittings, or call a plumber for pipe repair
Questions & Answers
What is the most common cause of a bathtub leak that shows up on the ceiling?
The most common causes are a faulty tub drain seal or an worn overflow gasket; both can allow water to escape and travel into the ceiling.
Most common causes are tub drain seal or overflow gasket failure.
Should I continue using the bathtub while the ceiling is leaking?
No. Using the tub can worsen damage and delay repairs; shut off water and assess safety before proceeding.
No, don’t use the tub until it’s checked.
When do I need to call a professional for a ceiling leak?
If water is actively dripping, if the ceiling is sagging, or if you cannot locate the leak safely, call a licensed plumber.
Call a pro when you’re unsure or the leak continues.
Can insurance help cover ceiling leak repairs?
Coverage varies by policy; document damage and contact your insurer to confirm what’s covered and what isn’t.
Check with your insurer—coverage varies by policy.
What should I tell a contractor when I call?
Describe when the leak occurs, symptoms, where the water comes from, and any signs of structural or electrical risk.
Tell the contractor timing, symptoms, and risks clearly.
How long does a bathtub leak repair typically take?
Time varies by source and scope; simple fixes may take a few hours, while larger repairs can extend over days.
It depends on the source and extent of damage.
Watch Video
Main Points
- Shut off water to stop further damage.
- Identify and fix the tub drain or overflow first.
- Ceiling damage often requires professional repair.
- Document damage for potential insurance claims.
- Schedule professional help if you cannot locate the source.