How to Put Leak Sealer in Central Heating System
Step-by-step guide to safely applying leak sealer in a central heating system, including prep, application, safety, monitoring, and when to call a pro.

This guide helps you safely put leak sealer into a central heating system to address minor radiator and pipe leaks. You’ll learn compatibility checks, preparation, step-by-step application, and how to verify results without compromising boiler safety or home heating performance. Follow the tips to minimize disruption and schedule maintenance if needed.
What leak sealer is and how it works
Leak sealers are chemical additives designed to seal small cracks and pinholes in metal surfaces within a closed heating system. In central heating circuits, they circulate with the water and migrate to the leak site, swelling slightly and forming a temporary seal. They are not a cure for large structural leaks or boiler malfunctions, and improper use can cause blockage in radiators or boilers. According to Leak Diagnosis, many homeowners consider leak sealers as a temporary fix to buy time while planning a permanent repair. Before you apply any product, verify compatibility with your boiler and radiator metals, check the system's warranty, and ensure the system is clean from sludge that could interfere with sealing. Always read the label for dosing instructions, circulation time, and any required flushing steps. Remember that a sealant can’t fix every leak; if you notice continuous dripping, weeping around joints, or sudden pressure drops, stop and seek professional help. This is not a substitute for professional diagnostics when corrosion or a failed component is present.
When is leak sealer appropriate
Leak sealer can help with minor, isolated leaks that are not actively growing, such as pinholes in a radiater valve, tiny seams on a boiler pipe, or seepage from a small crack in a heat exchanger. It is less effective on large, actively leaking joints or structural damage. The Leak Diagnosis team emphasizes that sealers work best as a temporary measure to reduce water loss and calm system pressure while you arrange permanent repairs. Always check for the source of the leak; if the leakage persists after applying sealer or if you notice rising pressure, stop and call a heating engineer. In sealed systems, using a sealer may alter flow and filtration, so plan accordingly. If your boiler warranty forbids sealant use, you should avoid it and pursue official service routes.
Types of leak sealers and compatibility
There are a few broad categories of leak sealers used in central heating systems. Polymer-based sealers are common for pinhole leaks and small gaps, while ceramic-based formulations can offer a different sealing mechanism, often with less risk of residue clogging. Epoxy-type sealers may provide stronger, more durable seals but can be harder to flush and may not suit all metals or inhibitor chemistries. Always choose a product labeled for central heating systems and compatible with your boiler’s metals and inhibitor regime. Some sealers are not compatible with pressurized sealed systems or with certain corrosion inhibitors. Check the boiler manual and the product label; if in doubt, consult a technician to avoid voiding warranties or causing blockages.
Preparation steps before applying sealer
Preparation is essential to successful sealing. Start by turning off the boiler and allowing the system to cool completely, then isolate from power and water supply per the boiler manual. Check the current system pressure and compare it to the manufacturer’s recommended range. If you need to relieve pressure, use the appropriate bleed valves or radiators as advised, never releasing large amounts at once. Clear the area around the boiler and radiators, lay down towels to catch any spills, and gather the tools you will need. Read the sealer label for any pre-flush requirements or inhibitor compatibility notes, and ensure the water in the system is not heavily sludge-laden. Gather PPE such as gloves and eye protection before you begin.
Safety considerations and risk management
Safety first: always work on a cold boiler, never on a hot surface. Use gloves and eye protection, and ensure good ventilation if you are working in a small or enclosed space. Do not apply a leak sealer to a system that is actively leaking a large amount of water or to boilers with known gas or flame hazards that require professional service. If your boiler is under warranty, verify whether sealants are permitted, as some manufacturers restrict usage. Keep a clear record of the product used and batch details in case you need to reference it for service or warranty claims. If you notice corrosion, unusual boiler noises, or changes in heating performance, stop and consult a heating professional promptly.
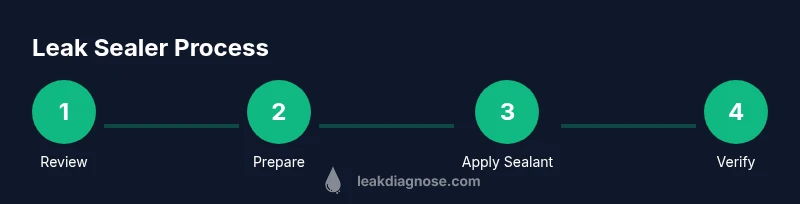
Step-by-step process overview
This section provides a high-level view of the process, without duplicating explicit step-by-step instructions that are covered in the dedicated STEP-BY-STEP block. You will confirm compatibility, prepare the system, add the sealer through the designated inlet, circulate the fluid, and then recheck system pressure and leaks. Expect the process to take from 60 to 120 minutes, depending on system size and the product you select. Always follow the product’s exact dosing instructions and circulating time. Allow for a final check after the system has run for the recommended period to ensure the leak is controlled and there are no new issues.
Monitoring results after application
After applying the sealer, monitor the system for several hours to a full day as recommended by the product label. Check for new drips, damp patches around joints, or changes in boiler pressure. If the pressure remains stable and there are no new leaks, you can continue with normal use, but continue to monitor daily for the first week. If you see new leaks or a sudden rise or fall in pressure, you may need a professional assessment to determine whether the sealant has worked or if plumbing components require replacement. Keep an eye on radiator performance and ensure there is consistent heat distribution across zones.
Troubleshooting leaks and red flags
Even with sealer, some leaks may persist or worsen if the issue is structural or due to a failing component. Red flags include repeated pressure fluctuations, radiator cold spots, unusual boiler noises, or a marked change in system chemistry indicators. If any of these occur, stop using the sealer and contact a heating engineer. Do not attempt to flush the system aggressively yourself, as this can dislodge the sealant or worsen leaks. If the remedy fails, you may need a full replacement of the affected pipework or radiator, or alternative repair methods recommended by a professional.
Alternatives and long-term fixes
Leak sealer is often a temporary solution. Consider longer-term options such as replacing the leaking radiator, repairing or replacing corroded pipework, or converting to a different type of heat emitter if necessary. A professional can perform a pressure test, inspect for corrosion, scale buildup, and other issues that sealants cannot address. For some systems, refitting with upgraded components or pump upgrades can improve reliability and reduce the likelihood of future leaks. The goal is to restore full system integrity and efficiency while keeping safety and warranty considerations in mind.
Maintenance and prevention tips
To reduce the risk of future leaks, maintain the central heating system with regular servicing, including corrosion inhibitor checks and radiator bleed procedures. Schedule annual boiler service and pressure checks, and ensure your system has the correct inhibitor levels to prevent corrosion. Keep radiators balanced to avoid excessive pressure in any one zone, and address any signs of dampness or leaks promptly. A well-maintained system not only reduces leak risk but also improves efficiency and prolongs boiler life.
Boiler warranty and sealer usage cautions
Always check your boiler warranty and the sealer product label before use. Some manufacturers prohibit using sealants and may void warranties if sealants are used in the system. If you have an older boiler or a sealed system, consider consulting a heating engineer before applying any sealer. Document the product used, date of application, and the expected circulation duration in case service history is requested. If you are in any doubt, seek professional guidance rather than risk unexpected failure at an inopportune moment.
What to do next for homeowners
If you have followed the manufacturer’s instructions, completed the steps, and still observe leaks or pressure instability, contact a licensed heating engineer for a thorough assessment. Keep a log of observations, including dates, gauge readings, and any changes in radiator performance. Maintenance and proactive monitoring can prevent larger problems down the line. For many households, leak sealer buys time and reduces nuisance leaks, but it is not a substitute for comprehensive repair when a major leak or systemic damage is present.
Tools & Materials
- Leak sealer suitable for central heating systems(Choose a product labeled for boiler and radiator use; confirm compatibility with your metal types)
- Gloves(Chemical-resistant; protect skin from contact)
- Old towels or rags(Catch drips and protect surfaces)
- Funnel or measuring cup(Aid precise pouring if the product requires it)
- Pail or tray(Contain any accidental spills)
- Radiator bleed key or screwdriver(Used to vent air from radiators if required)
- Boiler manual or product instructions(Keep handy for model-specific steps)
Steps
Estimated time: 1-2 hours
- 1
Review compatibility and instructions
Read the product label and your boiler manual to confirm the sealer is suitable for your system and metal types. This step avoids chemical reactions or warranty issues and ensures you use the correct quantity. Keep notes of any inhibitor levels or system chemistry requirements.
Tip: If in doubt, call the manufacturer’s support line before you start. - 2
Power down and cool the system
Shut off the boiler and allow the system to cool completely. Do not work on a hot boiler. Disconnect power if required by your boiler model to prevent accidental startup during the process.
Tip: Working on a cold system reduces burn risk and prevents scald injuries. - 3
Prepare the system and relieve pressure if needed
Check the current pressure on the boiler gauge. If your product requires it, relieve a small amount of pressure per the manual or product instructions to reach the recommended range for application. Ensure the area is clean and dry before adding sealer.
Tip: Only vent pressure gradually to avoid sudden pressure drops or splashes. - 4
Add the leak sealer to the system
Pour or inject the sealer into the system via the designated inlet (filling loop, header tank, or intended point). Use a funnel if provided. Do not exceed the recommended amount; overfilling can cause blockages or imbalances.
Tip: Measure accurately and do not mix different products in the same system unless allowed by the label. - 5
Re-pressurise and circulate
Refill the system to its normal pressure as per the boiler instruction. Refit any radiators or caps and start the boiler to circulate the sealer. Run the heating to circulate for the time specified by the product instructions (often 15–60 minutes).
Tip: During circulation, check for any unusual noises or new leaks and be ready to stop if needed. - 6
Inspect and monitor results
After the circulatory period, recheck for leaks and monitor the boiler pressure. If leaks persist, stop using the sealer and consult a professional. In some cases, a follow-up flush may be required to remove debris.
Tip: Document readings and any changes in radiator performance for service records.
Questions & Answers
What is a leak sealer and how does it work in a central heating system?
A leak sealer is a chemical additive that circulates with system water to seal small cracks. It’s intended as a temporary fix for minor leaks and should be used only when compatible with your boiler. Major leaks need professional repair.
Leak sealer is a chemical that travels with the water to seal small leaks. It’s a temporary measure and only for compatible boilers; major leaks require a professional repair.
Is leak sealer safe for all boiler types and warranties?
Not every boiler permits sealants. Always check your boiler manual and warranty terms before using a sealer. If in doubt, consult a heating engineer to avoid warranty voidance and potential damage.
Check your boiler manual and warranty first. If unsure, ask a heating engineer before using a sealer.
Can leak sealer fix a large or active leak?
Sealants are not designed to fix large or structural leaks. They work best on small, localized leaks and should be stopped if the leak is persistent or worsening.
Sealants aren’t for large leaks. They’re best for small, localized leaks and should not be used if the leak persists.
How soon will I see results after applying a sealer?
Results typically appear after circulation time specified by the product. Monitor the system for leaks and pressure changes over the next 24 hours to confirm effectiveness.
Results appear after the recommended circulation time; monitor for a day to confirm effectiveness.
What should I do if leaks continue after sealing?
If leaks continue, stop using the sealer and contact a licensed heating engineer for a diagnosis. Sealants may mask issues that require mechanical repair.
If leaks continue, stop and call a heating engineer for a proper diagnosis.
Are there alternatives to using leak sealer in central heating?
Alternatives include repairing or replacing leaking components, upgrading pipes or radiators, or flushing and refilling the system with proper inhibitors. A professional can evaluate the best option for long-term reliability.
Alternatives include repairing leaks or replacing faulty components; a professional can choose the best long-term fix.
Will sealers affect boiler warranty or system chemistry?
Sealants can interact with inhibitors and affect warranty terms. Always confirm compatibility with the system chemistry and preserve records of products used.
Sealants can affect warranties and system chemistry; check compatibility and keep records.
Should I attempt a sealant in a gas boiler system?
Gas boiler systems require careful handling because any additive interaction could impact gas safety components. Consult a professional before applying a sealant in gas-fired systems.
Gas boilers require caution; consult a professional before using sealants.
Watch Video
Main Points
- Check compatibility before use
- Prepare and cool the system safely
- Follow exact dosing and circulation times
- Monitor pressure and leaks after application
- Seek professional help if leaks persist