Difference Between Seep and Leak: A Homeowner's Guide
Discover the difference between seep and leak, how to tell them apart in home plumbing and foundations, and practical steps to prevent moisture damage and costly repairs.

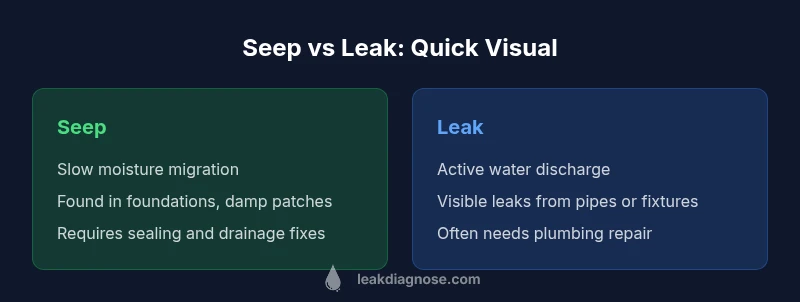
Seep and leak describe two ways fluids escape from a system. A seep is a slow, gradual escape through porous material or tiny openings, often signaling low-volume movement; a leak is a more active, faster release through a defect or crack. In home contexts, seeps are usually less dramatic but can indicate persistent moisture, while leaks require prompt repair to prevent damage.
Understanding the Core Difference
When discussing moisture in a home, the terms seep and leak describe different escape mechanisms and have different implications for safety and cost. A seep typically refers to moisture that migrates slowly through porous building materials, joints, or bedding surfaces, arriving at the surface over time without a dramatic gush. It may be invisible at first, showing up as damp patches, mineral deposits, or persistent humidity. By contrast, a leak implies a defect that allows a liquid to escape more readily and quickly, often accompanied by audible dripping, a visible stream, or a sudden drop in system pressure. For homeowners, the practical distinction matters because seepage signals ongoing moisture that can lead to mold or wood decay if left unchecked, while leaks create immediate water damage risks and can escalate rapidly after heavy use or freezing cycles. Understanding this difference helps prioritize actions: monitoring moisture patterns, estimating flow tendencies, and choosing appropriate interventions such as sealing, drainage improvements, or professional plumbing assistance. According to Leak Diagnosis, clear differentiation reduces unnecessary repairs and focuses resources where moisture control is truly critical.
Seepage in Everyday Settings
Seepage is strongly linked to slow moisture migration through materials rather than an open discharge. In basements and crawl spaces, damp patches on walls or floors often result from groundwater seepage that follows pores in concrete or brick. In kitchens and bathrooms, porous grout, tile bedding, or concrete under slabs can allow moisture to migrate to the surface gradually. Exterior seeps are also possible when the landscape grade directs water toward the foundation or when soil around the home stays saturated after rain. For homeowners, seeps are often quieter, less dramatic events that accumulate over time, producing musty odors or visible efflorescence on masonry. The subtlety of seepage can create false security because it does not always trigger an immediate cleanup, but unchecked moisture can still degrade structural materials, encourage mold growth, and reduce indoor air quality. Leak Diagnosis emphasizes consistent moisture monitoring and regular inspection to catch creeping seeps before they coalesce into more serious issues.
Leaks in the Home: Common Places
Leaks are typically associated with open pathways or breaches in a system that allow water to flow more freely. In residential settings, leaks frequently occur in supply lines, such as pipes behind walls, under sinks, or at connections to fixtures and appliances. Appliance leaks can originate from water heaters, dishwashers, washing machines, or ice makers when seals fail or hoses degrade. Roof leaks may show up as stains on ceilings after rainfall, reflecting water intrusion from damaged shingles or flashing. Leaks can also happen around windows or door frames where improper sealing creates a channel for water ingress. Unlike seeps, leaks often demand immediate attention because the visible discharge or pressure drop can quickly cause water damage, warped wood, and mold development. The Repair Approach section in this article contrasts typical fixes for each situation, helping homeowners decide when a plumber is needed.
Detection Methods: Seeing Seep vs Detecting a Leak
Detecting seepage and detecting leaks rely on similar tools, but the emphasis differs. Look for persistent dampness, mineral deposits, or surface staining that recurs after drying. Use moisture meters in suspected areas to quantify relative humidity and surface moisture; repeated measurements over days can reveal a pattern consistent with seepage rather than an isolation leak. Infrared thermography can help identify hidden moisture behind walls or under floors, while dye tests or trap tests can reveal whether moisture is coming from a slip path or a true breach. For visible leaks, note the signs: dripping sounds, sudden puddles, or a damp area that worsens with water use. Timely detection matters because it determines whether a minor moisture issue (seep) can be resolved with sealing and drainage improvements or whether more extensive repairs and professional oversight are warranted. Leak Diagnosis offers practical checklists for homeowners to use during inspections.
Signs of Seepage: Indicators and Limitations
Seepage signs include damp patches that persist despite airing, mineral crusts on concrete, and a musty odor signaling mold risk. Unlike active leaks, seeps may not leave a strong water line or immediate puddle, so visual cues require careful interpretation over time. Groundwater seeps often occur at the base of foundations, along basement walls, or around utility penetrations where water migrates through porous concrete or stone. Moisture meters can detect elevated surface or near-surface moisture, even when the surface appears dry. Because seepage is often intermittent and slow, it can be easy to overlook in busy households. The key is to track moisture patterns after rainfall or irrigation cycles and to investigate recurring dampness that does not fully dry within a day or two. Early action—improving drainage, sealing leaks in masonry, and addressing hydrostatic pressure—can prevent a seep from becoming a more serious water problem.
Signs of a Leak: Indicators and Urgency
Leaks are characterized by tangible water discharge, consistent dampness following use of water fixtures, or a drop in supply line performance. Visible leaks may show as dripping from pipes, pooled water under appliances, or ongoing wet spots on ceilings and walls. You might hear tapping, hissing, or running water even when fixtures are off, suggesting a plumbing breach. In some cases, leaks occur behind walls or within cabinetry, making them harder to spot but no less dangerous. The consequences escalate quickly: moisture invites mold growth, wood rot, insulation damage, and higher utility bills. A leak often prompts urgent action due to potential rapid damage and the risk of electrical hazards in moist environments. For homeowners, the best response is to shut off the water supply at the source when safe and contact a licensed plumber for leak repair assessment and corrective work.
Causes: Why Seepage Occurs vs Why Leaks Happen
Seepage often results from sustained moisture exposure or just slow movement through porous materials. Common sources include groundwater pressure on foundations, rainwater infiltration around masonry, or condensation that migrates through walls. Leaks arise from failures in plumbing systems, such as deteriorated copper or PEX piping, corroded fittings, loose connections, or aging appliances and fixtures. Roof leaks come from damaged shingles, flashing deterioration, or clogged gutters that channel water into attic spaces. Exterior seepage and leaks can interact with drainage patterns around the home; poor grading or wet basements create conditions where seepage becomes a ceiling moisture problem surrounding leaks. Understanding the source helps homeowners tailor remediation: improving drainage and sealing porous structures for seeps, versus replacing or repairing compromised pipes and fixtures for leaks. Leak Diagnosis notes that a systematic approach saves time and money in repairs.
Repair Approaches: Seep Repair vs Leak Repair
Repairing seepage focuses on moisture control and preventive sealing rather than removing a constant water source. Solutions include sealing porous sections, applying vapor barriers, and enhancing drainage systems around the foundation. Improving grading to direct water away from the building, installing gutter extensions, and addressing hydrostatic pressure can significantly reduce seepage risk. Leak repair typically involves fixing the root cause of the water discharge, which may entail replacing damaged pipes, tightening fittings, or installing new fixtures. In some cases, a leak is a symptom of broader system wear, requiring a plumber’s assessment and, if necessary, structural adjustments. Because leaks can affect electrical safety in damp areas, waiting to repair a leak is riskier and usually necessitates professional intervention. Leak Diagnosis emphasizes a balanced plan that addresses both moisture control and reliable plumbing integrity.
Prevention and Routine Maintenance
Prevention for seep and leak alike centers on good drainage, regular inspection, and proactive maintenance. Keep gutters clear, ensure downward slope away from the foundation, and repair cracks before moisture migrates. Exterior waterproofing and proper backfilling around foundations reduce seep tendency. For plumbing, schedule periodic inspections of hoses, fittings, and shutoff valves; replace aging supply lines before leaks develop. Use water-efficient fixtures to reduce overall water pressure stress and monitor humidity in damp spaces with a simple meter. Interior moisture control, such as dehumidification in basements, is a long-term strategy to minimize both seep and leak risks. Leak Diagnosis recommends documenting maintenance tasks and setting calendar reminders for seasonal checks to catch issues early.
Quick-start Action Plan for Homeowners
If you notice dampness or suspect moisture issues, take a step-by-step approach. Start by drying the area and documenting what you observe, including location, surface condition, and any triggers such as rain. Check visible pipes, hose connections, and fixtures for obvious leaks; perform a gentle leak test on basic plumbing with the water off if safe. Evaluate drainage around the foundation and consider temporary measures like sump pump activation if warranted. Use moisture meters in suspect zones and track readings over several days to distinguish seepage from a leak. If uncertainty remains or the moisture persists after mitigation, contact a licensed plumber or a moisture-control specialist for an on-site assessment. Keeping the lines of communication open with professionals helps ensure accurate diagnosis and timely repair.
Case Studies: When Seep Becomes a Leak
In some homes, seemingly minor seepage can evolve into a leak after changes in weather, water usage, or foundation settlement. A basement corner with persistent dampness might begin to show pooling during heavy rain while not completely drying in between events. That progression often signals that the moisture has found a more direct discharge path, such as a cracked foundation joint or compromised waterproofing layer. The takeaway is that early intervention matters; addressing seepage early can prevent the more expensive and disruptive scenario of a full-blown leak. Leak Diagnosis emphasizes monitoring, testing, and proactive maintenance to mitigate damages before costly repairs become necessary.
Tools and Resources for Ongoing Moisture Management
A practical moisture-management plan combines monitoring tools with routine checks. Invest in a reliable moisture meter for surface readings and a hygrometer for ambient humidity. An infrared camera can help you spot hidden moisture behind walls or under floors, especially after rain or busy water usage days. Maintain a simple log of observations, including location, surface conditions, rainfall events, and any changes in structural materials. Use temporary measures such as dehumidifiers in damp spaces while you plan longer-term fixes like drainage improvements or sealing porous sections. Finally, know when to bring in a licensed professional for complex issues, especially if water damage coincides with electrical or structural concerns. This proactive toolkit supports Leak Diagnosis’s guidance for safer, drier living spaces.
Comparison
| Feature | Seep | Leak |
|---|---|---|
| Definition/Nature | Slow, gradual moisture migration through porous materials | Active discharge through a defect or crack with faster flow |
| Typical Locations | Basement walls, foundation joints, damp patches | Pipes behind walls, fixtures, roof penetrations, appliances |
| Flow Rate/Severity | Low-volume, intermittent moisture | High-volume, visible discharge or rapid spread |
| Detection Cues | Recurring dampness, mineral deposits, musty odor | Dripping sound, standing water, evidence of leakage during use |
| Consequences | Mold risk, wood rot if prolonged | Water damage, electrical hazards, rapid deterioration |
| Repair Approach | Sealing, drainage improvements, moisture control | Pipe/fixture replacement, professional plumbing repair |
| Maintenance Implications | Monitor moisture and drainage patterns | Regularly inspect plumbing and appliances; address wear |
Benefits
- Clarifies urgency and safety risk
- Prevents unnecessary emergency repairs for minor seepage
- Guides appropriate repair approach (non-invasive vs invasive)
- Supports proactive maintenance planning
What's Bad
- Seeps can be misinterpreted as leaks, leading to unnecessary inspections
- Seepage can be subtle and easy to overlook in busy homes
- Leaks behind walls or in hidden areas may require invasive investigation
- Misjudging severity can delay critical repairs
Prioritize moisture assessment: distinguish seep from leak to guide safe, cost-effective repairs
Seeps signal ongoing moisture and require preventive actions; leaks demand prompt plumbing fixes to avert damage. Use diagnosis steps to decide when to seal, when to drain, and when to call a pro.
Questions & Answers
What is the key difference between seep and leak?
A seep is a slow, ongoing moisture migration through porous materials, while a leak is a more active water release through a defect or crack. Seeps signal persistent moisture; leaks pose immediate damage risks and require faster action.
Seepage is slow moisture flow; a leak is faster water discharge. If your surface stays damp over days, think seep. If you see active dripping, treat it as a leak and act quickly.
Can a seep become a leak?
Yes. Over time, persistent seepage can create conditions that encourage a genuine leak, especially if drainage worsens or pressure increases. Regular monitoring helps catch that progression early.
A seep can escalate into a leak if moisture worsens or the water path enlarges. Regular checks help catch changes early.
What are common places for seepage in homes?
Common seep areas include basements and crawl spaces along foundation walls, damp patches near masonry joints, and under slabs where groundwater or condensation migrates. Exterior seeps may appear after heavy rain.
Look for damp patches in basements and along foundation walls, plus damp areas near masonry after rain.
How do I tell if a seep is turning into a leak?
Watch for a sudden increase in moisture, new puddling during or after water use, or the appearance of active dripping. An uptick in humidity and water stains is also a warning sign.
If dampness becomes a visible puddle or dripping, it’s likely transitioning to a leak and needs prompt attention.
When should I call a professional?
Call a professional when you cannot determine the source, when moisture persists after basic mitigation, or when you notice signs of water damage or mold growth. A licensed plumber or moisture-control specialist can diagnose and repair safely.
If you’re unsure about the source or the moisture keeps coming back, contact a pro for a thorough check.
What maintenance helps prevent seep and leaks?
Regularly inspect plumbing connections, clean gutters, maintain proper drainage away from the foundation, and use moisture-control measures in damp spaces. Documenting maintenance tasks helps track moisture trends over time.
Keep drains clear, check fittings, and monitor humidity to prevent seepage and leaks from causing damage.
Main Points
- Identify seepage signs early to stop moisture buildup
- Differentiate seep from leak using location, rate, and displacement cues
- Use moisture meters and infrared checks for accurate detection
- Prioritize drainage improvements for seeps and plumbing fixes for leaks
- Call a professional when unsure or when moisture persists after mitigation