Soapy Water Test Gas Leak: A Practical DIY Guide
Learn how to safely perform a soapy water test gas leak, interpret bubbles, and know when to contact your gas provider. Step-by-step guidance plus safety tips for homeowners.

According to Leak Diagnosis, you can safely test for gas leaks using a soapy water test gas leak. This quick method spot-checks joints and appliance connections without expensive equipment. Apply a mild soap solution to suspected areas, watch for bubbles, and if bubbles appear, shut off the gas and call your utility or a licensed professional immediately.
What is a soapy water test gas leak? A quick, practical home method for verifying gas connections uses a soapy water test gas leak. This technique relies on a simple soap solution to reveal escaping gas as bubbles at joints, fittings, and appliance connections. It is not a substitute for professional leak testing, but it is a valuable quick-check after installation, maintenance, or when you suspect a problem. According to Leak Diagnosis, the test is best used as an initial safety check in well-ventilated areas and when no open flames or ignition sources are present nearby. Always identify the main gas shut-off location before testing and avoid any actions that could ignite gas. If you are unsure about a joint or connection, pause the test and contact a licensed technician. Maintaining a cautious approach protects you, your family, and your home.
Safety first: risks and essential precautions
Gas leaks pose immediate safety risks. Do not perform this test if you smell gas or hear hissing sounds; evacuate immediately and call emergency services. If you proceed, ensure there is adequate ventilation, avoid using electrical switches, and keep flames away from the testing area. Wear protective gloves and safety glasses, and have a buddy nearby who can assist or call for help if needed. Store testing materials safely after use and never leave soapy water in contact with electrical outlets or devices. Safety starts with preparation and clear, calm actions.
How the test works: bubbles as indicators
Soapy water reduces surface tension around leaks, allowing escaping gas to form visible bubbles at the leak site. Bubbles indicate a path for gas to escape and should be treated as a potential hazard. Gentle agitation of the joint after applying the solution helps reveal slow leaks. It’s important to test only the joints and connections that are accessible and relevant to the gas system, not the entire piping network. If you see bubbles, note the location and proceed to safe shutdown procedures if you can do so safely.
Test scenarios: when to apply the method
Use the soapy water test gas leak after installing or relocating gas appliances, tightening fittings, or replacing connectors and regulators. It’s a quick check for leaks that complements periodic professional inspections. Do not rely on this test as the sole means of leak detection for high-risk systems. For homes with older pipelines or suspicious odors, arrange a formal gas leak inspection with a qualified technician.
Preparing the testing area: setup and safety basics
Before testing, ensure good ventilation and turn off ignition sources. Open nearby doors or windows and remove combustibles from the area. Gather your materials: a mild dish soap solution, spray bottle or sponge, clean rags, a flashlight, gloves, and eye protection. Have the main gas shut-off key or valve accessible in case you need to stop gas flow quickly. Work with a partner if possible to monitor for safety concerns and assist if needed.
Common testing locations: where to apply the solution
Focus on joints near appliances (gas stoves, furnaces, water heaters), flexible connectors, regulators, and piping segments that can loosen over time. Also inspect outdoor connections at meters or service lines where visible corrosion or damage may occur. Do not overlook areas behind appliances or in cramped spaces where leaks can accumulate. Apply the solution to each joint slowly and watch for any bubble formation.
Interpreting results: what bubbles mean and how to respond
Bubbles at a joint indicate a leak; do not ignore them. If bubbles appear, shut off the gas supply if you can do so safely, ventilate the area, and call your gas utility or a licensed professional immediately. If no bubbles are observed but you still smell gas or hear hissing, treat this as a leak concern and evacuate. Document the locations of any bubbles for repair, and never re-use a damaged joint without professional assessment.
If a leak is detected: immediate safe actions
If you detect a leak, prevent ignition sources, turn off the gas at the main valve if you can safely reach it, and evacuate everyone from the area. Do not operate electrical switches, appliances, or lights. Once you are at a safe distance, call your gas utility or emergency services. Do not attempt to repair a gas leak yourself unless you are a trained professional; leaks require specialized training and equipment.
If no leak is detected but odor persists: what to do next
A persistent odor may indicate a leak somewhere you did not test, or a fault in an appliance. Stop testing, ensure ventilation, and contact your gas utility for a professional assessment. Do not assume the area is completely safe solely based on the absence of visible bubbles. A professional inspection can confirm the integrity of lines and connections.
Maintenance and prevention after testing
Regular checks reduce risk. Schedule periodic professional inspections and tighten connections only per manufacturer specifications. Keep an up-to-date list of shut-off locations and teach household members how to respond in an emergency. Clean vent areas and burners to maintain proper combustion and ensure the system remains in safe working order. Record test results and any actions taken for future reference.
Professional testing vs home testing: limits and when to call a pro
Home testing with soapy water is a helpful preliminary check, but it does not replace formal leak detection methods used by licensed technicians. If your system is old, if you smell gas, or if bubbles appear repeatedly, schedule a professional service promptly. Rely on qualified technicians for complex systems, including natural gas piping, propane lines, and gas appliances with high BTU ratings.
Tools & Materials
- Dish soap (mild) and water(Dawn, Joy, or equivalent; unscented recommended; avoid harsh detergents)
- Spray bottle or sponge(Fine mist spray preferred; ensure nozzle delivers a gentle, wide spray)
- Plastic cup or bowl(For mixing and applying the solution)
- Protective gloves(Nitrile or latex-free if sensitive; protect hands from skin irritation)
- Safety goggles(Eye protection in case of splashes)
- Old towels or rags(For cleanup and protecting floors)
- Flashlight(Inspect dimly lit areas and joints)
- Main gas shut-off wrench or valve key(Accessibility is essential; know the valve location)
- Ventilation aid (optional)(Fan or open window to improve airflow)
- Notebook and pen(Document results and locations for follow-up)
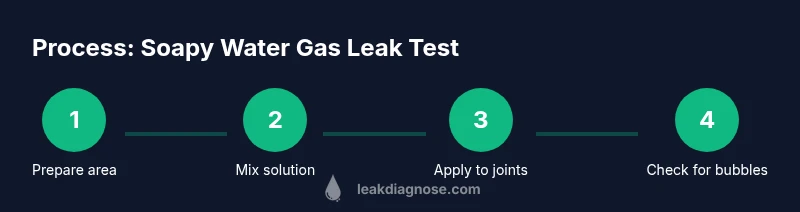
Steps
Estimated time: 20-40 minutes
- 1
Prepare safety gear and area
Put on gloves and safety goggles. Clear the testing area of flammables and open doors/windows for ventilation. Identify the main gas shut-off location and ensure it is accessible. Confirm you have a partner to assist if possible.
Tip: Never begin testing if you are unsure about the gas shut-off or if the area is poorly ventilated. - 2
Mix the soap solution
Add a few drops of mild dish soap to a cup of clean water and stir gently until suds form. The solution should be soapy but not overly foamy to avoid masking small leaks.
Tip: Label the cup to avoid accidental ingestion or mixing with other cleaners. - 3
Identify test zones
Focus on joints, connections, and fittings near gas appliances and along exposed piping. Do not test electrical sockets or wiring. Ensure area remains free of ignition sources during the test.
Tip: Only test areas you can safely reach without forcing access or disturbing wiring. - 4
Apply the solution to joints
Spray or brush the soapy solution onto joints and connections one at a time. Keep the area moist and avoid over-wetting. Allow a short settling period for bubbles to form.
Tip: Do not apply near open flames or pilot lights. - 5
Observe for bubbles
Watch each joint for bubble formation over a 60–120 second window. Even slow bubble formation indicates a leak and requires action.
Tip: Use your flashlight to help reveal small bubbles in dim areas. - 6
If bubbles appear
If you see bubbles, shut off the gas if you can safely reach the main valve. Do not touch electrical switches or operate devices that could spark. Evacuate if smell of gas is strong or you cannot reach the shut-off safely.
Tip: Call your gas utility or emergency services from a safe location as soon as you are clear. - 7
If no bubbles, document results
Wipe away the solution, dry the area, and record which joints were tested and outcome. If a leak is suspected despite no bubbles (odor persists), contact a professional for testing.
Tip: Take photos or notes to assist with repair work. - 8
Post-test steps
Ventilate the space, re-check after any maintenance, and plan a follow-up professional inspection if you detected a leak or suspect piping issues.
Tip: Never reuse damaged components before a professional inspection.
Questions & Answers
What is a soapy water test gas leak?
A soapy water test gas leak uses a mild dish soap solution to indicate escaping gas by forming bubbles at leak sites. It helps homeowners quickly spot obvious leaks near joints and connections. It is a preliminary check and should be followed by a professional inspection if a leak is suspected.
The soapy water test uses soap bubbles to show where gas might be leaking. It's a quick home check, but a professional inspection is needed if a leak is suspected.
Is it safe to perform this test at home?
Yes, when done with proper safety precautions: in a well-ventilated area, with no ignition sources nearby, and using gloves and eye protection. Avoid testing near flames and never rely on this method alone for critical gas systems.
It can be safe at home if you follow safety precautions and avoid ignition sources.
Can I use regular dish soap for the test?
Regular mild dish soap is suitable for making a soapy solution. Use a small amount in water to create a gentle lather that forms bubbles at leaks without masking tiny drips.
Yes, regular mild dish soap works for this test.
What should I do if bubbles appear at a joint?
Shut off the gas if you can do so safely, evacuate if the odor is strong, and call your gas provider or emergency services. Do not attempt to tighten or repair a leak yourself.
Shut off the gas if possible and call for professional help.
How often should I test for gas leaks using this method?
Use this method after installation, maintenance, or if you suspect an issue. For general safety, schedule formal inspections at least once a year or per local codes.
Test after work on gas systems and have annual professional inspections.
What if I can’t locate the leak after testing?
If a leak cannot be located or the odor persists, leave the area and contact your gas utility for a professional inspection. Do not continue testing if you can't identify the source.
If you can’t identify the leak, call a professional.
Watch Video
Main Points
- Identify leaks with visible bubbles from soapy solution.
- Shut off gas if a leak is detected and call the utility or professional.
- Document test locations for repair follow-up and future checks.