What Leaks in a Car: Urgent Troubleshooting Guide
Learn what leaks in a car, how to spot different fluids, and a practical diagnostic flow to stop leaks safely. A homeowner-friendly guide by Leak Diagnosis.

Most car leaks come from the cooling system, engine oil, transmission fluid, or fuel lines. To triage quickly: park on a dry surface, note the drip color, and wipe a patch under the area to trace the source. If the leak is active or under the engine, stop driving and seek professional diagnosis immediately.
What leaks in a car: A quick primer
Leaking fluids under your car are a warning sign that something is not sealed or stored correctly. The most common culprits are engine oil, coolant, transmission fluid, and fuel lines, but you can also see leaks from power steering fluid, brake fluid, or condensate from the air-conditioning system. According to Leak Diagnosis, the quickest way to triage is to note color, location, and smell, and then stop driving if you suspect a fuel or brake-fluid leak. Early detection helps prevent corrosion, expensive repairs, and safety risks. In this guide, you’ll learn how to identify leaks, differentiate between fluids, and follow a practical troubleshooting flow that is safe for homeowners and DIY enthusiasts.
Most common leak sources in vehicles and their signs
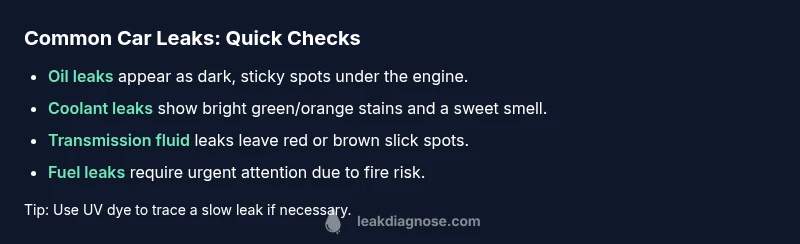
Vehicles can leak several different fluids, each with distinct clues. Engine oil is typically dark amber to brown and slippery, leaving slick, dark spots under the engine. Coolant leaks show bright green, orange, or pink colors and a sweet odor. Transmission fluid leaks often appear red or brown and may smell metallic. Fuel leaks present a strong gasoline odor and visibly damp lines or connections near the fuel rail or lines. Other potential sources include power steering fluid, brake fluid, and AC condensate from the evaporator. Recognizing the color, location, and odor helps you prioritize safety and fixes, and reduces the risk of collateral damage to components like belts, hoses, and the catalytic converter.
Safe, initial inspection steps you can perform today
Begin with safety as your priority. Park on a level surface, turn off the engine, and set the parking brake. Use a flashlight to inspect under the hood and around the engine bay for fresh drips. Place white paper towels or a sheet of cardboard under the suspected area to make color and flow easier to track. Check the fluid reservoirs and level indicators (oil, coolant reservoir, brake fluid, power steering fluid). If you smell fuel or see active dripping from a line or connector, do not start the engine and contact a professional right away. Document what you see with photos and notes to help a mechanic diagnose the issue quickly.
How to identify the leak source: color, location, and smell
Color is a quick hint—but don’t rely on color alone. Oil tends to be dark and slick, coolant is bright and often sweet-smelling, and transmission fluid is red to brown and slippery. Trace the drip line back to its origin by following the trail: leaks often emerge at hose connections, gaskets, seals, or the pan. Location matters: leaks near the engine more commonly point to oil or coolant, while leaks under the car toward the center can indicate transmission fluid or fuel line issues. If you notice a strong gasoline odor or feel dizzy near the vehicle, move away from the car and call for professional help. A test with UV dye can help if the source is slow or hard to detect.
Diagnostic flow: symptom → diagnosis → solutions
When you see a puddle or staining, start with the most common culprits (oil, coolant, transmission fluid) and move outward. Symptom: puddle color and location. Diagnosis: correlate color, smell, level indicators, and component access. Solutions: tighten clamps, replace worn hoses, fix seals, or replace faulty components. If you suspect fuel, brake, or high-pressure lines, stop driving and contact a professional immediately. This flow helps you prioritize repairs and prevents unnecessary parts replacements. Leak Diagnosis recommends documenting each step to track progress and inform the technician.
Step-by-step fixes for the most common leaks (oil and coolant)
Here are practical fixes for the two most frequent leaks. Oil leaks: 1) Inspect the valve cover gasket and oil pan gasket for signs of seepage. 2) Tighten or replace damaged oil pan drain plug gaskets and nearby drain plugs. 3) Replace worn hoses or cracked seals along the valve cover area. 4) Clean the area and monitor for fresh leaks after a test drive. Coolant leaks: 1) Check radiator hoses for cracks or loose clamps. 2) Replace damaged radiator hose sections or clamps. 3) Inspect the radiator cap for proper seal and pressure retention. 4) If the near-head area shows staining near the water pump or thermostat housing, address those seals. Always perform a pressure test after repairs to confirm sealing. If you’re unsure, schedule a professional inspection to verify the fix and avoid a roadside breakdown.
Safety tips and prevention to reduce future leaks
Prevention is safer and cheaper than repairs. Regularly inspect hoses and belts for cracking or soft spots. Use a clean surface to catch drips so you can track changes over time. Maintain proper fluid levels and replace seals and gaskets that show signs of wear before they fail. If you use engine dye or a leak detection kit, follow the instructions carefully and ensure proper ventilation when testing. Never mix fluids and always dispose of any used oil or coolant responsibly. Remember to disconnect the battery only if required by the repair and always work on a cool engine.
When to call a professional and what to expect
If you have any doubt about the source, face a strong odor of fuel, see active fuel lines, or notice brake fluid leaks near the wheel wells, call a professional. A qualified mechanic will confirm the leak source, pressure test the cooling and fuel systems, inspect hoses and clamps, and identify associated damage. Expect a repair plan with recommended parts and a rough tolerance for the service cost. The goal is to stop the leak, restore safe operation, and prevent future problems. The Leak Diagnosis team emphasizes timely professional evaluation when leaks involve critical safety systems or high-pressure fuel lines.
Steps
Estimated time: 60-90 minutes
- 1
Prep and safety check
Put on gloves and eye protection. Park on a level surface, apply the parking brake, and turn off the engine. Ensure there are no open flames or sparks nearby. Gather a flashlight, white paper, and a camera to document the leak.
Tip: Safety first: never work near a fuel leak. - 2
Inspect the origin under the hood
Open the hood and look for fresh oil around the oil cap, valve cover, and pan. Check coolant reservoir caps and radiator hoses for signs of seepage. Use the flashlight to spot dampness or staining.
Tip: Take photos of suspect areas for reference. - 3
Trace leaks to the source underneath
Slide under the car on a flat surface with proper lighting to identify drips. Color and texture can guide you toward oil, coolant, or transmission fluid. Move slowly and avoid stepping on hot components.
Tip: Place white cardboard under suspected spots to magnify color. - 4
Check fluid levels and reservoirs
Check engine oil level, coolant level, brake fluid, power steering fluid, and transmission fluid. If levels are low, this confirms a leak and helps prioritize which system is affected.
Tip: Do not top off if the leak source is unknown. - 5
Clean the area and re-check
Wipe the area clean and drive a short distance (if it’s safe) to see if new drips appear. Re-inspect after cooling down to identify the exact source.
Tip: Document before and after for comparison. - 6
Decide on next steps
If you identify a fuel leak, brake fluid, or a high-pressure line, stop driving and contact a professional. For oil or coolant leaks, plan a fix or maintenance appointment as soon as possible.
Tip: When in doubt, schedule a professional evaluation. - 7
Prepare for repair or replacement
If you’re comfortable, gather replacement hoses, clamps, gaskets, or seals and reference a repair guide. If not, arrange a service appointment with a trusted shop and share your findings.
Tip: Keep a log of what you checked and replaced.
Diagnosis: Puddle or stain under parked car; visible drips under hood or engine bay
Possible Causes
- highOil leak (engine or valve cover gasket)
- highCoolant leak (radiator, hoses, water pump)
- mediumTransmission fluid leak
- lowFuel leak
- lowAC condensate or windshield washer fluid
Fixes
- easyInspect for fresh oil smelling, check engine area and oil level; replace seals/gaskets if necessary
- easyCheck coolant hoses and radiator for cracks; tighten clamps or replace hoses
- mediumInspect transmission pan and lines; refill fluid only after fixing leak
- hardIf fuel leak suspected, avoid ignition sources and call a professional immediately
- easyFor condensate from AC, no repair needed unless staining or odors indicate contamination; schedule service if needed
Questions & Answers
What are the most common car leaks?
Oil, coolant, transmission fluid, and fuel lines are the most common leaks. Differentiating by color, location, and smell helps you identify the culprit quickly and decide whether you can assess it safely or need a professional.
Common car leaks are usually oil, coolant, transmission fluid, and fuel lines. Look for color clues and location to identify the culprit, then decide if you can handle it safely or need a mechanic.
Can a small leak be dangerous?
Yes. Even a small leak can indicate a failing seal or hose and may worsen quickly, leading to more expensive damage or safety risks.
Yes. Small leaks can signal failing seals or hoses and can escalate fast if ignored.
Is it safe to drive with a leak?
If you suspect a fuel, brake, or high-pressure fuel line leak, stop driving immediately and seek professional help. For oil or coolant, limit driving and schedule a diagnostic soon.
If fuel or brake leaks are suspected, stop driving and call a pro. For oil or coolant leaks, minimize driving and arrange service soon.
How can I tell oil leaks from coolant leaks?
Oil leaks look dark and slick, often near the engine. Coolant leaks are bright colored (green/orange/pink) and may have a sweet odor. Location helps too: oil near the engine; coolant near hoses and the radiator.
Oil leaks are dark and slick near the engine; coolant leaks are bright colored and sometimes smell sweet. Check hose areas for coolant leaks.
What should I do right after noticing a leak?
Park safely, note the color and location, and check levels if possible. If fuel or brake fluid leaks are suspected, do not drive and contact a professional.
Park safely, note the color and area, and check fluid levels if you can. If it’s fuel or brake fluid, don’t drive and call a pro.
When should hoses or seals be replaced?
If hoses or seals show cracks, wear, or swelling, replace them promptly. Use a professional for gasket or seal replacements beyond basic hose work.
Replace worn hoses or seals promptly. For gaskets and seals beyond basics, rely on a professional.
Do I need special tools to diagnose leaks?
Basic tools plus a flashlight, clean paper, and a notebook can help a DIY triage. UV dye and a leak detector kit can aid professionals for slow leaks.
A flashlight, gloves, and a notebook are enough for a basic check. UV dye helps find slow leaks.
What should I expect during a professional inspection?
The mechanic will pressure-test systems, inspect hoses and seals, and verify repairs after replacement. Expect a clear repair plan and a cost range based on parts and labor.
Expect a pressure test, hose and seal checks, and after-repair verification with a clear plan and cost range.
Watch Video
Main Points
- Identify the leak types by color, location, and smell
- Prioritize safety: stop driving if fuel/brake leaks are suspected
- Document findings before repair
- Follow a step-by-step diagnostic flow to prevent wasted parts
- Consult a professional for high-risk leaks or complex repairs