What Leaks Coolant: DIY Troubleshooting Guide
Urgent guide to identify, diagnose, and fix engine coolant leaks safely. Learn common causes, how to spot leaks, a diagnostic flow, and when professional help is needed.

Most coolant leaks stem from worn hoses, a loose radiator cap, or a failing water pump. In many cases, a quick check under the hood, a visual inspection of hoses, and a cold-start pressure test can confirm the culprit. If you see puddles, sweet-smelling steam, or the temperature gauge climbing, stop driving and start diagnostics.
What 'what leaks coolant' means for your vehicle
If you’re asking what leaks coolant, you’re facing a safety and reliability issue. The engine cooling system keeps the engine at a safe operating temperature by circulating antifreeze and water. A leak means coolant is escaping somewhere along hoses, the radiator, the water pump, or the heater core. For homeowners and DIY enthusiasts, the goal is to identify the source quickly and safely to prevent overheating and expensive damage. According to Leak Diagnosis, most leaks begin as small seepage from a worn hose or a loose clamp, then grow into a noticeable puddle under the vehicle. In this guide, you’ll find practical checks, a clear diagnostic flow, and actionable steps to fix or safely contain the problem while protecting your engine and your safety. Remember: coolant is toxic, and spillage is slippery, so handle spills with care and dispose of old fluids properly. The phrase what leaks coolant is commonly searched by people who notice dampness, a sweet smell, or a rising temperature gauge. By understanding common failure points, you can act quickly and minimize engine damage.
Common sources of coolant leaks
Coolant leaks almost always originate from a few reliable spots. The easiest to check are the hoses and clamps; heat cycles and vibration over time wear these parts. A loose radiator cap is another frequent source, especially if you hear a hiss when the engine is cool but running. The water pump seal, thermostat housing, and heater core are other common culprits. In older vehicles, cracks in the radiator or failed freeze plugs can cause slow seepage. Knowing where leaks usually start helps narrow your search and prevents unnecessary component replacements. If you’re investigating what leaks coolant, begin with the visible, accessible parts and work inward toward the core components.
Visual clues you can spot
Look for bright fluid pools underneath the engine or in the engine bay after the vehicle has cooled. Coolant often appears green, pink, yellow, or orange depending on the brand, and a sweet, syrupy scent is a telltale sign. Sticky residue on hoses or fittings indicates a slow leak that’s been seeping for some time. Steam or a visibly damp radiator area can pinpoint a location. Don’t ignore a rising temperature gauge, as it signals your engine is losing its cooling capacity. If you’re wondering what leaks coolant, these visual clues help you decide whether to proceed with a pressure test or a dye-based leak search.
Safety and quick checks before digging deeper
Always park on a level surface and let the engine cool completely before touching anything in the cooling system. Never loosen the radiator cap while hot. Wear gloves to protect from hot surfaces and be mindful of pressurized coolant that can spray. A handheld flashlight can reveal damp areas you might miss in daylight. Basic checks include inspecting hose clamps for tightness, looking for cracks or bulges in hoses, and ensuring the reservoir cap seals tightly. Remember, even a small, slow leak can lead to overheating if ignored. If you observe which hose or joint leaks when you press gently, you’re closer to the source of the problem.
Pressure test and checking hoses
A cooling-system pressure test pressures the system to a safe level to reveal leaks not visible when the engine is cold. This method is effective for pinpointing hose leaks, radiator seepage, and pump failures. Follow the tester’s instructions, usually around 15-20 psi for most cars, and observe all gauge readings and any damp spots. While conducting the test, look for sudden pressure drops and listen for hissing sounds near joints. If you’re asking what leaks coolant, this test is a reliable next step after basic visual checks and cap inspection. Always wear eye protection and have a catch pan ready for any expelled fluid. If you can’t locate the leak with the test, consider dye tracing as the next step.
Diagnostic flow: from symptom to solution
The diagnostic flow starts with a clear symptom: a coolant leak or overheating. From there, perform visual checks on hoses, clamps, and the radiator cap. If the leak isn’t obvious, conduct a pressure test to identify external leaks and then consider dye tracing to locate internal leaks like the heater core. Safety is critical: never run the engine with a suspected leak for long, and get professional help if you notice continuous loss of coolant or overheating despite fixes. If you’re dealing with what leaks coolant, this flow helps you systematically validate each potential source and avoid chasing phantom problems.
Quick checks you can do without tools
Some checks don’t require tools. Inspect all visible hoses for bulges, cracks, or wetness around clamps. Tighten clamps if you’re comfortable and replace damaged hoses. Check the radiator cap for cracks and ensure a clean seating surface on both cap and neck. Look for damp areas around the water pump pulley and the thermostat housing—these are common leak points. Clean any evidence you find to better spot new leaks after a drive. If you’re curious about what leaks coolant, combine these quick checks with a late-evening inspection when the engine is cool for best results.
When to call a professional
If the leak persists after quick checks and basic hose replacements, or if you notice continuous steam, significant coolant loss, or the temperature gauge climbs, stop driving and seek professional help. A trained technician can perform a thorough pressure test, diagnose interior leaks like a faulty heater core, and perform precise repairs such as water-pump replacement or radiator work. The cost of delaying repairs includes higher engine damage and potential coolant contamination. If you’re uncertain about the leak’s source or lack the tools, don’t hesitate to contact a pro.
Prevention and maintenance to avoid future leaks
Preventing coolant leaks starts with regular maintenance. Use the correct coolant type and mix ratio, and replace aging hoses, clamps, and the radiator cap as part of your routine. Schedule inspections if you notice a gradual coolant loss or a changing temperature gauge. Bleed the cooling system after any service to remove air pockets, which can masquerade as leaks. For potential buyers and DIYers, proactively monitoring the cooling system reduces the chance of a sudden failure and keeps the engine running cooler and more reliably. According to Leak Diagnosis, proactive maintenance and early replacement of worn parts significantly reduce the risk of expensive engine damage due to leaks.
Steps
Estimated time: 60-90 minutes
- 1
Power down and cool off
Park the vehicle on a level surface and turn off the engine. Allow the engine to cool completely (at least 30 minutes or longer) before touching cooling-system components. This reduces the risk of burns from hot coolant and pressure.
Tip: Never open the radiator cap when the engine is hot; use a towel and a cap wrench if needed. - 2
Inspect hoses and clamps
Check every visible hose for cracks, bulges, or wetness around clamps. Tighten loose clamps and replace any damaged hoses. Look for discoloration, which can indicate chemical damage from coolant.
Tip: Pay attention to the lower radiator hose and the bypass hose near the water pump. - 3
Check the radiator cap and neck
Examine the cap for cracks or a warped seal. If the cap is damaged, replace it with the correct pressure-rated cap. Ensure the cap seats firmly and the neck is clean before reseating.
Tip: A bad cap can be a surprisingly common leak source. - 4
Conduct a pressure test
Use a cooling-system pressure tester to pressurize the system to the manufacturer’s specification (often around 15-20 psi). Observe for pressure drop and inspect hoses and joints for new leaks.
Tip: Have a helper watch the gauge while you inspect potential leak points. - 5
Localize with dye if needed
If the leak isn’t visible, introduce UV dye into the coolant and use a blacklight to trace the leak source. This helps locate hidden issues like heater-core leaks.
Tip: Follow dye instructions carefully and dispose of used dye safely. - 6
Repair and refill
Replace faulty components (hose, cap, pump, or heater core) as identified. Refill with the correct coolant concentration and bleed any air from the system per your vehicle’s service manual.
Tip: Always mix coolant with distilled water to achieve the recommended ratio.
Diagnosis: Visible coolant leak under the vehicle or engine bay puddles with overheating signs
Possible Causes
- highWorn/cracked radiator hoses
- highLoose or damaged radiator cap
- mediumFaulty water pump seal
- lowHeater core leak
Fixes
- easyTighten or replace the radiator cap
- easyReplace worn hoses and clamps
- hardReplace the water pump or repair the seal
- hardInspect and repair the heater core
Questions & Answers
What are the most common places coolant leaks start?
Most leaks begin at hoses, clamps, and the radiator cap. The water pump seal and heater core are also frequent culprits. Inspect these areas first when you notice dampness or puddling. If you’re unsure, a pressure test will help confirm the source.
Most leaks start at hoses, clamps, or the radiator cap, with the water pump seal and heater core following closely. A pressure test can confirm the source.
Can I fix a coolant leak myself?
Many small leaks from hoses or clamps can be repaired with replacements and proper tightening. More complex issues, like a faulty water pump or heater core, usually require a professional. Always follow safety precautions and consult the vehicle manual.
You can fix small hose leaks yourself, but major components like the water pump or heater core usually need a pro.
How can I tell if the leak is external or internal?
External leaks show coolant on the ground or engine bay. Internal leaks, such as head gasket failures, may not leave a puddle but can cause white smoke or overheating. A pressure test with dye can help differentiate.
External leaks leave coolant puddles; internal leaks may not. A dye test helps tell them apart.
What safety steps should I take if I spill coolant?
Coolant is toxic; avoid skin contact and never let pets or kids drink it. Wipe spills with absorbent material and dispose of it per local guidelines. Use gloves and goggles when handling coolant.
Coolant is toxic, so clean it up carefully and dispose of it properly.
When should I replace the water pump?
If the pump seal is leaking or the pump is noisy, it’s time to replace it. Delaying can cause overheating and damage to the engine. A professional can confirm the proper timing belt or chain interaction.
If the pump leaks or sounds loud, replace it to prevent overheating.
Watch Video
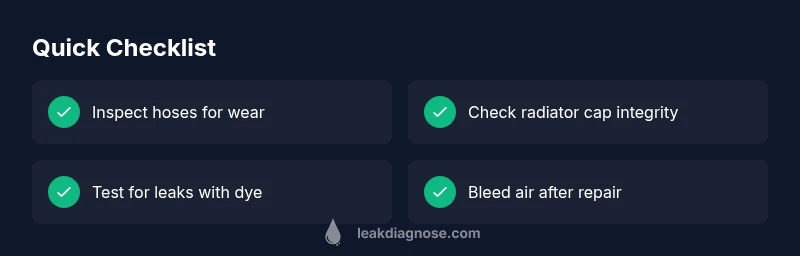
Main Points
- Identify common leak sources early
- Use pressure testing to locate leaks
- Do not drive with a leaking cooling system
- Bleed air after repairs to prevent air pockets
- Replace worn hoses and caps proactively