Oil Leak on Engine: Quick Troubleshooting Guide
Urgent guide to diagnose and fix an oil leak on engine. Learn common causes, safe checks, and step-by-step fixes to protect your engine and prevent costly damage.

An oil leak on engine is most often caused by a loose gasket, worn seal, or a faulty drain plug. Start with a safe hand-free inspection: check the drain plug, oil filter, and valve-cover gaskets for obvious looseness or weeping. Tighten or replace loose parts, address damaged seals, top up oil if needed, and clean spills immediately to reduce fire risk.
What an oil leak on engine means for your vehicle
An oil leak on engine is a clear alert that lubrication is escaping where it should stay contained. Oil is the lifeblood of your engine, providing cooling, lubrication, and a barrier against wear. Even small leaks can lead to low oil level, which raises the risk of accelerated engine wear, overheating, and potential damage if the vehicle is driven for extended periods. The moment you notice oil spots under your car or a burning oil smell after a drive, treat it as urgent. According to Leak Diagnosis, early detection of an oil leak on engine can prevent costly damage and should prompt a careful, methodical inspection.
Common sources of an oil leak on engine
Most leaks originate from a handful of failure points. Typical culprits include a loose or damaged drain plug and washer, worn valve-cover gaskets, a leaking oil pan gasket, a failing rear main seal, or a compromised oil filter. Less obvious but possible sources include a faulty oil pressure sensor, a cracked valve cover, or a PCV system issue that pushes oil into gaskets. Not all leaks dribble at the same rate, so you may see dampness on one side of the engine or a steady drip depending on where the failure occurs. Leak Diagnosis emphasizes inspecting for fresh oil seepage rather than just dark stains—that indicates current leakage.
Immediate safety steps you can take
Safety first: pull over to a safe spot away from traffic, turn off the engine, and let it cool before touching anything. If you must check oil level, use the dipstick with clean gloves or a rag, and avoid hot components. Do not smoke or operate electrical devices near a fuel/oil spill. Contain the area with absorbent rags and place a tray under the car if you can. If you observe heavy smoke, heat, or a large puddle, call roadside assistance and avoid driving.
How to inspect without special tools
Begin at the most accessible components. Check the drain plug and its washer for looseness or oil seepage. Inspect the valve-cover gaskets for fresh oil around the valve covers, and look for oil seepage around the oil filter and oil pan. A simple wipe-down can help you trace fresh leaks to their source. If you notice oil on the front or sides of the engine, suspect valve-cover area or drain plug; if the leak pools near the oil pan, focus there. Be mindful of the oil level and ensure you aren’t running the vehicle low on lubrication while inspecting.
Diagnostic approach: symptom to source mapping (flow)
Use observable signs to narrow down causes. A bright, fresh leak near the drain plug often means a loose plug or damaged washer. Wetness around valve covers points to gasket seepage. Oil on the oil pan or pan gasket area suggests a gasket leak there. If oil leaks through the timing cover or rear main seal, you might notice seepage along the bottom of the engine and transmission. Remember, a tiny seep can become a bigger leak if ignored. Leak Diagnosis notes that early, small leaks are easier to fix than late-stage failures.
Most common fix: drain plug and valve-cover gasket checks
The simplest fixes address the most frequent failures first. Step one is tightening the drain plug to the manufacturer’s torque specification and replacing the washer if warped. Step two is inspecting and replacing worn valve-cover gaskets. If the leak is coming from the oil pan gasket, you’ll need to reseal or replace the gasket, which is more time-consuming. After any fix, refill oil to the proper level and run the engine briefly to check for renewed seepage. If you still see leaks, escalate to a professional.
When to call a professional and what to expect
If the leak persists after simple fixes, it’s time to call a mechanic. Professionals can perform pressure tests, dye tests, and a more thorough inspection that may reveal issues like a rear main seal or main bearings that require specialized tools. Engine damage from low oil can be costly, so an expert assessment is prudent when leaks are slow and have persisted for days. Regular maintenance checks after repair help prevent recurrence.
Prevention tips to avoid future leaks
Commit to a preventive routine: check oil level regularly, replace gaskets and drain plugs only with OEM or quality aftermarket equivalents, and use the correct torque on all fasteners. Address any oil smells or smoke immediately, monitor for new spots under the vehicle, and keep the engine bay clean so you can spot leaks faster. For longevity, follow the manufacturer’s maintenance schedule and use high-quality oil and filters.
Steps
Estimated time: 1-2 hours
- 1
Ensure safety and prep
Park on a flat surface, engine off and cool. Gather rags, gloves, and a flashlight. If you notice a large amount of oil, call for roadside assistance rather than attempting a drive.
Tip: Never work on a hot engine—burn risks are high. - 2
Locate the leak source
Wipe down suspected areas with a clean rag to identify fresh seepage. Look around the drain plug, valve covers, oil filter, and oil pan for active leaks.
Tip: A bright flashlight helps you spot tiny drips. - 3
Check the drain plug and washer
Inspect the drain plug for tightness and check the washer for deformation or damage. If loose, tighten to torque spec and replace the washer if needed.
Tip: Use a torque wrench to avoid overtightening. - 4
Inspect valve-cover gaskets
Check for wetness around valve covers. If damp, remove the cover (carefully) and inspect or replace the gaskets as needed.
Tip: Replace gaskets in pairs to ensure a proper seal. - 5
Check the oil filter and pan
Inspect around the oil filter and oil pan for seepage. If the filter gasket or pan gasket shows signs of leaking, replace them and reseal properly.
Tip: Avoid over-tightening the oil filter; it should be snug without forcing. - 6
Refill and test the system
Top up oil to the correct level, run the engine briefly, and recheck for leaks. If you still see leaks, escalate to a professional for diagnostic testing.
Tip: Monitor oil level after test runs to ensure no new loss.
Diagnosis: Visible oil leak under engine or on engine components
Possible Causes
- highLoose drain plug or worn drain plug washer
- highWorn valve-cover gasket seepage
- mediumOil pan gasket leak
- lowRear main seal leak
Fixes
- easyTighten drain plug to manufacturer torque and replace washer if warped
- mediumReplace valve-cover gaskets if visibly worn or leaking
- hardReseat or replace oil pan gasket if leaking around the pan area
- hardInspect for rear main seal failure and schedule professional service
Questions & Answers
What are the most common causes of an oil leak under the hood?
The top culprits are a loose drain plug, a faulty valve-cover gasket, and oil pan gasket leaks. Slow seepage may come from the rear main seal or oil filter area. Inspect these areas first to identify the source.
Most leaks come from the drain plug, valve-cover gaskets, or oil pan gaskets. Start there to locate the source quickly.
Can driving with an oil leak cause engine damage?
Yes. Driving with an oil leak can lead to insufficient lubrication, overheating, and accelerated engine wear. If you notice a leak, limit driving and seek a professional assessment.
Yes. An oil leak can cause major engine damage if left unchecked, so limit driving and get a professional check.
Is a tiny oil seep always easy to fix at home?
Not always. Some leaks require gasket replacement or professional sealer applications. Start with basic checks, then escalate if the seep persists or worsens.
A small seep may be fixable at home, but don’t ignore persistent leaks—seek a professional if unsure.
Should I drive to the mechanic with a suspected oil leak?
Only if the oil level is safe and the leak is minor. If the level is dropping or you see a big puddle, avoid driving and call for assistance.
Only drive if oil level is safe; otherwise, call for help to avoid engine damage.
How can I tell if the leak is from the valve cover vs the oil pan?
Valve-cover leaks usually appear near the top edges of the engine; oil pan leaks near the bottom edges around the pan gasket. Clean the area and observe where fresh oil appears after running the engine briefly.
Top-edge leaks point to valve covers; bottom pan leaks point to the oil pan gasket.
Is sealant a good temporary fix for leaks?
Sealants are not a reliable long-term fix for engine oil leaks. They may provide a temporary seal but can clog passages or fail under heat. Reseal with proper gaskets and torque.
Sealants aren’t a long-term answer. Use proper gaskets and torque for a lasting fix.
Watch Video
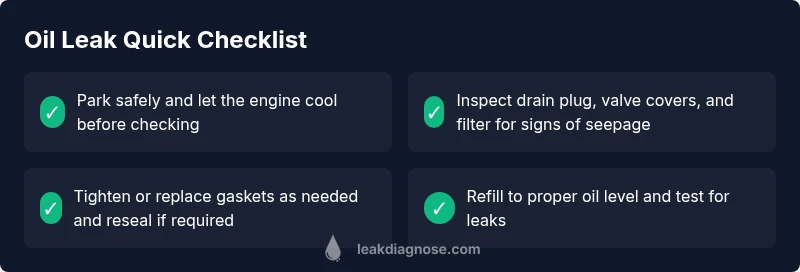
Main Points
- Act quickly to locate and fix leaks
- Check drain plug, gaskets, and oil filters first
- Refill to proper oil level and test
- Schedule professional help if leak persists
- Maintain regular oil checks to prevent recurrence