Is Vacuum Leak Easy to Fix? A Practical Car DIY Guide
Learn how to diagnose and fix a car vacuum leak with clear, step-by-step guidance. This guide covers common causes, safe testing methods, DIY fixes, and when to call a professional.

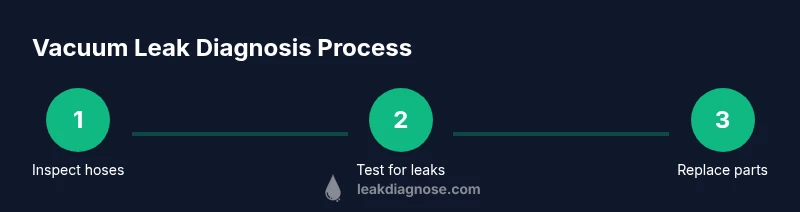
Answer: You can often fix a simple vacuum leak yourself by inspecting hoses, tightening clamps, and replacing cracked lines. Start with a visual check under the hood, listen for a hiss, and use a smoke test or propane method to pinpoint the source. If the engine runs poorly or warning lights appear, consult a professional. According to Leak Diagnosis, many common leaks originate in hoses or clamps and are DIY-friendly when caught early.
What is a vacuum leak in a car?
A vacuum leak occurs when unmetered air enters the intake manifold, bypassing the throttle and upsetting the controlled air-fuel mixture. The result can be rough idle, stalling, reduced power, and higher emissions. If you're asking "is vacuum leak easy to fix", the answer depends on where the leak is and how accessible the components are. According to Leak Diagnosis, many simple leaks originate in hoses or clamps, making them candidates for DIY fixes by homeowners with basic tools. This issue is not just about a single component; it’s about the path air takes as it enters the engine. When a leak is present, the engine’s computer may compensate by altering fuel trim, which can mask the problem until you observe abnormal performance, high idle, or lean-related trouble codes. With the right approach and patience, many leaks can be fixed without major disassembly.
When the leak involves an intake gasket or a cracked manifold, the repair can become more involved and may require specialized tools and expertise. In those cases, safety and accuracy become more important than speed. This guide will walk you through the most common, fixable leak sources and practical steps to determine whether your situation fits a DIY approach.
Tools & Materials
- Basic toolbox(Screwdrivers, pliers, and wrenches for hose clamps and fittings)
- Ratchet and socket set(For removing and tightening clamps and parts)
- Screwdrivers (flathead and Phillips)(For hose clamps and vacuum components)
- Replacement vacuum hoses(Choose hoses matching your vehicle’s hose sizes)
- Hose clamps (various sizes)(Keep several sizes on hand)
- Safety gear (gloves, eye protection)(Protect hands and eyes while working near moving parts)
- Smoke tester or alternative leak-detection method(Optional but highly effective for locating leaks)
- Torque wrench (optional)(Useful for torquing bolts to spec if needed)
- Shop rag and throttle-body cleaner(Keep area clean while inspecting leaks)
Steps
Estimated time: 45-90 minutes
- 1
Prepare workspace and safety gear
Park on a flat surface, engage the parking brake, and disconnect the battery if you’ll be working near electrical sensors. Put on gloves and safety glasses before touching hoses or clamps. Clear space around the engine bay so you can see every connection clearly.
Tip: Have a flashlight handy and work in a well-ventilated area to avoid fumes. - 2
Visually inspect hoses and clamps
With the engine off, look for cracked, brittle, or swollen hoses. Check all hose clamps for looseness and replace any showing rust or damage. Include small vacuum lines near the throttle body and PCV routing, as these are easy to miss.
Tip: Use a mirror or camera to inspect hard-to-see spots behind components. - 3
Perform a leak-detection test
Use a smoke tester if available, or apply a controlled leak method (such as a propane test or soapy solution) to reveal leaks. Watch for smoke at joints or bubbles forming at connections. Ensure you perform tests in a ventilated area and away from open flames.
Tip: Never test near fuel lines; keep a fire extinguisher within reach. - 4
Isolate and pinpoint the source
If you identify a suspect hose or connection, gently manipulate it to see if the engine idle changes. Replace or reseal the faulty part and re-test. This step helps confirm the leak before you buy parts.
Tip: If re-seating a clamp improves performance, you’ve likely found the culprit. - 5
Replace damaged hoses or gaskets
Install fresh hoses of the correct size and replace clamps as needed. Re-test after replacement to confirm a tight seal and no lingering hiss. Dispose of old parts and avoid reusing damaged clamps.
Tip: Use new gaskets or seals rather than reusing old ones for reliability. - 6
Re-test and verify engine performance
Start the engine and observe idle, throttle response, and any check-engine light codes. If codes persist, scan for fuel trim and misfire data to ensure fixes didn’t affect other systems. Clear codes if the condition has been resolved.
Tip: Note fuel trim values; persistent lean readings may require deeper diagnostics.
Questions & Answers
What is a vacuum leak in a car?
A vacuum leak happens when unmetered air enters the intake, upsetting the air-fuel mixture and causing idle and performance problems. It can be diagnosed with visual checks, listening for a hiss, and testing with smoke or a propane method. Some leaks are simple fixes; others require part replacement.
A vacuum leak means extra air is entering the engine, throwing off the air-fuel balance. Most leaks can be found with basic tests and fixed without major work, but bigger leaks may need a mechanic.
Is a vacuum leak easy to fix?
Fixes are often straightforward when the leak is in hoses or clamps. More complex leaks around the throttle body or intake gasket may require special tools and resealing. Start with the simplest components first.
Yes, small hose leaks are usually DIY repairs; bigger gasket issues might need a pro.
How can I tell if I have a vacuum leak?
Signs include rough idle, high or fluctuating idle, misfires, and a check engine light. A hiss under the hood or poor acceleration also points to vacuum issues. Inspect hoses and seals as your first step.
Look for rough idle and a hiss, then check hoses and seals for leaks.
Can a vacuum leak trigger engine codes?
Yes. Vacuum leaks can trigger lean-condition or misfire codes depending on sensors. Use an OBD-II scanner to confirm the leak’s presence and location.
Yes, codes can point to a vacuum-related lean condition.
What tools do I need to diagnose a vacuum leak?
A flashlight, pliers, screwdrivers, hose clamps, and replacement hoses. An optional smoke tester and an OBD-II scanner help pinpoint leaks and verify fixes.
You’ll need basic tools plus a smoke tester or scanner for precise results.
When should I seek professional help?
If you find a damaged intake gasket, a cracked manifold, or persistent codes after fixes, professional help is recommended. A mechanic can perform a thorough vacuum test and ensure no other systems are affected.
If leaks persist or involve gaskets, call a professional.
Watch Video
Main Points
- Identify leaks early to prevent engine damage.
- Many leaks originate in simple hoses and clamps and are DIY-friendly.
- A smoke test is a fast way to locate hidden leaks.
- Replace damaged parts rather than patching permanently.
- If in doubt, seek professional help before driving the vehicle.