How to Check a Leaking Head Gasket: Step-by-Step Guide
Learn practical, safe steps to diagnose a leaking head gasket at home. Recognize symptoms, perform tests, and decide when to seek professional help with guidance from Leak Diagnosis.

Learn how to check leaking head gasket with a safe, at-home approach. Start by recognizing common signs, then perform basic, non-invasive tests before calling a mechanic. This step-by-step guide from Leak Diagnosis outlines essential tools, tests, and decision points you need to know.
how to check leaking head gasket — signs, tests, and fixes
If you're wondering how to check leaking head gasket, you're not alone. According to Leak Diagnosis, head gasket leaks are a common engine issue that can appear gradually as mileage climbs and heat cycles repeat. The head gasket seals the joint between the engine block and cylinder head, keeping coolant and oil separate from combustion gases. When it fails, you may see coolant loss with no obvious leak, milky oil, white exhaust, or bubbles in the radiator. In this guide, you'll find practical, safe at-home steps to confirm a leak, interpret test results, and plan the next move. Safety is essential: ensure the engine is cold and your coolant is cool before starting, and dispose of any contaminated fluids according to local rules.
sectionsNoteOnlyForThisBlock":null},
Quick checks before you test
Before starting formal tests, do a quick sanity check. Look for unexplained coolant loss, a drop in coolant level, milky oil on the dipstick, or white smoke from the exhaust. Inspect for external signs around the head gasket area, including the cylinder head bolts and the timing cover. Keep in mind these signs are clues rather than proof; use them to decide which tests to run next. Document the symptoms with dates and, if possible, photos. This baseline helps a technician compare results if you seek professional help later.
sectionsNoteOnlyForThisBlock":null],
At-home diagnostic methods you can perform safely
Home diagnostics for a suspected head gasket leak focus on safely pressurizing the cooling system and looking for cross-contamination signs. Start with a cooling system pressure test, following the tool’s instructions and ensuring the engine is completely cool. A stable pressure over several minutes that holds suggests seals are intact; a pressure drop indicates a leak somewhere in the cooling circuit, which could involve the head gasket. If you want more visibility, a UV dye test can reveal tiny leaks when viewed under a black light. Always inspect oil and coolant for milky appearances, which strongly point to gasket failure. Keep records of observations to support a service visit.
sectionsNoteOnlyForThisBlock":null],
Interpreting results and next steps
If tests indicate a leak, it does not automatically mean immediate teardown. A failed pressure test or cross-contamination signs should prompt a professional evaluation to determine whether a head gasket replacement is necessary or if a less invasive repair is possible. In some cases, small external leaks or warped mating surfaces may be addressed with sealing techniques or surface refinishing, but these options are engine- and situation-specific. If tests are inconclusive, consider repeating tests in a controlled way or consulting a trusted technician for a second opinion.
sectionsNoteOnlyForThisBlock":null],
Preventive maintenance to reduce future leaks
Preventing future gasket leaks starts with maintaining proper cooling system health and avoiding overheating. Regularly flush and replace coolant as recommended by your vehicle’s manufacturer, monitor coolant level, and inspect hoses for wear or soft spots. Address oil leaks promptly to reduce contamination around the head area. Use high-quality coolant and ensure the water pump, thermostat, and radiator are functioning correctly. Routine checks can extend engine life and help you spot brewing problems before they escalate.
sectionsNoteOnlyForThisBlock":null],
When to seek professional help
If you observe consistent coolant loss, milky oil, continuous white smoke, or a persistent pressure drop during tests, professional diagnostics are warranted. A head gasket replacement is a major repair that requires precise torque specs, proper head resurfacing, and a calibrated cooling system. A qualified mechanic can confirm the diagnosis, provide a repair plan, and discuss warranty and cost expectations.
sectionsNoteOnlyForThisBlock":null],
mainTopicQuery
head gasket leak
Tools & Materials
- Cooling system pressure tester(Connects to the radiator neck to pressurize the system without running the engine)
- Funnel and clean coolant(Use new coolant if you top off the system)
- Protective gloves and safety goggles(Protect hands and eyes when dealing with coolant)
- Flashlight(Inspect areas under hoses and around the head gasket area)
- Screwdrivers and socket set(For removing clamps or debris as needed)
- Drain pan and absorbent rags(Contain spills and cleanup)
- UV dye kit (optional)(Helps visualize tiny leaks under UV light)
Steps
Estimated time: 30-60 minutes
- 1
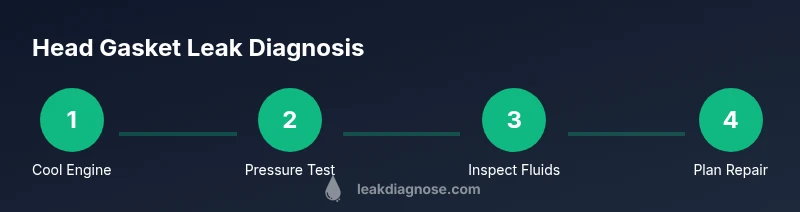
Cool engine completely
Wait until the radiator and hoses are cool to reduce the risk of burns and scalding. Cooling the system also prevents sudden coolant spray when opening hoses or caps.
Tip: Never open the radiator cap when the engine is hot. - 2
Gather tools and safety gear
Collect your tester, coolant, drain pan, gloves, goggles, and a flashlight. Having everything ready keeps you from scrambling mid-test.
Tip: Lay out towels to catch drips and keep the work area tidy. - 3
Inspect visually for external leaks
Look for fresh coolant around hoses, the radiator, and the head gasket area. Note any wet spots or crusty residue that could indicate a leak.
Tip: Use a bright light and mirror to examine hard-to-see joints. - 4
Attach and pressurize the cooling system
Attach the pressure tester to the radiator neck or pressure cap housing and apply gentle pressure per the tool’s instructions. Monitor for stability over several minutes.
Tip: Do not exceed the tool’s recommended pressure to avoid false positives. - 5
Observe for pressure loss and signs of leakage
If the pressure drops, a leak is likely. Check around gaskets, hoses, and the head area while watching for fresh coolant or steam.
Tip: If you can’t pinpoint a leak, consider a UV dye test. - 6
Check fluids for cross-contamination
Inspect engine oil for a milky appearance and look for oil in the coolant. Milky fluids strongly indicate a gasket issue.
Tip: Wipe a sample on paper to better see color changes. - 7
Document findings and plan next steps
Record test results, symptoms, and test timing. This helps a mechanic diagnose and schedule repairs.
Tip: Take photos or short videos of observable leaks and readings. - 8
Decide on repair approach or professional help
If tests indicate a leak, plan a repair with a qualified technician. Head gasket work requires proper torque and calibration.
Tip: Ask about warranty, costs, and scope before proceeding.
Questions & Answers
What are the most common signs of a head gasket leak?
Common signs include milky oil, white smoke from the exhaust, coolant loss without obvious external leaks, and bubbles in the radiator when the engine is running.
Look for milky oil, white smoke, and unexplained coolant loss to suspect a head gasket leak.
Can I drive with a suspected head gasket leak?
Driving with a suspected leak can cause overheating and engine damage. Have the vehicle inspected and avoid aggressive driving until a diagnosis is confirmed.
Don’t drive aggressively if you suspect a gasket leak; get it diagnosed first.
What tools are essential for at-home checks?
Essential tools include a cooling system pressure tester, flashlight, drain pan, gloves, and rags. These help you perform safe checks before any disassembly.
A pressure tester, flashlight, and safety gear are your basics for at-home checks.
Is head gasket repair DIY-friendly?
Head gasket replacement is a complex, high-precision job that requires specialized equipment and torque sequences. Professional service is usually recommended.
Most people should seek professional help for head gasket repairs.
How long does a head gasket repair take?
Repair time varies by vehicle and shop workload, but expect a multi-hour to full-day process for a proper head gasket replacement.
A full head gasket replacement can take several hours to a day depending on the car.
Should I use dye to locate leaks?
UV dye helps visualize small leaks that aren’t easy to see with the naked eye. Use as directed and inspect with a UV flashlight.
Dye tests can help reveal tiny leaks you might miss otherwise.
Watch Video
Main Points
- Identify signs early to prevent engine damage
- Use safe, non-destructive tests before disassembly
- Document findings for accurate diagnosis
- Decide on repair vs. professional service
- Prevention reduces future leaks