Engine coolant leak fix: DIY guide for homeowners
Learn a proven, safe approach to diagnose and fix engine coolant leaks at home. Step by step guidance, safety tips, and maintenance advice from Leak Diagnosis to help you prevent overheating and expensive repairs.

Fixing an engine coolant leak prevents overheating and costly damage. This practical guide helps homeowners diagnose common leak sources, perform safe temporary stops, and plan a permanent repair. You will learn the right tools, a clear sequence, and when to call a professional. According to Leak Diagnosis, addressing leaks early saves time and money.
What is an engine coolant leak and why it matters
An engine coolant leak is a sign of a compromised cooling system in a gasoline-powered vehicle. The cooling system uses a mixture of water and antifreeze to regulate engine temperature and prevent freezing or boiling. When a leak develops, you lose coolant, which can lead to overheating, warped metal, blown head gaskets, and expensive repairs. According to Leak Diagnosis, diagnosing and addressing leaks early reduces the risk of overheating and engine damage, saving time and money in the long run.
In this section, we cover common symptoms, how leaks start, and the key terms you will encounter. You will learn to distinguish between tiny seepage from a hose clamp and a full-on radiator or water pump failure. This foundation helps you decide whether a DIY fix is reasonable or if a professional repair is the safer option.
Common sources of engine coolant leaks
Leaks can originate from several parts of the cooling circuit. The most frequent sources include worn or damaged hoses and clamps, cracks in the radiator, a faulty radiator cap, or a leaking water pump. The expansion tank or reservoir can crack or develop loose connections, while the thermostat housing and heater core are common gasket and connector failure points. Each source has different signs, so a careful inspection is essential. Leak Diagnosis analysis shows that locating the exact source drives the repair approach and prevents unnecessary parts replacements.
Safety first: before you begin
Working on a cooling system requires respect for safety. Do not open the radiator cap when the engine is hot because pressurized coolant can spray and cause burns. Work on a cold engine on a level surface, use gloves and eye protection, and keep pets and children away from the work area. Ventilate the engine bay if you must run the engine briefly for testing, and never mix coolant types unless the manufacturer specifies compatibility. Keep used coolant in a sealed container and dispose of it according to local regulations.
Diagnostic approach: how to locate the leak
Start with a visual sweep of the engine bay while the car is cold. Look for damp spots, crusty residue, or staining along hoses, clamps, radiator seams, and the water pump area. A pressure test offers a structured way to reveal leaks that are not obvious with plain sight. Attach a coolant system pressure tester, pressurize to about 15 psi, and observe for several minutes. A dye can help highlight leaks that are otherwise invisible. This approach helps you avoid guessing and speeds up the repair planning.
Temporary fixes you can try while planning a permanent repair
If a clamp is loose, retighten it to the manufacturer’s torque specification. A small hose seepage may respond to a new clamp or slight hose trimming and reseating. Do not rely on sealants or epoxy as a long term solution for automotive cooling leaks, especially on pressurized systems. Refilling coolant without addressing a leak can lead to rapid loss and overheating. Use this step only to stabilize the situation while you source proper parts.
Permanent repair pathways: what might be involved
Major leaks and structural damage often require component replacement. Typical pathways include replacing worn hoses and clamps, installing a new radiator cap, or replacing the thermostat housing gasket. If the water pump shows a leaking seal or if the radiator itself is cracked, plan for a component replacement. For engine gasket leaks such as the head gasket, or significant corrosion, professional service is usually the safest option. Knowing when to stop the DIY path is part of a smart repair plan.
Refilling, bleeding, and testing the cooling system after repair
After addressing the leak, you must refill the system with the correct coolant type and bleed air from the loop. Fill slowly, start the engine with the radiator cap off to vent air, and top up as needed until the level becomes stable. Recheck for leaks after the system reaches operating temperature, and monitor the temperature gauge over the next 24 hours. Correct bleeding prevents hot spots and continued overheating.
Maintenance to prevent future leaks
Regular inspections of hoses, clamps, and reservoir connections can prevent most leaks. Schedule coolant flushes per the vehicle manufacturer’s guidelines and replace coolant with the correct specification. Keep a simple log of coolant level observations, top ups, and any symptoms such as steam or sweet smells. Proper maintenance reduces risk and extends engine life.
Tools & Materials
- Engine coolant (correct type for your vehicle)(Check owner manual for HOAT vs OAT specification; do not mix types.)
- Coolant funnel(Wide mouth helps avoid spills.)
- Drain pan(Large enough to hold several quarts.)
- Rags or shop towels(For spills and clean up.)
- Gloves and eye protection(Chemical resistant gloves; eye protection.)
- Wrench set and pliers(To tighten clamps and remove hoses.)
- Coolant system pressure tester(Used to reveal hidden leaks.)
- New hoses, clamps, or thermostat (as needed)(Source parts after leak source is confirmed.)
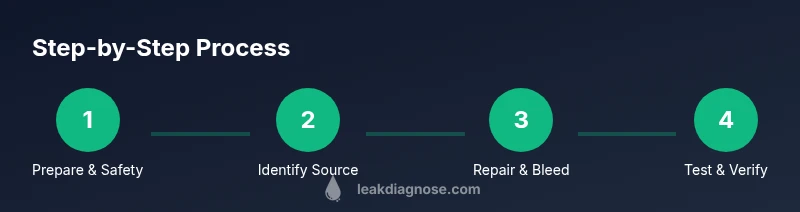
Steps
Estimated time: 90-120 minutes
- 1
Prepare and safety check
Ensure the engine is completely cool before starting. Gather tools, wear PPE, and set the vehicle on a flat, level surface. If the vehicle is in gear or the parking brake is not engaged, secure it before you begin.
Tip: Keep a container ready for draining coolant and never rush steps that involve hot components. - 2
Locate the leak source visually
With the cap off, inspect hoses, clamps, radiator seams, the water pump area, and the expansion tank. Note any wet spots, dried residue, or coolant dye traces that point to a source.
Tip: A clean engine bay and good lighting help you spot subtle seepage more quickly. - 3
Pressure test to reveal hidden leaks
Attach the pressure tester to the radiator neck or reservoir and pump to about 15 psi. Maintain this pressure for 5 to 10 minutes while watching for new drips or puffs of air. A consistent leak during the test confirms the problem area.
Tip: Do not exceed 16 psi; over-pressurizing can damage the cooling system. - 4
Address the leak source
If a hose is damaged, replace it and install a new clamp. If the radiator cap is old or faulty, replace it with the correct cap. For gasket or housing leaks, you may need professional service for proper sealing.
Tip: Only replace components you are confident are faulty; incorrect parts can worsen the issue. - 5
Refill coolant and bleed air
Use the correct coolant and mix ratio. Refill slowly, run the engine with the cap off to vent air, and watch the level. Refill to the full line as air escapes.
Tip: Do not run the engine without coolant, and never mix old and new coolant without clearance. - 6
Test run and monitor
After a proper bleed, run the engine to operating temperature and observe for leaks. Recheck the coolant level and inspect for signs of overheating in the following 24 hours.
Tip: Keep an eye on the temperature gauge and coolant reservoir level during the first drive after repair.
Questions & Answers
What are common signs of an engine coolant leak?
Common signs include visible puddles under the vehicle, low coolant levels, a sweet smell, white exhaust smoke, or overheating gauge readings. If you notice these signs, inspect the cooling system promptly.
Look for puddles and coolant level drops, plus overheating alerts. If you see any, inspect the cooling system right away.
Is it safe to drive a car with a coolant leak?
Driving with a coolant leak risks engine overheating and severe damage. If you notice leakage or overheating, pull over safely and arrange for service or towing.
No. If you see a leak or the engine overheats, stop driving and seek professional help.
How do you locate the leak source effectively?
Start with a visual inspection of hoses and the radiator. Use a pressure test to reveal leaks not visible during normal operation. Dye can help pinpoint leaks that are otherwise hard to spot.
Inspect hoses, clamps, and the radiator. A pressure test and dye can reveal hidden leaks.
How much coolant should I add after a leak is addressed?
After addressing the leak and ensuring no further loss, top up the coolant to the correct level according to the reservoir marks and vehicle manual. Do not overfill.
Top up to the proper level after bleeding and confirming the leak is fixed.
When should I call a mechanic for a coolant leak?
If the leak persists after a temporary fix, if the water pump or head gasket shows signs of failure, or if overheating recurs, seek professional help promptly.
If the leak continues or you see overheating, it is time to call a mechanic.
What safety risks are associated with coolant leaks?
Coolant is toxic to pets and humans. Avoid skin contact and inhalation of fumes. Clean spills immediately and ventilate the area when testing or refilling.
Coolant is toxic. Clean spills and keep kids and pets away.
Watch Video
Main Points
- Identify leak sources with care to tailor the repair.
- Use the correct coolant type and bleed air after refilling.
- Don t rely on sealants for major leaks; replace faulty parts.
- Monitor the system after repair to ensure durability.