Fix Car Leak: A Practical Step-by-Step Guide
Learn how to diagnose and fix car leaks safely. This comprehensive guide covers common leak sources, DIY repair steps, safety tips, and when to seek professional help. Includes tools, a step-by-step plan, and maintenance advice to prevent future leaks.

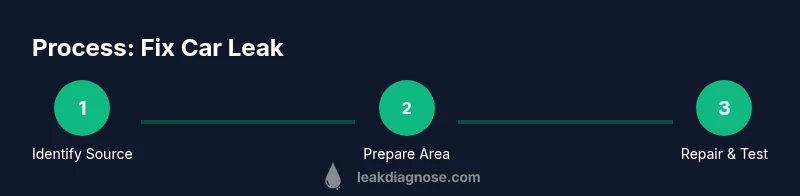
To fix a car leak, start by safely locating the leak source, then pre-clean the area and prepare the correct repair approach. Begin with the simplest fix if possible—like tightening a cap or replacing a loose hose—before moving to gaskets or seals. Depressurize the system, support the vehicle, and test for leaks after repair.
Why fixing a car leak matters
A car leak isn’t just a mess to clean up; it’s a warning sign. Left untreated, leaks can lead to engine overheating, reduced lubrication, and costly damage. In addition to the risk of breakdowns, leaking fluids can pose environmental hazards and create slippery driveways. The Leak Diagnosis team emphasizes that addressing leaks early saves money and reduces safety risks. By learning to fix car leak issues, you protect your vehicle’s reliability and preserve your home’s surroundings, especially around heat- and oil-prone areas of the engine bay. This guide focuses on practical, safe strategies you can perform with common hand tools and basic automotive knowledge, while clearly identifying moments when a professional should step in.
Common sources of car leaks
Car leaks come from a handful of usual suspects. Understanding each source helps you diagnose the problem more quickly and choose the right repair path.
- Engine oil leaks: Often originate at valve covers, gaskets, or seals where oil whips out under pressure.
- Coolant leaks: Typically show up at hoses, radiator connections, water pump, or the thermostat housing.
- Transmission fluid leaks: Common around pan gaskets or cooler lines; the fluid is red or brown and has a distinctive smell.
- Fuel system leaks: Look for damp, sweet-smelling residues around fuel lines, injectors, or hose clamps.
- Other fluids: Power steering fluid, brake fluid, and AC refrigerant can leave marks in their respective colors. Each fluid has a specific viscosity and color, which helps with diagnosis.
Note: Some leaks are seasonal or only occur under pressure when the engine is hot. Always inspect with the engine off and cool, and never work under a car supported only by a jack. For persistent leaks, professional evaluation is wise to prevent misdiagnosis and ensure safety.
Diagnostic approach: locating the source
Diagnosing a leak starts with a careful, multi-step inspection rather than assuming the worst from a single puddle. Begin by cleaning the area to reveal the true source and using a flashlight or inspection mirror to trace the dampness back to its origin.
- Identify the color and odor of the fluid to differentiate between oil, coolant, transmission fluid, and fuel.
- Check fluid levels in each reservoir to gauge which system is losing fluid.
- Use a dye kit or UV dye to trace leaks that are not visible during the first pass.
Once you identify the likely source, document the exact location and the surrounding components. This helps you select the right replacement part and avoid unnecessary substitutions. If a leak involves critical components like the radiator, water pump, or crankshaft seals, consider professional service to prevent engine damage.
Repair options by leak type: hoses, gaskets, and fittings
Not all leaks require the same fix. Start with the simplest repair that addresses the root cause without replacing more pieces than necessary.
- Loose or cracked hoses: Tighten clamps with a screwdriver or replace the hose if it’s softened, cracked, or bulged.
- Worn gaskets or seals: Replacing gaskets between the valve cover, oil pan, or intake manifold is common. Ensure proper torque specs and clean mating surfaces.
- Pressure-fed seals: Replace oil and coolant seals if you notice seepage around the timing cover, water pump, or thermostat housing.
- Fluid-specific fixes: Use compatible sealants or flux where appropriate, but avoid using stop-leak products as a primary fix for long-term reliability.
Tip: Always test after repairs by running the engine, checking for drips, and rechecking fluid levels. Do not overfill reservoirs, as this can mask underlying leaks.
Safety and environmental considerations
Working on a car requires attention to safety and the environment. Leaked fluids are hazardous to skin and eyes, and improper disposal can harm water quality. Follow these precautions:
- Work in a well-ventilated area away from flames or sparks, especially when dealing with fuel or solvents.
- Wear safety glasses and gloves; clean up spills with absorbent material and dispose of it according to local regulations.
- Support the vehicle with appropriate stands on a flat surface; never rely on a jack alone.
- Use spill containment pans and towels to minimize environmental impact.
When in doubt about the repair’s complexity, consult a professional to avoid injury and further damage to your vehicle.
Refill, test, and monitor after repair
After completing the fix, refill any lost fluids to the correct levels and run the engine for a few minutes to test under operating temperature. Check for new drips from the repaired area and inspect hoses and clamps for any signs of movement or loosening.
- Recheck coolant and oil levels after the engine has cooled down.
- Reassess the area after a drive cycle and park on a clean surface to observe fresh leaks.
- Keep a maintenance log of leaks detected, parts replaced, and dates of service to track patterns over time.
Documenting your repairs helps with future maintenance and can be helpful if the vehicle is sold later.
When to call a professional: signs of complexity or risk
Some leaks are straightforward to fix, but others require professional expertise. You should seek a technician if:
- The leak involves high-pressure cooling systems, fuel lines, or brake systems.
- Replacing seals or hoses requires special torque specs or timing belt work.
- You notice overheating, fogging from the radiator, or a rapid drop in fluid levels that you cannot diagnose.
In these cases, a licensed mechanic can ensure safe repairs, proper part installation, and a warranty on the service. The goal is reliability and safety, not just a temporary patch.
Quick-start checklist for DIYers
- Gather essential tools and materials, including a catch pan and rags.
- Identify the fluid, location, and probable source.
- Secure the vehicle and wear protective gear.
- Perform the repair, then test and monitor for future leaks.
Final note from the Leak Diagnosis perspective
Leak diagnosis is a practical skill that combines careful observation with mechanical know-how. By following these steps, you can fix car leak problems effectively while minimizing risk. If a leak returns after a DIY repair or involves critical systems, consider professional service. Consistent maintenance and early intervention are the best strategies for keeping your vehicle leak-free and safe on the road.
Tools & Materials
- Safety glasses(Protect eyes from splashes and debris)
- Mechanic gloves(Grip and skin protection)
- Catch pan(Place under the suspected area to collect fluids)
- Rags or paper towels(Dry areas for inspection and cleanup)
- Socket set and wrenches(Remove clamps, hoses, and bolts)
- Screwdrivers (flat and Phillips)(Work with hose clamps and components)
- Torque wrench(Torques must match factory specs on gaskets)
- Replacement hoses/gaskets(Only if the identified part is damaged)
- Coolant and oil (as needed)(Refill to proper levels after repair)
- Sealant or leak dye kit(Use only if recommended for the leak type)
- UV flashlight or dye kit(Helpful for tracing elusive leaks)
Steps
Estimated time: 90-120 minutes
- 1
Locate the source and prep workspace
Begin by cleaning the suspected area to reveal the exact source of the leak. Park on a level surface, turn off the engine, engage the parking brake, and place absorbing material nearby. A clean area makes diagnosis accurate and safer.
Tip: Take photos before disassembly to aid reassembly. - 2
Depressurize and secure the vehicle
Allow the engine to cool, then relieve pressure by removing the radiator cap if safe or performing a controlled cooldown. Use jack stands on a flat surface and never rely on a jack alone.
Tip: Never work under a car supported only by a jack. - 3
Dry and inspect for dampness
Wipe the area dry and run the engine briefly (with cap removed if appropriate) to identify active leaks. Re-check after a few minutes of operation and note the exact components involved.
Tip: Use a flashlight at an angle to reveal seepage lines. - 4
Replace worn hoses or clamps
If hoses are soft, cracked, or bulging, replace them and snug clamps to factory torque. Inspect hose routing to prevent chafing and confirm clamp position after assembly.
Tip: Ensure clamps sit squarely and are not over-tightened. - 5
Address gaskets or seals
For leaks at valve covers, oil pans, or thermostat housings, remove the component and replace the gasket or seal. Clean mating surfaces thoroughly before reinstalling.
Tip: Use new gaskets; re-use only if manufacturer allows. - 6
Refill fluids and recheck losses
Top off oil, coolant, and other fluids to recommended levels. Start the engine and monitor for renewed leakage during warm-up.
Tip: Check for air in cooling system after refill. - 7
Test under operating conditions
Take a short drive to reach normal operating temperature. Park on a clean surface and re-inspect for drips after cooling down.
Tip: Document any changes for future maintenance. - 8
Evaluate the result and plan next steps
If leaks persist, evaluate whether a dye trace or professional diagnostics are needed. Avoid prolonged driving with unresolved leaks.
Tip: Record part numbers and torque specs for future reference.
Questions & Answers
What are common signs of a car leak?
Common signs include fresh fluid stains under the vehicle, low fluid levels, a sweet smell (fuel or coolant), or damp engine areas. Identifying the color helps distinguish oil, coolant, or transmission fluid leaks. Always clean the area and inspect again after a drive.
Look for new fluid stains, check fluid levels, and note the color to identify the type of leak. Clean and recheck after a short drive.
Can I drive with a coolant leak?
A coolant leak risks overheating and engine damage. Do not drive long distances; top off coolant if safe and transport the vehicle to a repair shop for a proper diagnosis.
Coolant leaks can overheat the engine, so avoid driving long distances. Have it inspected soon.
How much does it cost to fix a car leak?
Costs vary by leak type and parts. DIY fixes may range from inexpensive hose clamps to several hundred dollars for gaskets or seals, plus labor if you hire a shop. Expect a broader range depending on vehicle and part availability.
Costs depend on parts and labor, from affordable hose fixes to more involved gasket replacements.
Is stop-leak a good long-term fix?
Stop-leak products are generally temporary measures and can cause downstream issues. They are not a substitute for proper repair and may clog passages or degrade seals over time.
Stop-leak is usually temporary and not a long-term solution; proper repair is better.
When should I replace a hose vs a gasket?
Replace hoses if they show cracks or bulges. Gaskets are replaced when seepage occurs at mating surfaces or seals. Always inspect neighboring components for wear when making a replacement.
Replace worn hoses or seals with new components, checking nearby parts for wear.
Watch Video
Main Points
- Identify the leak source accurately before replacement.
- Start with the simplest fix and escalate only as needed.
- Test after each repair to confirm success and prevent再leaks.
- Dispose of fluids responsibly and maintain a clean engine bay.
- When in doubt, seek professional help to avoid costly damage.