Leak Diagnosis: Fixing a Leak from Garbage Disposal
Urgent, practical guide to diagnose and repair a leak from garbage disposal. Learn quick checks, a diagnostic flow, step-by-step fixes, safety tips, and prevention to protect your home.

To fix a leak from garbage disposal, start by cutting power and water, then inspect mounting bolts, seals, and the dishwasher inlet hose for obvious drips. Tighten fittings and replace worn gaskets if needed. If water persists, disassemble the unit to inspect the sink flange and disposal body for cracks. If unsure, pause and call a professional to prevent water damage.
Why a Leak from Garbage Disposal Happens
Water leaks around a garbage disposal are usually caused by a worn seal, a loose mounting flange, or a cracked housing. Over time, the interior gasket or O-ring can degrade, letting water seep into the cabinet. Misaligned or loose mounting bolts can also create a gap where water escapes, especially when you run the unit or drain water. In some cases, a misdirected dishwasher inlet hose or a damaged sink flange seals the leak path. By understanding these common failure points, you can quickly determine where the leak originates and decide whether a simple seal replacement or a full unit replacement is required.
Leak sources are often intermittent—sealing failures may only show when the disposal spins, or when the dishwasher kicks in during a wash cycle. If you notice water pooling after heavy use, inspect both the bottom mounting area and the drain connections first. Quick checks save time and prevent further damage to your cabinet and floor.
Quick Safety First: Shutting Off Power and Water
Safety is non-negotiable when working on a garbage disposal. Begin by unplugging the unit under the sink or shutting off the dedicated circuit breaker. If your faucet line feeds a pedestal or a separate shut-off under the sink, turn that valve clockwise to stop water flow. Never place your hands near the grinding chamber while the power is on. Use a flashlight to inspect for drips without leaning over the cavity. Once power and water are off, test a leak-free state by running a small amount of water into the sink before you begin disassembly.
If you smell burning or hear unusual noises after re-enabling power, stop and re-check the wiring and guards. Electrical safety is critical, and if you suspect wiring damage, contact a licensed electrician. These precautions reduce the risk of shock and short circuits.
Common Leak Points to Inspect
Before disassembling the disposal, check the most likely leak points: the sink flange seal where the unit attaches to the sink, the disposal mounting bolts, the dishwasher inlet hose, and the discharge outlet. Tighten mounting bolts in a crisscross pattern to avoid warping the flange. Inspect the rubber gasket around the flange for cracks or deformations; replace if compromised. Examine the dishwasher inlet hose clamps for looseness or cracks, and replace any worn sections. Finally, inspect the discharge elbow and trap for signs of corrosion or damage. Addressing these areas often stops leaks without major repairs.
Document each area you inspect with a simple sketch or note—this helps if you need professional help later. If you notice rust, deep cracks, or a misaligned sink flange, plan for replacement as these issues are unlikely to seal permanently with tightening alone.
Diagnosing by Symptoms: Flow and Puddles
Leaks can present as a slow drip, a steady stream, or puddling that worsens when the disposal runs. Start by cleaning the area and running water to observe where the water appears first. A leak that originates at the flange usually shows water at the sink surface around the drain, while a bottom-body crack leaks from the unit itself. A loose dishwasher inlet hose often leaks only during dishwasher cycles. If the leak shifts when you wiggle hoses or the disposal, you may have a loose connection rather than a cracked unit. Use this symptom map to prioritize fixes: tighten bolts first, replace gaskets second, and consider replacement if the unit is cracked.
Keep a bucket and towels handy while testing, and document any changes you observe. If the leak persists after the simple fixes, proceed to more involved repairs or professional help. Early detection helps prevent water damage and mold growth under your sink.
Tools and Materials You’ll Need
For most small leaks, you’ll need a few basic tools: adjustable wrench, screwdriver set, pliers, bucket, towels, and silicone sealant or plumber’s putty. Have replacement parts on hand: sink flange gasket, disposal O-ring, and if needed, a new inlet hose clamp. If you suspect a cracked housing, you may require a full disposal kit replacement. Do a quick inventory of your supplies before starting—this reduces multiple trips to the hardware store and speeds up repairs. Always select hardware that is compatible with your disposal model and kitchen setup.
Tip: Wear gloves to protect your hands from sharp metal edges inside the unit, and work in a well-lit area to avoid missing small leaks. Maintain a clean workspace under the sink to prevent accidental slips or spills while you disassemble components.
Diagnosing the Source: Flow Chart and Quick Checks
Use a simple flow chart to identify the leak source, starting with external seals, then moving inward to the flange, gasket, and finally the disposal body. If tightening and replacing gaskets don’t stop the leak, confirm the trim near the sink with a bead of silicone on the flange and inspect for hairline cracks around the disposal housing. A few households benefit from resealing around the mounting flange with food-grade silicone, ensuring a stable, watertight seal. If the leak is from a pipe connection, you may only need a new hose clamp or a re-pitched drain line.
Document findings at each step and re-test after each fix. This approach minimizes guesswork and ensures you address the actual leak path. If the diagnosis points to a cracked disposal, plan for replacement rather than attempting permanent repairs that may fail again.
What Not to Do: Common Mistakes
Avoid common missteps that can worsen leaks: overtightening mounting bolts, which can crack the flange; applying silicone to an area that isn’t a seal point; neglecting to disconnect power, which creates a serious safety risk; and relying on temporary caulks instead of replacing worn gaskets. Don’t reuse old O-rings or gaskets—their material ages and may not seal properly. Also, never ignore leaks that appear after heavy use or dishwasher cycles; these patterns often signal a failing component that requires replacement.
Being mindful of these mistakes helps you complete a durable repair without recurring leaks. Always follow manufacturer guidelines for your model and use compatible parts to maintain warranty safety.
When to Call a Professional and Preventive Maintenance
If you identify a crack in the disposal body, a loose or broken mounting flange that won’t reseal, or persistent leaks after all seals have been replaced, it’s time to call a professional plumber. Electrical safety concerns also warrant a pro—faulty wiring or a failed switch can create hazards beyond water damage. Once the leak is resolved, incorporate preventive maintenance: run the disposal with plenty of cold water, avoid putrid materials that degrade gaskets, and periodically inspect the seal and flange for wear. A simple annual inspection can catch small issues before they become costly repairs. A pro can also help install a new unit with the correct mounting height and trap configuration to minimize future leaks.
Final Checks Before Reassembly
Before reassembly, ensure all wiring is safely tucked away, gaskets are clean and properly lubricated with food-grade silicone, and the flange is clean and dry. Reassemble in the reverse order of disassembly, tighten all fasteners evenly, and run cold water through the sink to test for leaks. If you notice any moisture around the flange or hoses, stop and recheck your seals. Finally, wipe down the area and replace the cabinet shelf or insulation to prevent long-term water damage. A quick test that includes a few cycles confirms the repair’s durability and helps you avoid another emergency visit from a plumber.
Steps
Estimated time: 60-90 minutes
- 1
Power off and secure the area
Unplug the disposal at the outlet or switch off the dedicated circuit breaker. Confirm there is no power before touching any components. Place a bucket to catch residual water and put on protective gloves.
Tip: Always verify power with a non-contact tester before touching wires. - 2
Shut off water and locate the leak
Close any under-sink shut-off valves if available. Run a small amount of cold water to observe where the leak appears first—flange, seals, or hose connections. This helps you target the repair without unnecessary disassembly.
Tip: Use a flashlight to clearly see tight spaces around the disposal. - 3
Inspect mounting flange and gasket
Check the sink flange and gasket for cracks or wear. Tighten bolts evenly in a diagonal pattern. If the gasket is damaged, replace it with the correct size O-ring or gasket for your model.
Tip: Do not over-tighten; you can crack the flange or the sink. - 4
Check dishwasher inlet hose and clamps
Inspect the hose from the dishwasher to the disposal for cracks or loose clamps. Tighten or replace the hose clamps as needed and ensure the hose runs without kinks.
Tip: Avoid using duct tape or sealant as a permanent fix on hoses. - 5
Test gasket and seals
Apply a small amount of food-grade silicone sealant around the flange if the gasket appears intact but the leak persists. Allow the sealant to cure according to the product's instructions before testing again.
Tip: Silicone seals should be compatible with food prep areas. - 6
Inspect for cracks on the disposal body
Examine the body of the disposal for visible cracks or corrosion. If you discover a crack, replacement is typically the safest option, as patches are not reliable for moving parts.
Tip: Cracks mean replacement is the best long-term fix. - 7
Reassemble and test
Reconnect power and water, then run cold water through the sink while operating the disposal. Observe for any new leaks at all joints. If leaks remain, consider professional service.
Tip: Test with a dishwasher cycle to ensure inlet hose is leak-free.
Diagnosis: Visible water pooling under sink after turning on garbage disposal
Possible Causes
- highLoose mounting bolts or flange
- highWorn or damaged sink gasket or disposal gasket
- mediumCracked disposal housing or damaged dishwasher inlet hose
- lowImproper drain connection or pipe slope
Fixes
- easyTighten mounting bolts and reseal the flange
- easyReplace worn gaskets/O-rings and inspect the dishwasher inlet hose
- hardReplace the disposal if the housing is cracked or replace a damaged inlet hose
- easyCorrect drain hose connections and ensure proper trap alignment
Questions & Answers
What is the most common cause of a leak from garbage disposal?
The most common causes are a loose mounting flange or a worn gasket. Tightening bolts and replacing seals often stops the leak. If the unit is old, a replacement may be necessary.
Most leaks come from a loose flange or worn gasket, which you can fix by tightening and replacing seals.
Can a leak come from the dishwasher inlet hose?
Yes. The inlet hose can crack or become loose, allowing water to leak during dishwasher cycles. Inspect clamps and replace cracked hoses as needed.
Yes, the dishwasher inlet hose is a frequent source of leaks during cycles.
Is it safe to fix a leak myself?
Yes, many leaks can be fixed safely with basic tools if you disconnect power and water first. If you notice electrical issues or persistent leaks after fixes, call a professional.
DIY is often safe for small leaks if you follow safety steps.
When should I replace the disposal?
If you see deep cracks, a cracked housing, or repeated leaks after resealing, replacement is usually the best option to avoid ongoing damage.
Replace the unit if the housing is cracked or leaks keep returning.
Will leaks cause mold or water damage?
Persistent leaks can lead to water damage and mold under the sink. Address leaks promptly and dry the area thoroughly after repairs.
Yes, long-term leaks can cause mold if not fixed quickly.
Do I need to hire a plumber?
For most small leaks, a DIY repair is fine. If you lack tools or if the leak persists after basic fixes, hire a professional.
If in doubt, or the leak keeps coming back, call a pro.
Watch Video
Main Points
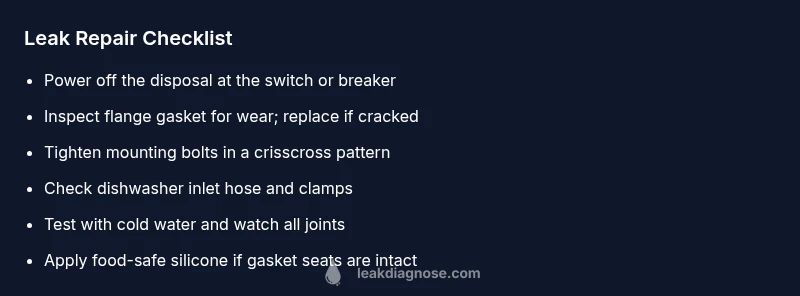
- Tighten loose bolts and replace worn gaskets first.
- Shut off power and water before any inspection.
- Test each fix with cold water to confirm a leak-free seal.
- Inspect dishwasher inlet hose during checks.
- Consider replacement if the disposal housing is cracked.